Kibi API
3min
The Kibi REST API allows external applications, AI assistants, and automations to access Kibi Connect data. The API can read and write content—from wiki pages to news posts, tasks, and calendar entries.
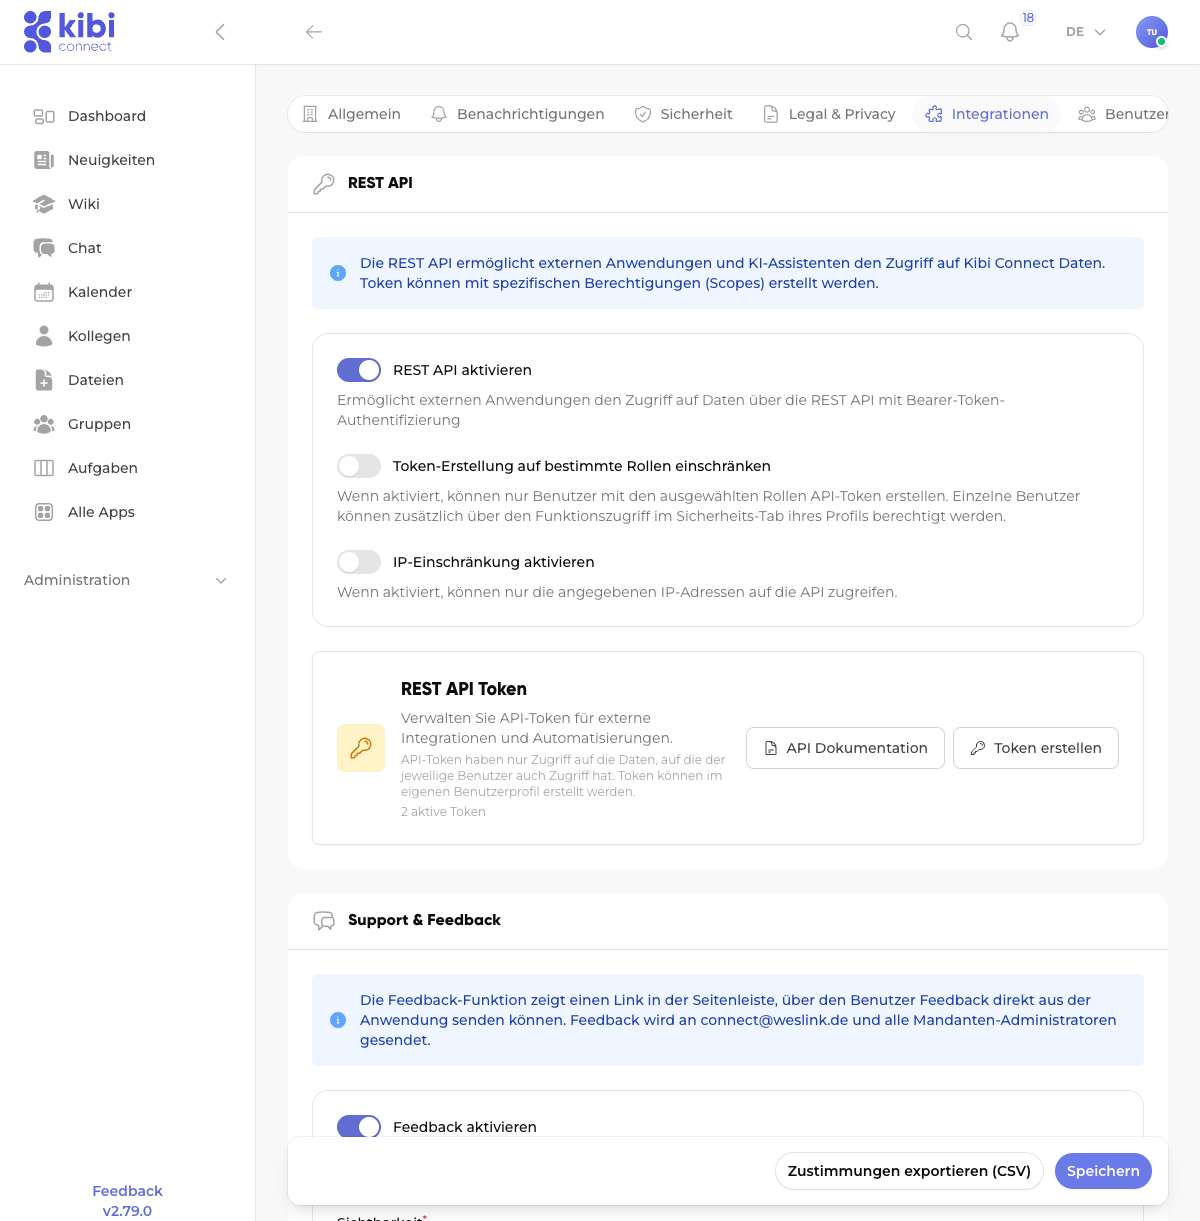
Enable API access
The REST API must first be enabled by a system administrator. The setting is located under:
Settings → Integrations → REST API
The following options are available:
Enable REST API
Turns the API interface on or off.
Restrict token creation to specific roles
When enabled, only users with the selected roles can create API tokens. Individual users can additionally be authorized via function access in the security tab of their profile.
Enable IP restriction
When enabled, only the specified IP addresses can access the API. This is an additional security layer.
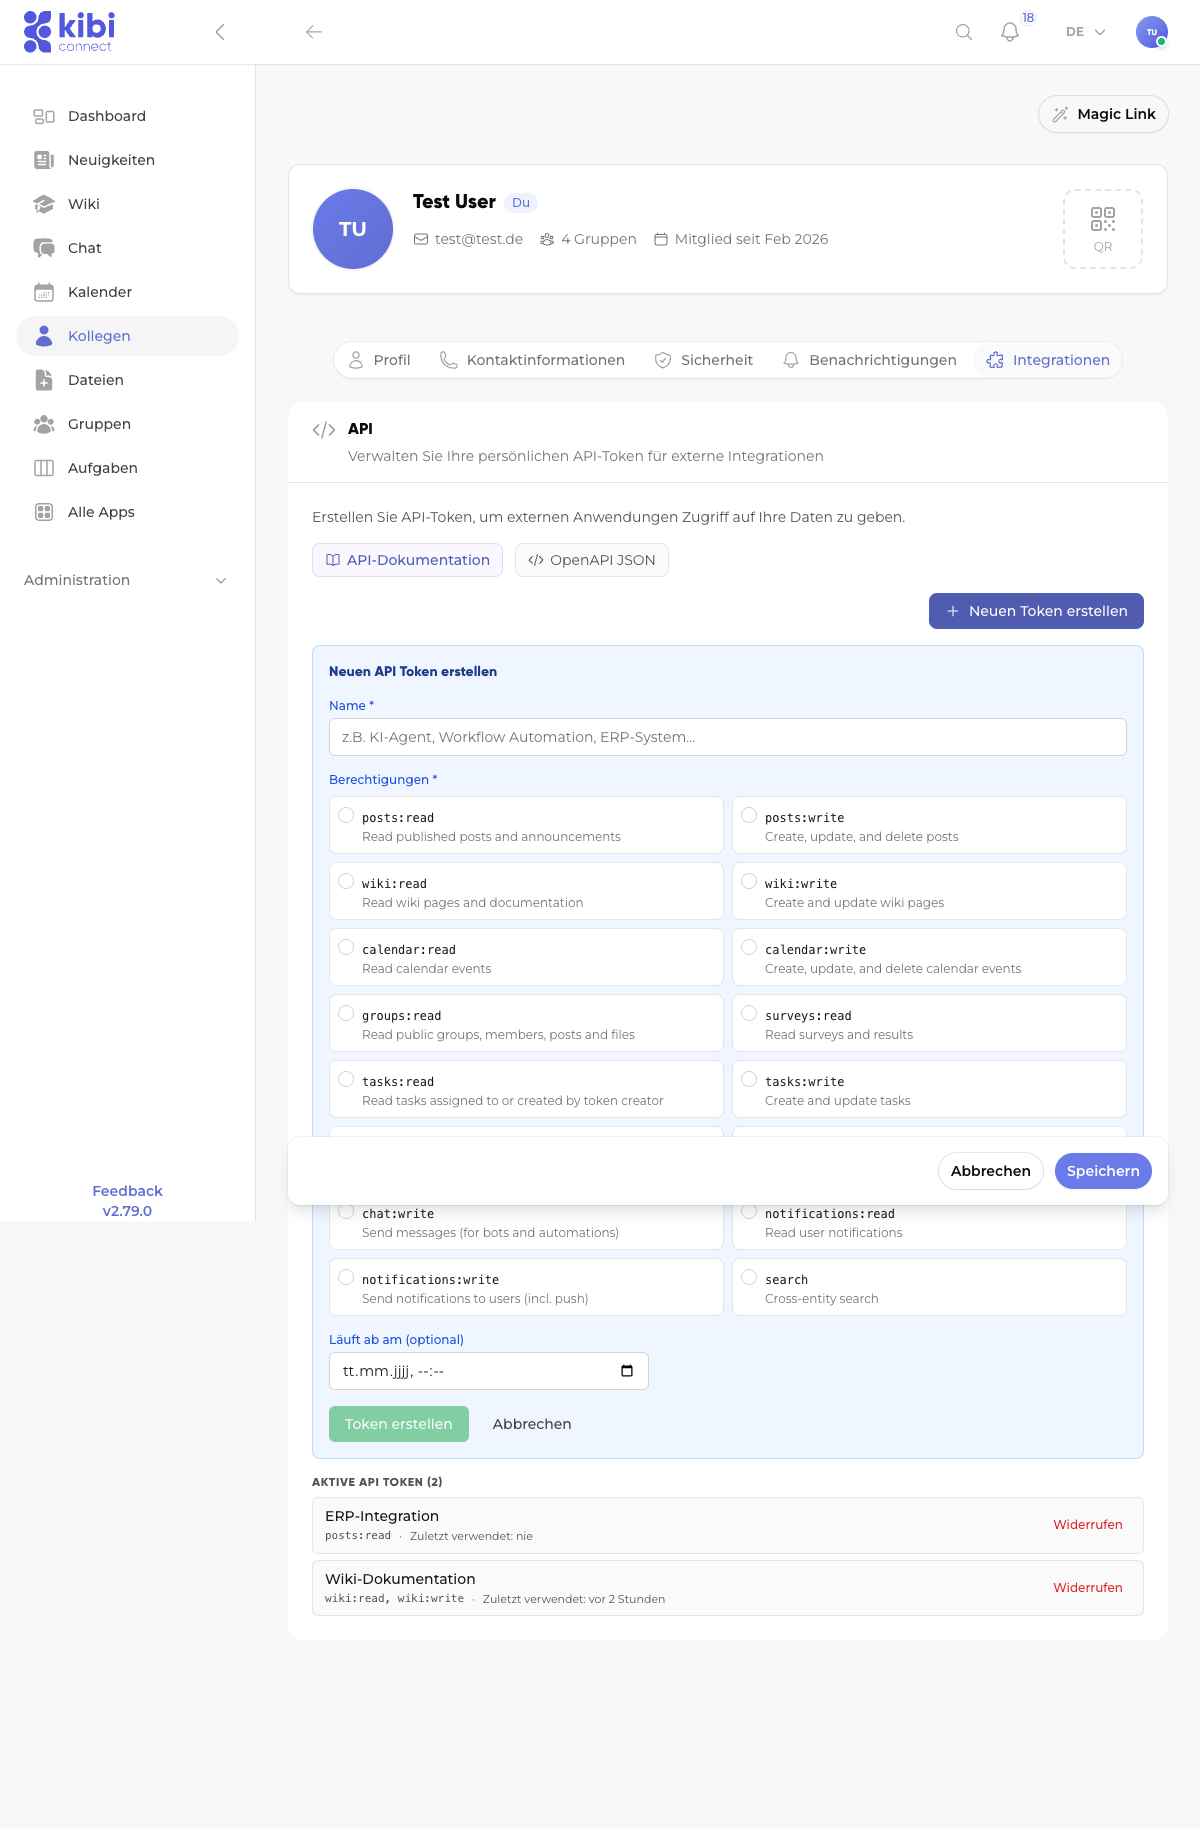
Create API token
Each user can create their own API tokens via their user profile. To do this, navigate to:
User profile → Integrations → Create new token
When creating a token, you specify:
Name
A descriptive name (e.g., "AI Agent," "ERP Integration," "Workflow Automation").
Permissions (Scopes)
Select only the permissions the integration actually needs (principle of least privilege).
Expiration date (optional)
Optionally, you can set an expiration date after which the token automatically becomes invalid.
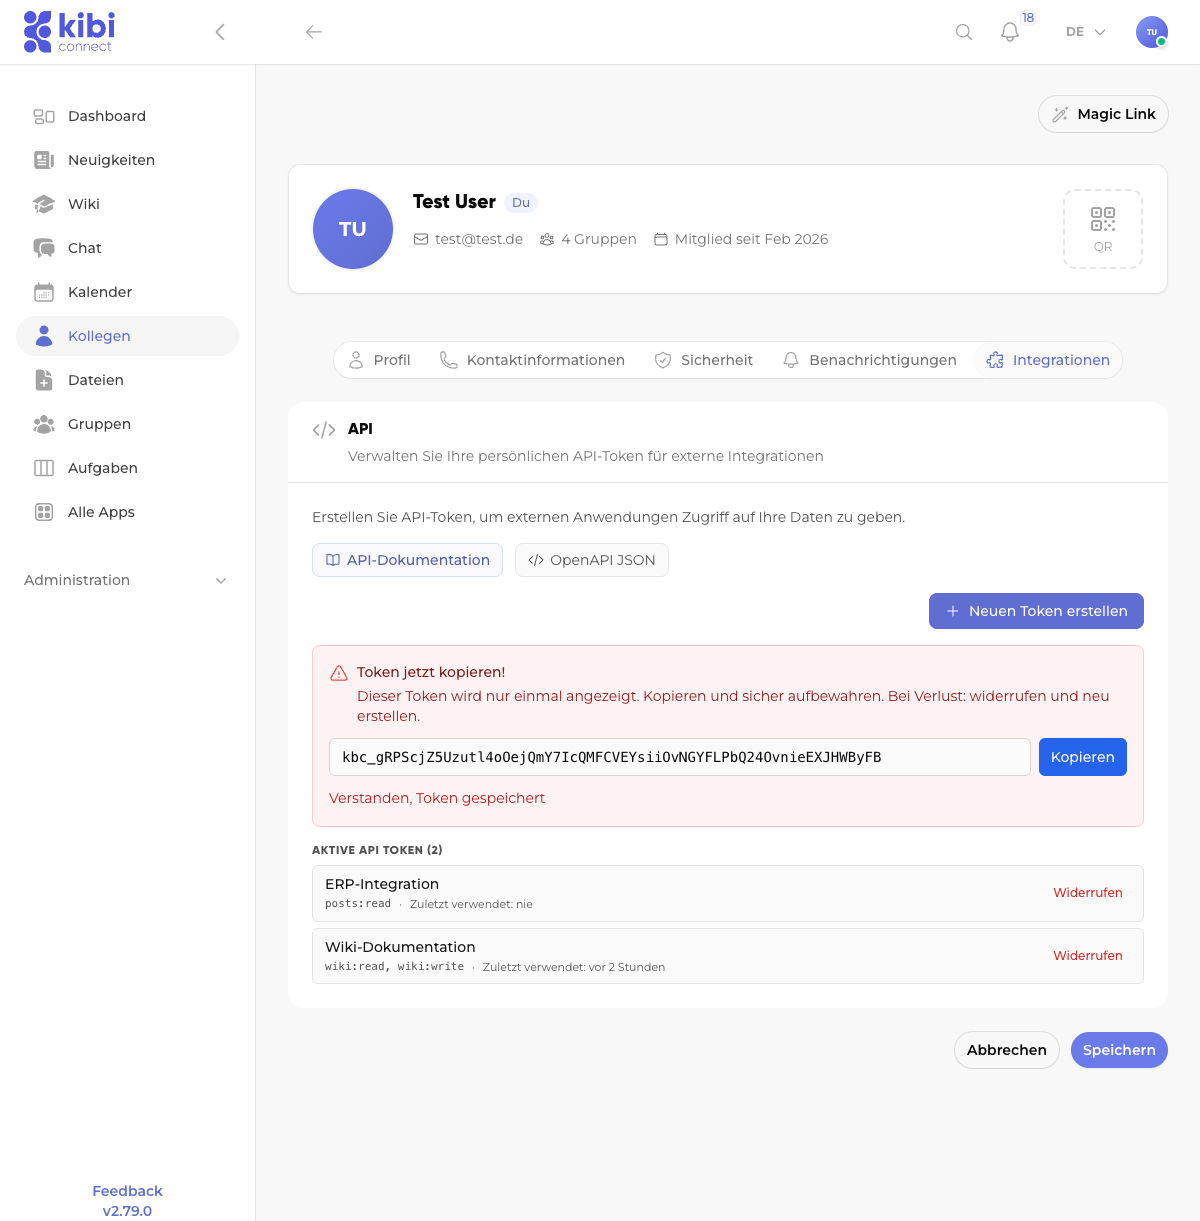
Store token securely
After creation, the token value is displayed only once. Copy it immediately and store it securely (e.g., in a password manager). If lost, the token must be revoked and a new one created.
Available permissions (Scopes)
The following scopes control the API token's access to different areas:
Scope |
Description |
|---|---|
|
Read published posts and news |
|
Create, update, and delete posts |
|
Read wiki pages and documentation |
|
Create and update wiki pages |
|
Read calendar entries |
|
Create, update, and delete calendar entries |
|
Read public groups, members, posts, and files |
|
Read surveys and results |
|
Read tasks (only own or assigned) |
|
Create and update tasks |
|
Read public user directory (no private data) |
|
Read conversations and messages |
|
Send messages (for bots and automations) |
|
Read user notifications |
|
Send notifications to users (including push) |
|
Cross-entity search |
API authentication
All API requests must include the token as a Bearer token in the Authorization header:
curl -H "Authorization: Bearer kbc_IhrTokenHier" \
     https://ihre-firma.kibi.de/api/v1/wiki
The API base URL is: https://ihre-firma.kibi.de/api/v1
Available endpoints
The complete API documentation with all endpoints and parameters is available directly in Kibi Connect under:
Interactive documentation: User profile → Integrations → API documentation
OpenAPI specification (JSON): User profile → Integrations → OpenAPI JSON
Key endpoints at a glance:
Area |
Endpoint |
Description |
|---|---|---|
Wiki |
|
List wiki pages |
Wiki |
|
Create wiki page |
News |
|
List posts |
Tasks |
|
List tasks |
Calendar |
|
List calendar entries |
Chat |
|
Send direct message |
Users |
|
List user directory |
Search |
|
Cross-entity full-text search |
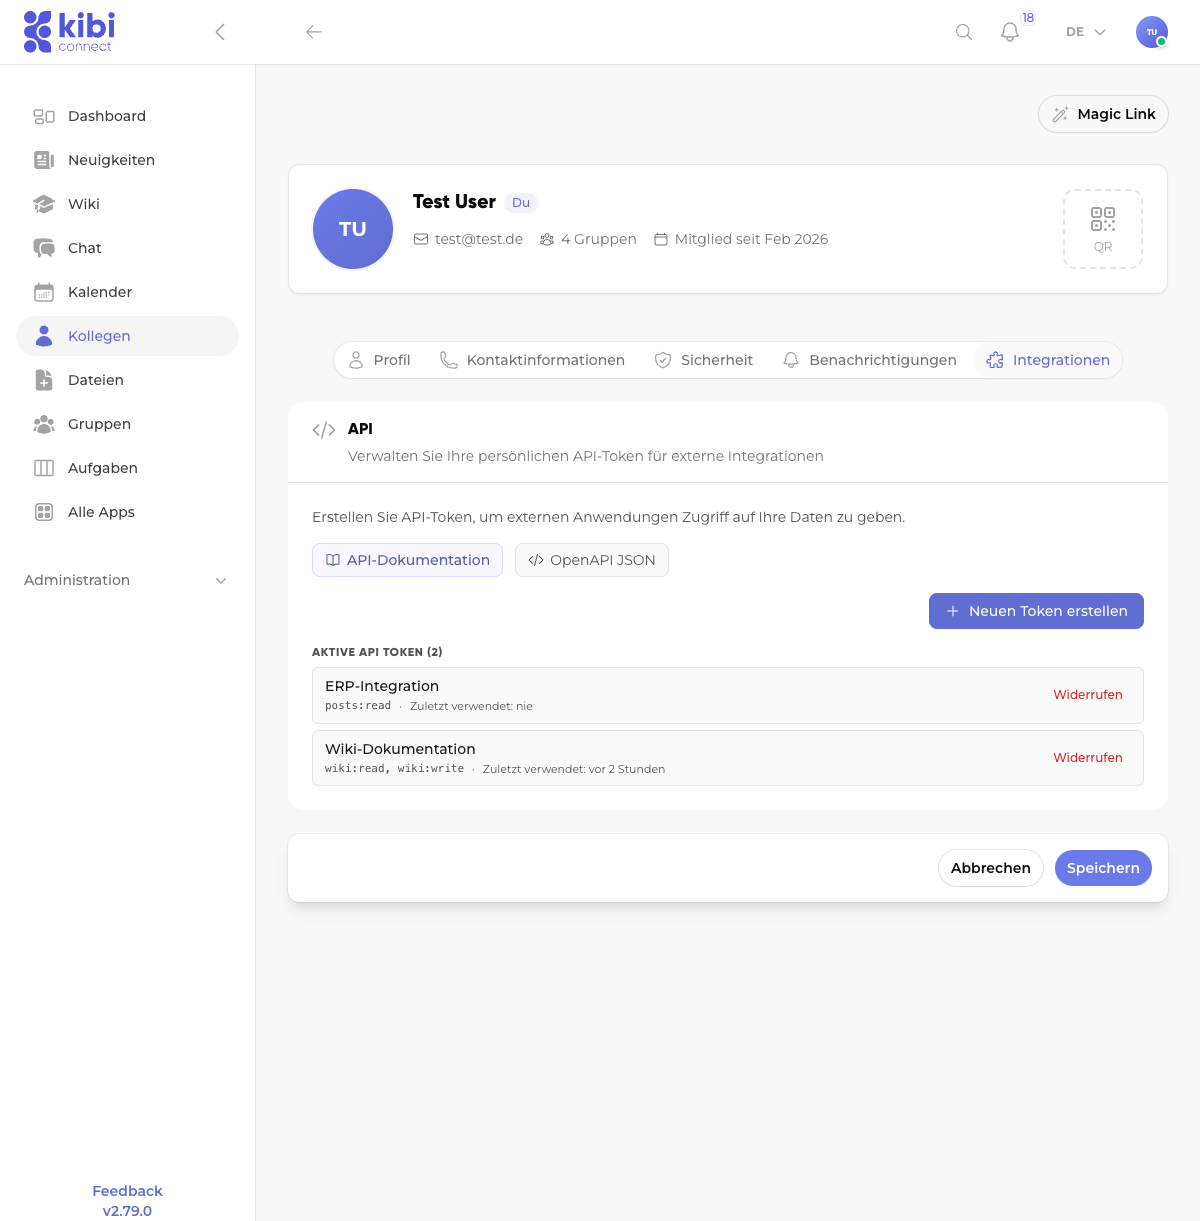
Manage tokens
All created tokens are displayed in the overview under User profile → Integrations. Here you can see:
The token name
The assigned permissions
When the token was last used
The option to revoke a token
Important notes
Data access: API tokens only have access to the data the respective user can access. The user's permissions still apply.
Security: Never share API tokens publicly. Store tokens in environment variables or a secrets manager, not in source code.
Least privilege: Grant only the minimum necessary permissions. A token for wiki integration does not need chat access.
Expiration date: Set an expiration date for temporary integrations to enhance security.
Revocation: Immediately revoke tokens no longer needed via the token overview.