
How do I check in guests at an event?
Updated Reading time: 2 min
At the entrance, you record who actually arrived: by scanning a guest's QR code or by clicking in the list of participants. Both paths end up in the same list.
Info
Anyone who can edit the event can check in: the person who created it, co-organizers, content managers, and system admins. To allow employees without any additional role to help at the entrance, add them to the co-organizers.
Check in guest via QR code#
The guest opens their personal registration link and shows their QR code in the Entry tab.
Scan the code with your smartphone camera and open the link.
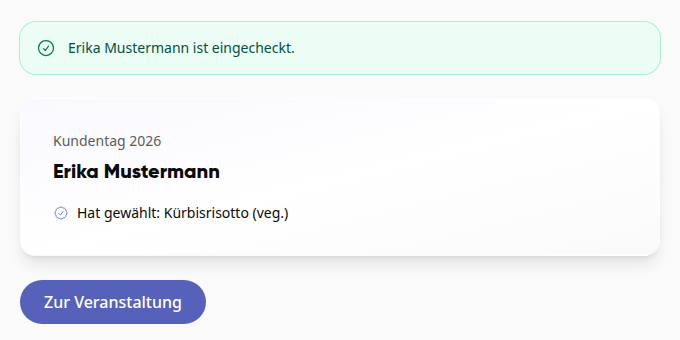
You will see the confirmation … is checked in. with the guest's name. If the guest has selected a meal, Has selected: appears below with the dish, so you can give them the right meal right away. Use Go to event to access the event.
If you scan the same code again, nothing changes. You will then see Already checked in at … o'clock by … with the time and the person who checked in the guest.
Info
If the event lasts several days, the check-in shows the meal for the current day. If you scan before the first day, you will see the meal for the first day. A check-in applies to the entire event, not to a single day.
Important
Guests only see the Entry tab if the event has files, catering, or a program. Therefore, for example, create the schedule in the Program tab if you want to work with QR codes, or check off guests directly in the list of participants.
Tip
You must be logged in to Kibi in your smartphone browser. Otherwise, the login page will appear first. Log in, wait until the platform has loaded, and scan the code again. This also applies if the dashboard appears after the scan.
Warning
If you lack the permission to edit the event, the scan will show the message 403 Forbidden, and the guest will not be checked in.
Check in attendees from the list#
This works for guests and colleagues, even without a QR code.
Open the event under Events and click on Manage.
Open the Attendees tab.
Click on Check-in in the person's row. The button turns green and then reads Checked in. If you hover over it with the mouse, you will see the time, for example Checked in at 9:12 PM.

If you checked someone in by mistake, click on Checked in again. The check-in will then be undone without confirmation, and the person can be checked in again.