
How do I manage personnel files?
Updated Reading time: 2 min
On this page
In the personnel file, you store documents for employees, view their submissions, and request files.
Info
This function is available to HR managers. A system admin without the additional role of HR manager does not have access to personnel files.
Enable personnel file#
The personnel file must be enabled for your platform.
Open Administration and click on HR / Personnel > Time & Absences.
Open the Settings tab and go to the Personnel File section.
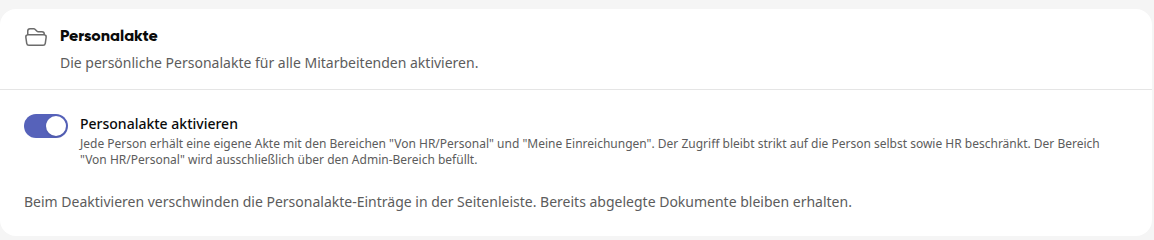
Enable Enable Personnel File and click Save in the top right.
Info
When deactivated, personnel file entries disappear from the sidebar. Already stored documents remain preserved.
Open personnel file#
Open Administration and click on HR / Personnel > Personnel Files.
Under Newly Submitted, you see what employees have uploaded. With To File, you jump directly to the person's file.
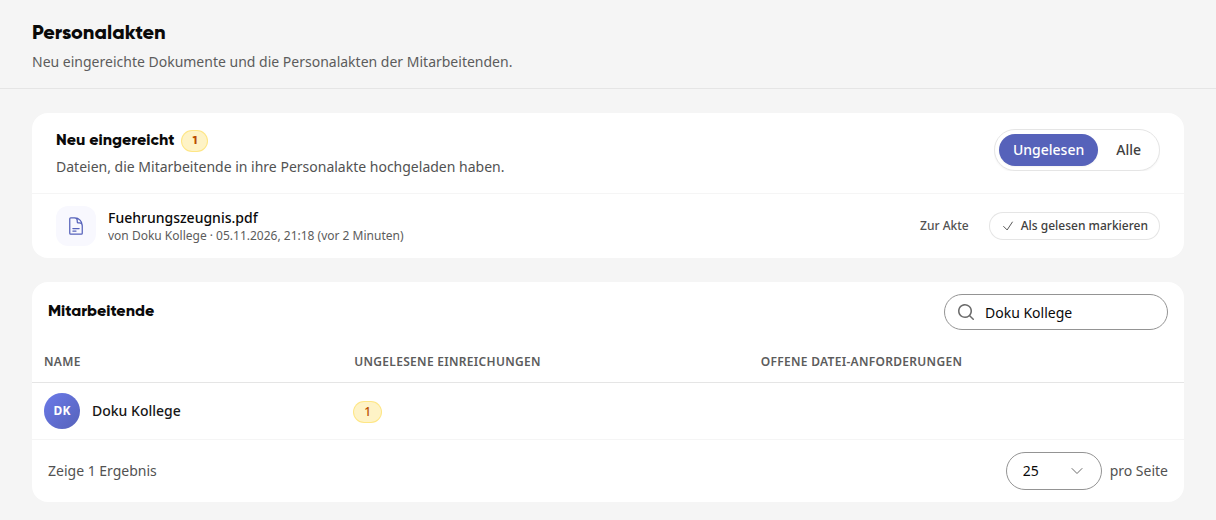
Under Employees, all people are listed in a table. The columns Unread Submissions and Open File Requests show who has something to do.
Find the person under Search Employees or click directly on their row.
In the file, you switch between the tabs From HR/Personnel, Submissions, and Requests. Via Master Data, you access the person's editing page.
Store document for the person#
Open the From HR/Personnel tab and click Store Document.
Select the file. It will then be in the file, and the person will be notified.
If the person should confirm the document, click Request Confirmation. The document will then show Confirmation pending, and after confirmation, Confirmation confirmed.
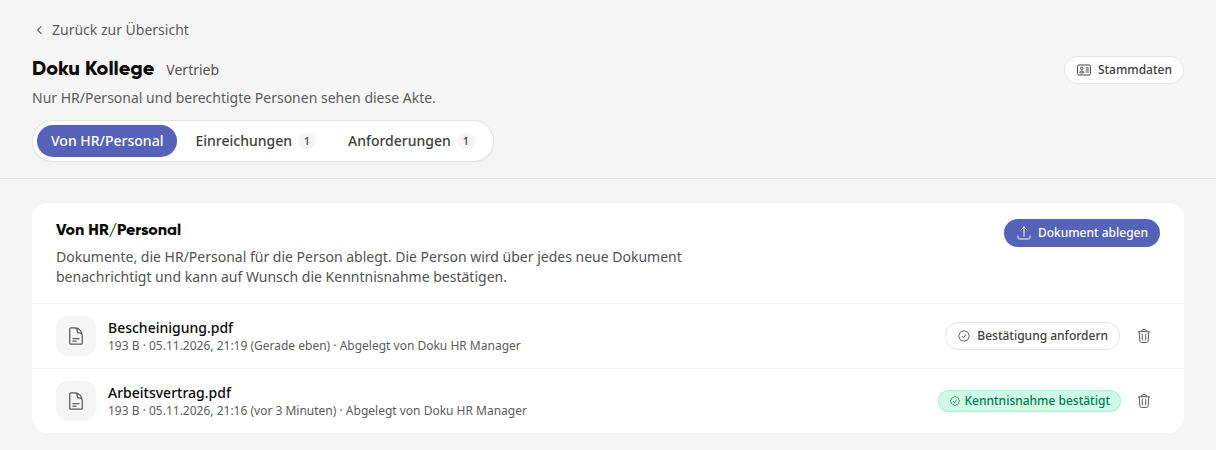
With the trash can symbol Remove Document, you remove a document from the file after a query.
View submissions#
In the Submissions tab, you will find the files that the person has uploaded themselves. With Unread and All, you switch the view; clicking on the file opens it. Once you have checked a submission, click Mark as Read.
Request files and fulfill requests#
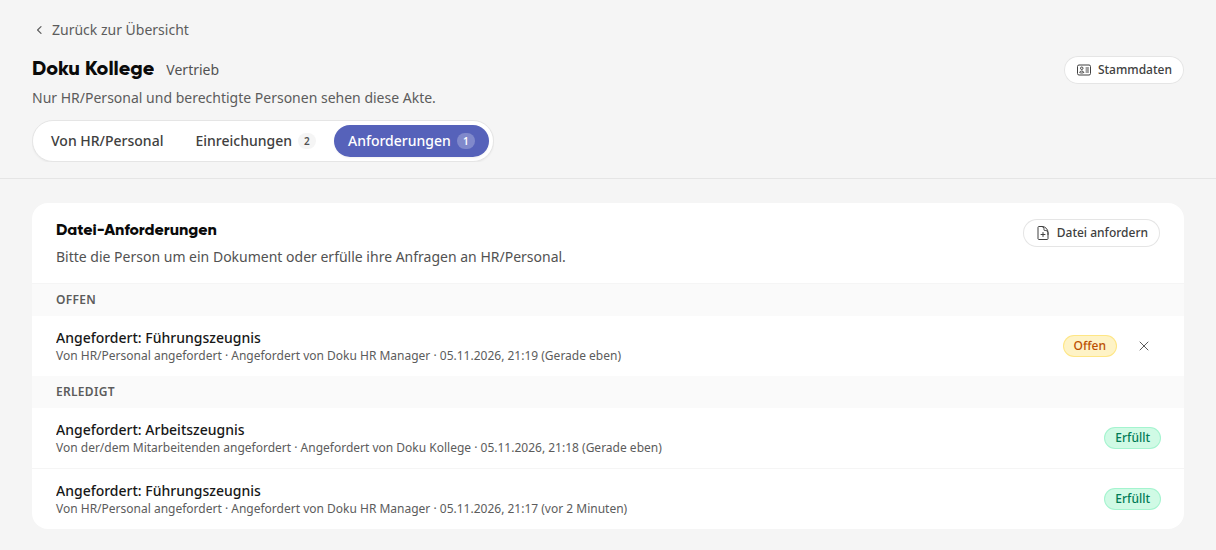
Open the Requests tab and click Request File.
Under What is being requested?, enter the document, for example, "Certificate of Conduct". A Note is optional.
Click Request. The request now appears under Open. As long as it is open, you can withdraw it via the X symbol Cancel Request.
If the person uploads the file, the request moves with the status Fulfilled to Completed.
Conversely, if the person requests a document, the request also appears under Open. Click there on Upload File. The file is placed in the From HR/Personnel section, and the request is considered fulfilled.
How employees see their file#
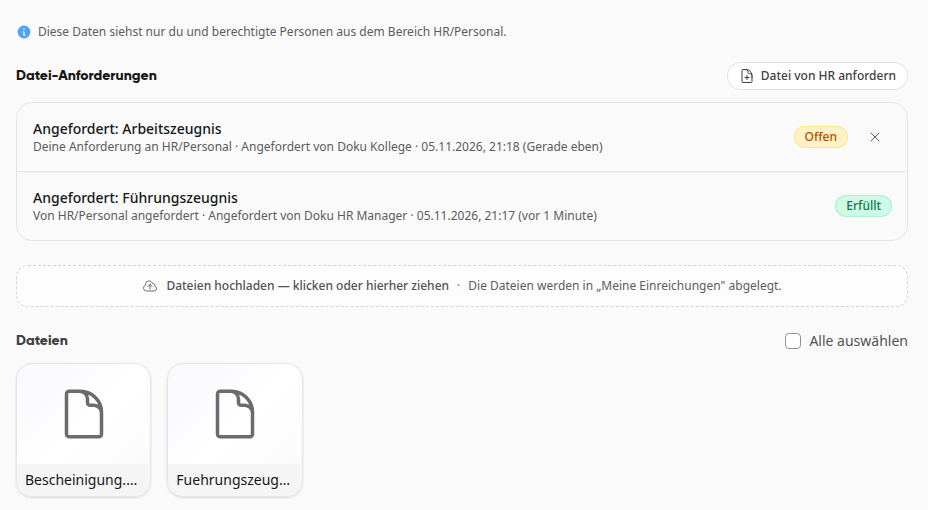
Employees find their file under Files in the sidebar at My Personnel File. It contains two folders:
From HR/Personnel: your stored documents. Here, the person confirms with Confirm Acknowledgment.
My Submissions: own uploads and open requests. With Request File from HR, the person asks you for a document.
Personnel files in the desktop app#
In the Kibi-Connect desktop app, HR managers see all personnel files in read-only mode in the folder Personnel Files. Downloads are logged. Employees see their own Personnel File there; only My Submissions is writable.