
How do I install the desktop app on Mac and Windows?
Updated Reading time: 4 min
On this page
With the desktop app, you use Kibi Connect in a dedicated program window on your Mac or Windows PC. The app displays your familiar Kibi platform, stores your Kibi files in Finder or Explorer, continues running in the background, and keeps itself up to date.
Overview#
Property | Value |
|---|---|
Systems | macOS (Mac with Apple chip or Intel processor) and Windows (64-bit, x64) |
Download | in your profile under Integrations › Devices and Apps or at kibi-connect.eu |
Size | macOS approx. 24 MB, Windows approx. 8 MB |
Publisher | macOS: notarized by Apple (Weslink GmbH); Windows: signed by WESLINK GmbH |
Updates | automatic, you only confirm the installation |
Cost | none – you only need access to Kibi Connect |
What the desktop app can do#
Its own window for your Kibi platform – no browser tab that gets lost among other tabs.
Files in Finder and Explorer: Your Kibi files appear as a location in Finder (macOS) or Explorer (Windows). Details: Photos and personnel files in the desktop app.
Runs in the background: If you close the window, the app remains active and continues syncing your files. You can access it via the Kibi icon in the menu bar (macOS) or in the notification area of the taskbar (Windows).
Notifications appear as messages from your operating system.
Sign in with passkey is also possible in the desktop app.
Dictation (optional): You hold down a key, speak, and the text is inserted into the program that is currently open. Turn it on under Settings → Dictation. Default key:
fn(macOS) orCtrl+Win(Windows). Dictations are billed against your Kai credit.Multiple accounts: If you work in multiple Kibi platforms, you can add them under Settings → Accounts → Add account.
Prerequisites#
A Mac with macOS or a Windows PC with 64-bit Windows (x64).
Your access to Kibi Connect: email address and password (or passkey) and, if known, the address of your platform, e.g., firma.kibi.de.
An internet connection.
Download#
From your profile#
If you are logged in to Kibi Connect in your browser, you will find the downloads directly in your profile.
Click on your profile picture (your initials) at the top right.
Select My profile.
Open the Integrations tab.
In the Devices and apps card, in the Desktop app for macOS and Windows box, click on Download for macOS or Download for Windows. The download for your operating system is listed first and highlighted.
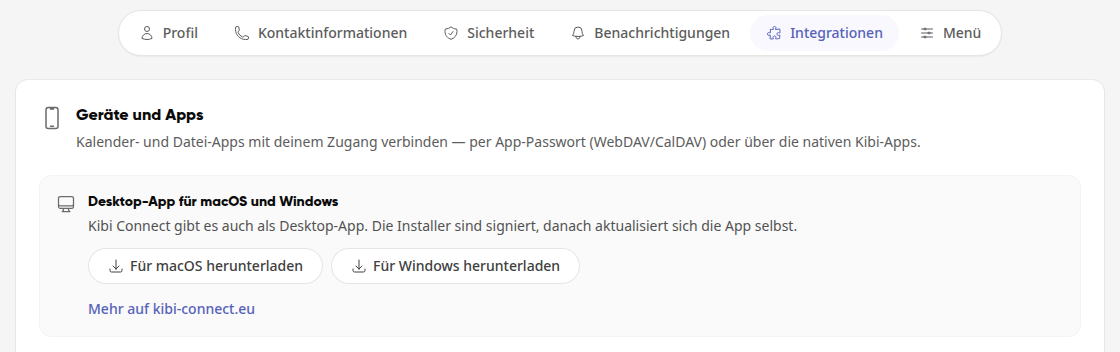
Under More on kibi-connect.eu you can learn more about the app.
Info
You only see the box in the browser. It is hidden in the desktop app and in the smartphone app. Your profile only shows the Integrations tab if your administration has enabled at least one connection; otherwise, you download the app via the website or the links below.
From the website or directly#
Download the app from the website kibi-connect.eu (buttons below the store icons) or directly here:
The links always lead to the current version.
Installation on the Mac#
Open the file Kibi-Connect.dmg from your Downloads folder.
A window will open. Drag the Kibi Connect icon to the Applications folder.
Start Kibi Connect from the Applications folder or via Launchpad.
On first launch, macOS will ask if you want to open the app downloaded from the internet. Confirm with Open.
Eject the "Kibi Connect" drive in Finder. You can then delete the Kibi-Connect.dmg file.
Installation on Windows#
Open the file Kibi-Connect-Setup.exe from your download folder.
Follow the steps of the installation program.
Start Kibi Connect via the Start menu.
Tip
You manage IT and want to distribute the app to many computers? There is a separate guide for that: Distribute the desktop app on Windows (silent installation).
First Login#
On first launch, the app shows the Login page.
Enter your email address or the domain of your platform (e.g., company.kibi.de) and confirm the entry.
Log in with your password or your passkey – just like in the browser.
Afterwards, your Kibi platform opens in the app window. The app sets up the file storage in Finder or Explorer itself; you don't need to do anything further.
You will remain logged in the next time you start.
The Kibi icon in the menu bar or taskbar#
A click on the icon brings the window back to the front; on the Mac, this also works via the icon in the Dock. In the icon's menu, you will find:
Entry | Purpose |
|---|---|
Your accounts | Switch between your Kibi platforms (checkmark = active) |
Open sync folder | Opens your Kibi files in Finder or Explorer |
Pause sync / Resume sync | Pauses or resumes file synchronization |
Settings… | Accounts, dictation, and other settings |
Check for updates… | Immediately checks for a new version |
About Kibi Connect | Shows the installed version |
Quit | Completely quits the app, including file synchronization |
Updates#
The app automatically checks for new versions: shortly after launch, then regularly, and when your computer wakes from sleep or you reopen the app. If an update is available, it shows you what's new. With one click, it gets installed, and then the app restarts.
You can also check manually: Kibi icon → Check for Updates….
Help with problems#
Problem | What you can do |
|---|---|
The login page does not load | Check your internet connection. In the company network, a VPN or proxy can block the connection: What to do if a VPN or company proxy blocks Kibi Connect? |
The app window has disappeared | The app is still running. Click on the Kibi icon in the menu bar or in the notification area of the taskbar (on Windows, possibly behind the ^ arrow). |
The Kibi files do not appear in Finder or Explorer | The file storage requires the REST API and device pairing to be enabled in your company. Contact your administration (How do I set up the REST API and the document format?). |
An update is not arriving | Kibi icon → Check for updates…. If that does not work, download the current installer using the links above and install the app again. |
You need help from support | Under Settings → Accounts, use Copy diagnostics to copy technical information that you can send to support. |