
How do I set up buildings and floor plans?
Updated Reading time: 5 min
On this page
You create your buildings with their floors, upload the floor plan for each floor, and draw the areas on it: rooms, corridors, kitchens, or the reception. With one click, you turn an area into a room. If a room is bookable, the plan shows whether it is currently available.
Info
This function is available to HR managers and system administrators.
Create a building#
Open Administration and click on Rooms under Organization. Switch to the Buildings tab.
Click on Create building.
Enter the Name, optionally the Address and Description. Under Visible to, you specify who can see the building: Internal (default), Also guests, or Only specific. Under Responsible, select the people who receive reported defects and maintenance tasks, such as the caretaker.
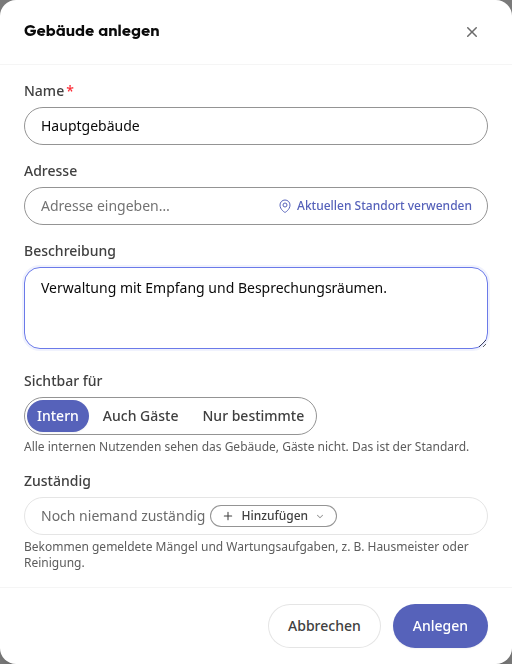
Click on Create. The building's page opens.
Import a set of plans#
If you have the plans from the architect, you can import them in one step. Supported formats are PDF, DXF (from AutoCAD, ArchiCAD, Revit, Allplan, or Vectorworks), and images. Save a DWG file in the CAD program as DXF or PDF first.
On the building's page, click on Import plans and select the file.
Each page of the plan set becomes a floor. For each page, check the Name and Floor. Under Target, select New floor or an existing floor. Remove pages you don't need from the selection.
Keep Detect rooms enabled. Rooms whose names are on the plan will then be drawn as areas. Below, it shows how many rooms were found and the scale.
Enable Adopt detected rooms as rooms if the areas should immediately become rooms. Under Preview of rooms, you can see for each area what will happen:
Link to "…": There is already a room with this name or room number. The area will be linked to it.
Create new: The room will be created new.
Multiple rooms match, please link manually in the plan: Nothing will be linked or created. You will select the room yourself from the area afterward.
Next to each room, it indicates whether it is bookable or only in the plan. Only meeting rooms can be bookable; an office, a tea kitchen, or a heating room will only appear in the plan.
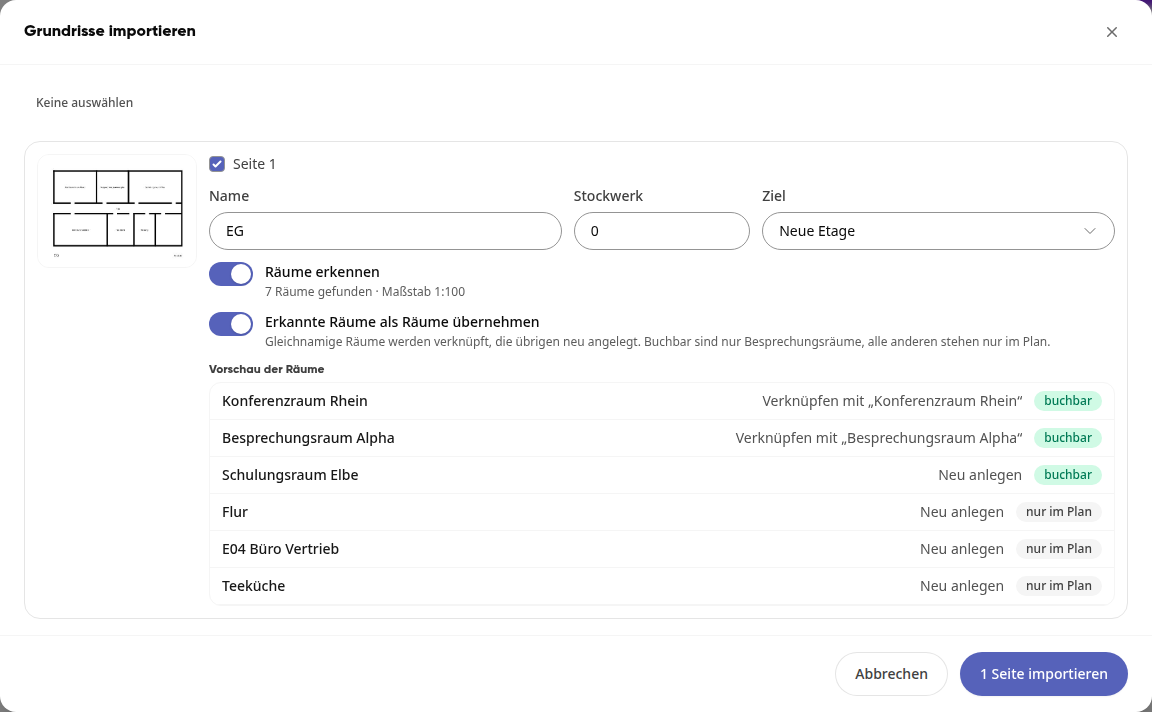
Click on Import pages (for example, Import 1 page). The floors appear with their areas; on the right under Areas, all areas of the floor are listed, with bookable rooms showing their current status.
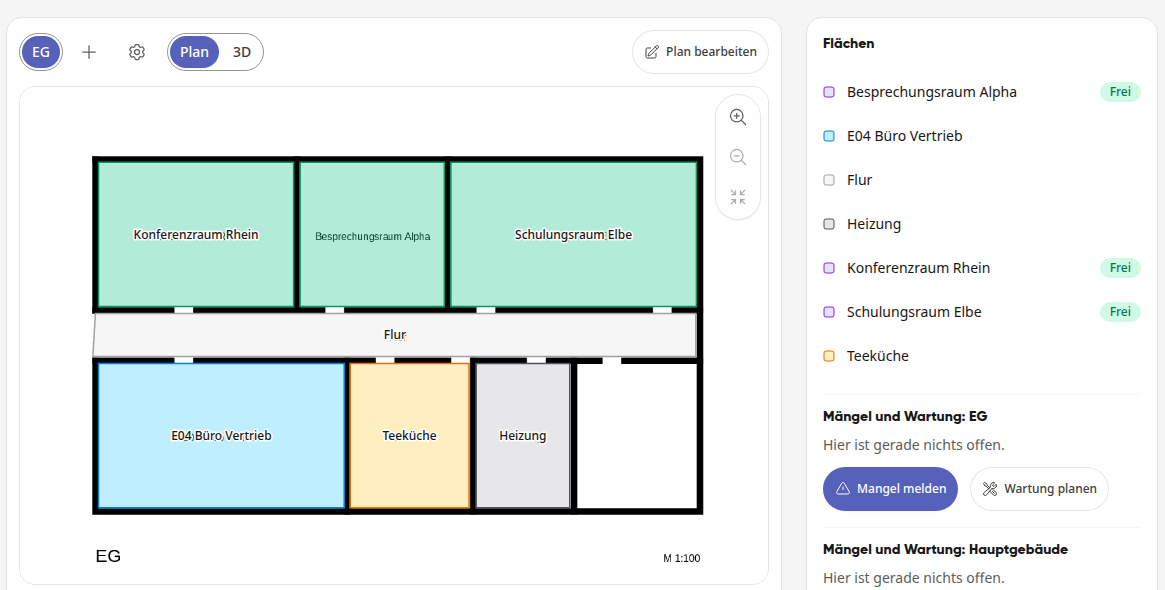
For rooms whose names are not on the plan, you can draw them yourself afterward, as described under "Draw areas".
Create a floor yourself and upload the floor plan#
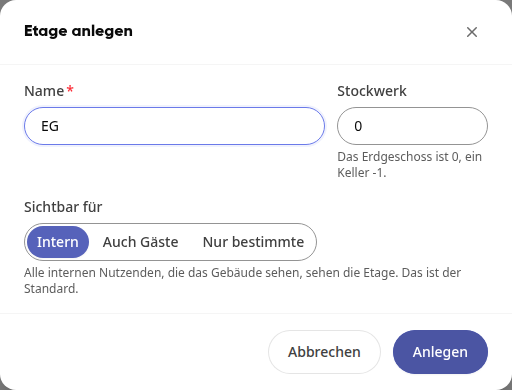
On the building's page, click on Create floor.
Enter the Name, for example "Ground Floor" or "1st Floor", and the Floor level: Ground floor is 0, a basement is -1. Click on Create.
Click on Upload floor plan and select the file. Supported formats are PDF (only the first page is used) or an image as PNG, JPG, or photo.
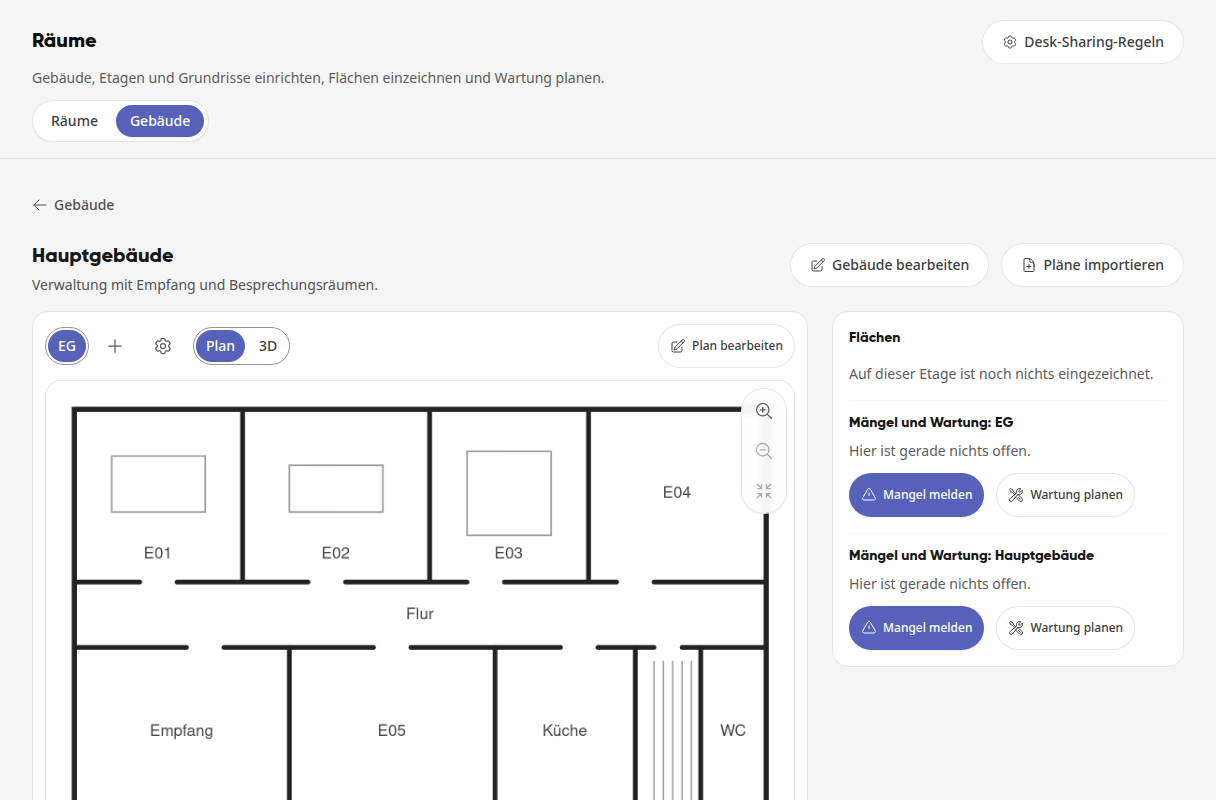
Click on the gear icon next to the floor (Edit floor) and enter the actual width of the floor plan in meters under Plan width. The platform uses this to calculate the room sizes and the 3D view. Without the plan width, the sizes are only estimated.
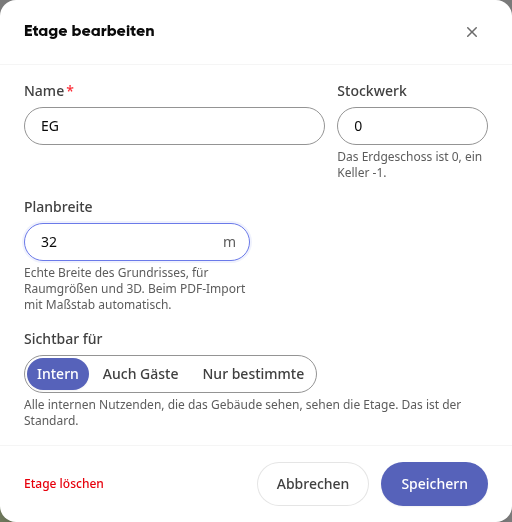
You can create additional floors using the plus sign next to the floors. To replace a floor plan, do so in edit mode via More actions and Replace floor plan. The areas retain their position relative to the plan; check afterward if they still fit.
Draw areas#
Click on Edit plan above the floor plan.
Select Rectangle and drag a rectangle over the area while holding down the mouse button. For an area with more corners, select Polygon, click the corners one after another, and close the shape by clicking the first point again.
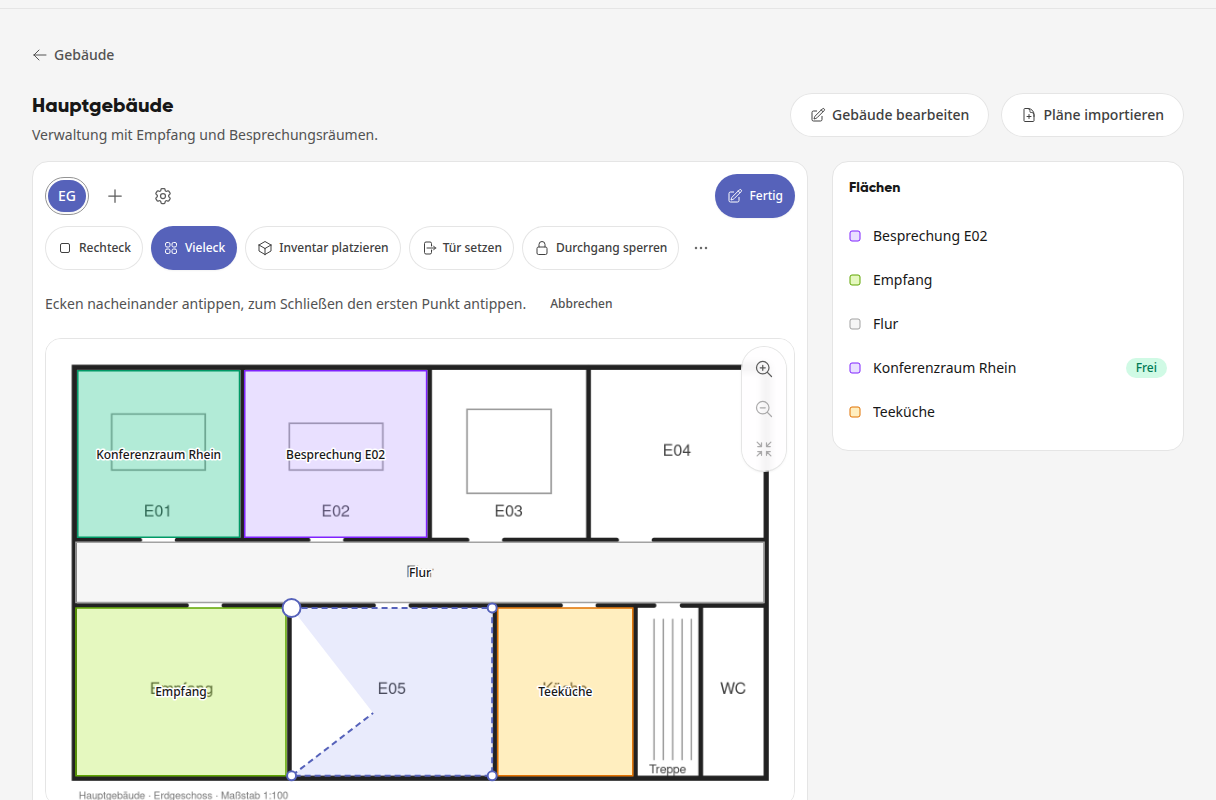
On the right, New area appears. Enter the Name and select the Type, for example Office, Meeting, Kitchen, Storage, Technical, Corridor, or Entrance / Reception. Under Seats, enter how many people can fit there.
If the room already exists, select it under Room. The list includes all rooms, even those that are only in the plan.
Click on Create.
When all areas are drawn, click Done at the top. On the right under Areas, all areas of the floor are listed, with bookable rooms showing their current status.
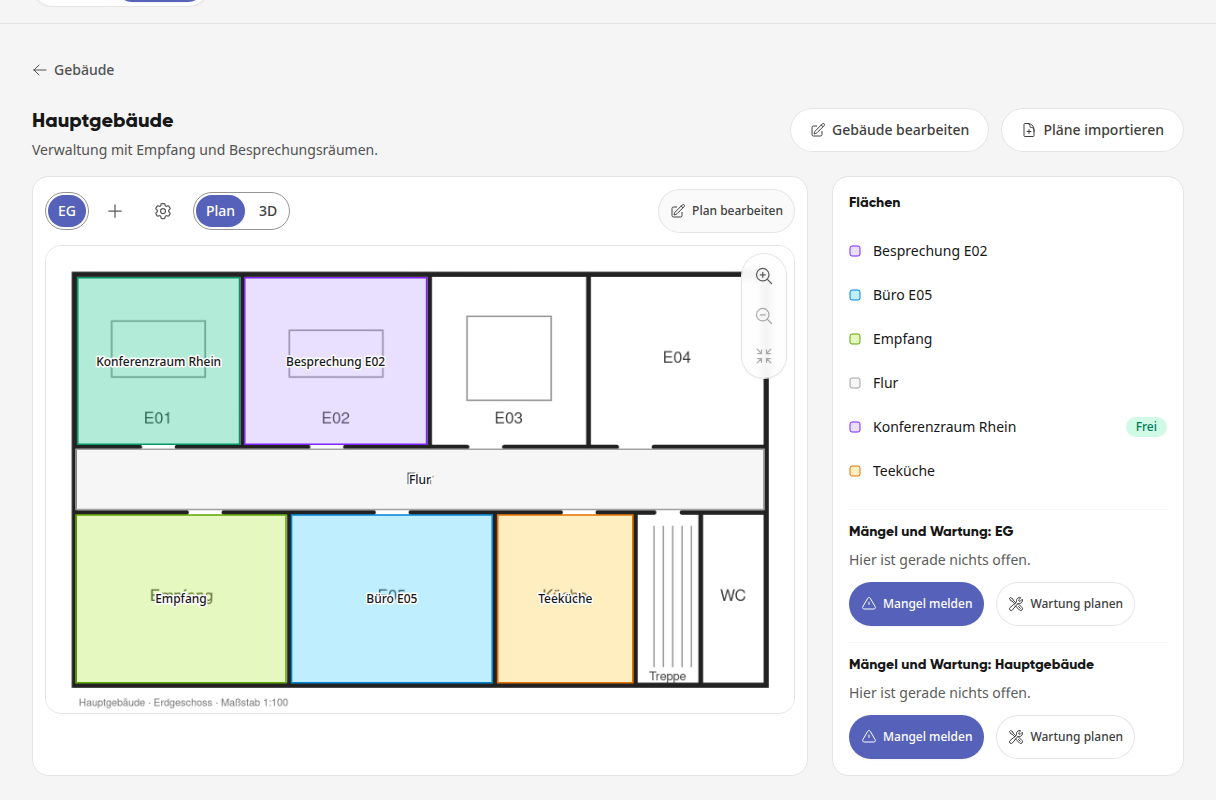
Info
Draw at least one area of the type Entrance / Reception and the corridors. This is where the directions start when someone looks for the way to a room.
Turn an area into a room#
If there is no room for an area yet, you can create it directly in the plan. This can be done immediately after drawing or later in edit mode.
Click on Edit plan and then on the area. On the right, Edit area opens, and under Room it says No room.
Click on Create as room. The room gets the name of the area, the floor, and the building as its location, and the seats as its capacity.
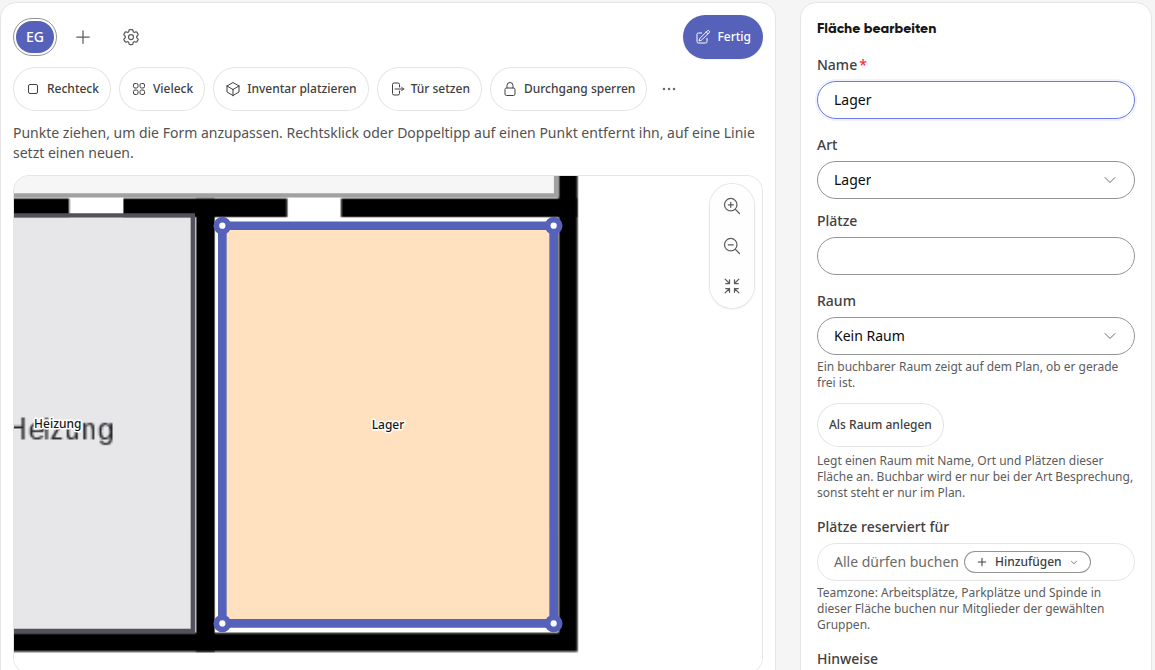
A message confirms that the room has been created. Under Room, the new room is now listed, with Open room and the toggle Bookable below it.
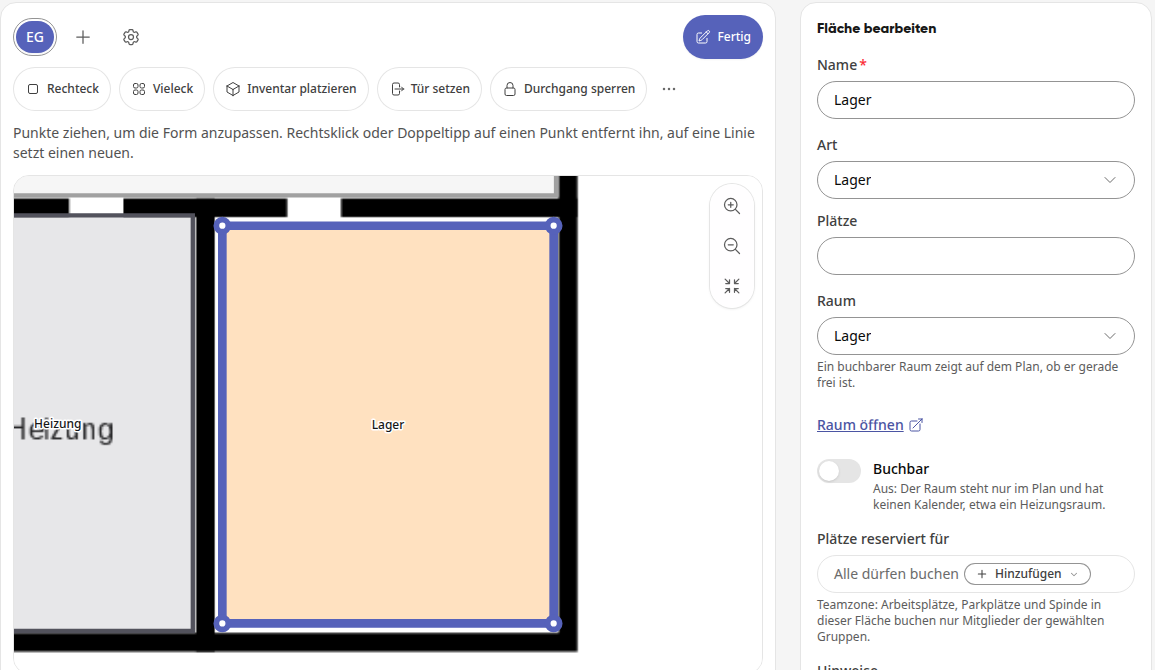
A new room is only bookable if its type is Meeting. All other rooms only appear in the plan: they have no calendar and do not appear anywhere for booking. You can change this at any time using the Bookable toggle.
Tipp
If you rename the area later, the room keeps its name. You can change the room's name via Open room on the room's page.
Adjust an area afterward#
Click on Edit plan and then on the area, either in the plan or in the list on the right. The plan zooms in on the area, and Edit area opens on the right.
Drag the points at the corners to adjust the shape.
Remove point: Right-click on the point; on a smartphone or tablet, double-tap.
Add point: Right-click or double-tap on a line to place a new point there, which you can then drag.
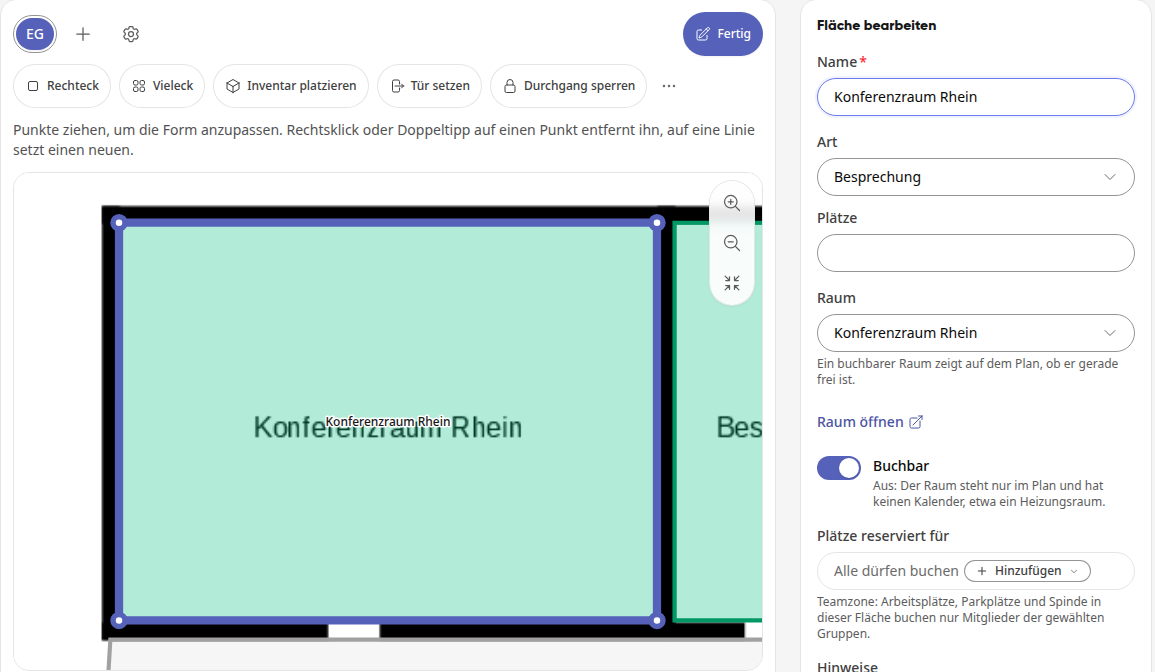
If needed, change the name, type, seats, room, or the Bookable toggle, and click on Done.
Use Delete area to remove an area from the floor plan. Tasks associated with it remain preserved.
View a room in the plan#
Outside of edit mode, clicking on a room zooms the plan to that room. On the right, you can see the type, size, and seats, whether the room is free, and you can access the room page via Open room "…". Use Directions here and Directions from here to start the directions. Use the magnifying glasses on the edge to zoom in and out of the plan; Show entire plan returns the full floor.
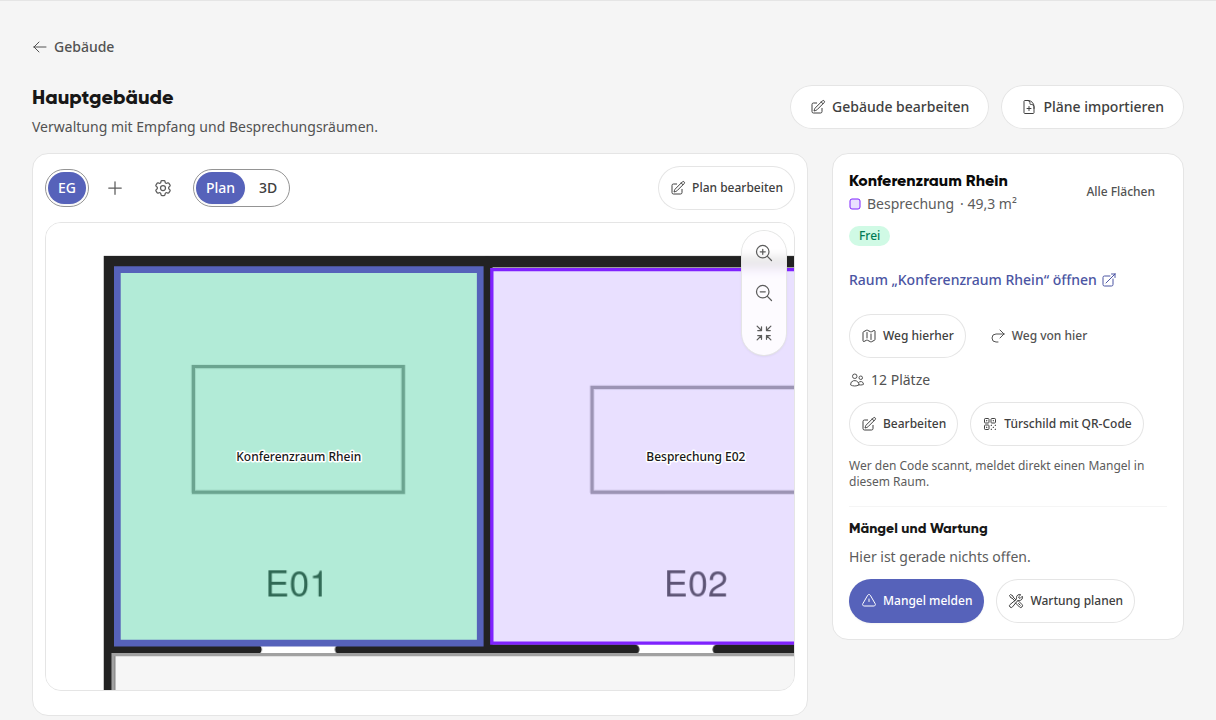
Employees can find the released buildings in the Rooms module under the Buildings tab.