
How do I create an event and manage the guests?
Updated Reading time: 10 min
On this page
- Creating an event
- Edit event later
- Settings in the Master Data
- Use a different room on individual days
- Specifying who can participate
- Name co-organizers
- Add participants
- Editing guests and removing people
- Set catering and order deadline
- Selecting meals for participants
- Changing meals after the order deadline
- Enable public registration
- Add files and frequently asked questions
- Messages to Participants
- View the event the way participants do
- Cancel or delete an event
You create an event, decide who can participate, and keep track of who is coming: colleagues as well as external guests.
Info
New events are created by default by employees with the role News Creator and System Admins. If you don't see the Create event button, you lack this permission. An existing event can be edited by whoever created it or is listed as a co-organizer, even without this role.
Creating an event#
Click on Events in the menu and then on Create event.
Enter the Title, Day, and Start time. These three fields are mandatory. If needed, add Ends on, End time, All day, Location, Select room …, and Also take place online as well as the description, a cover image, and attachments. In the room selection, you can see for each room whether it is Free or Occupied at your time.
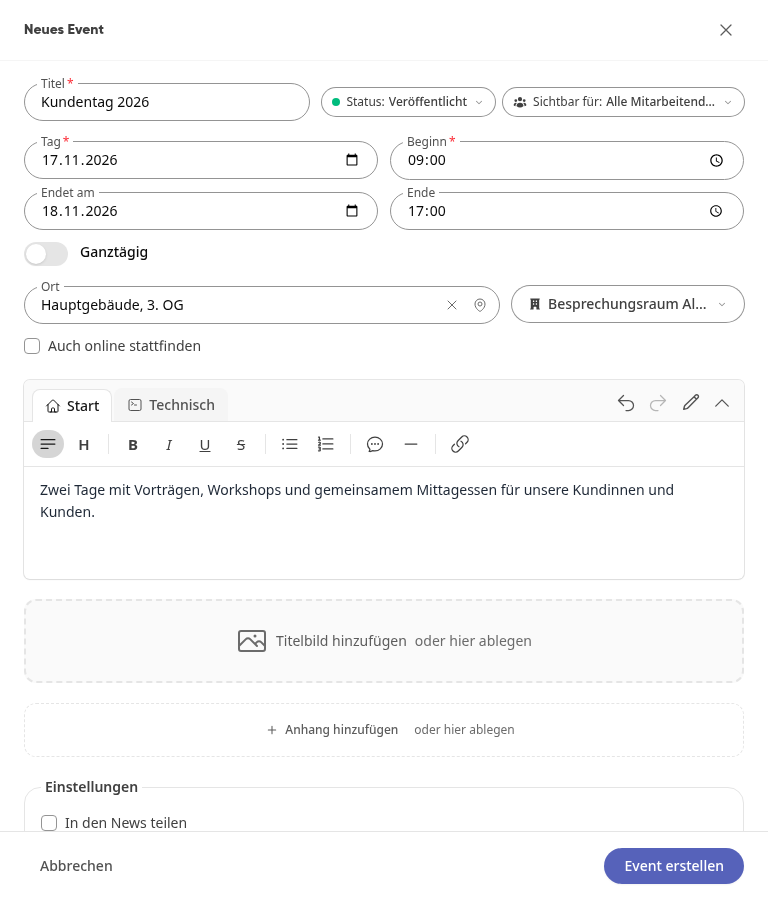
Use Status to choose whether the event should be visible immediately, and use Visible to to choose whether All employees can see the event or only one of your groups. You can change this later in the Master data tab under Participation.
Check the Settings at the bottom of the form, for example Share in news, Limit number of participants, and Create group (explained further below).
Click on Create event. The Manage area opens directly.
The two statuses mean:
Draft: Only visible to you and admins. You will find the event in the list under the Drafts filter.
Published: Live in the calendar, all authorized persons can RSVP.
Warning
Share in news is preselected. Once an event has appeared as a post in the news, the checkbox can no longer be changed. Remove it before publishing if you do not want a post.
Edit event later#
Open the event and click on Manage. Changes are saved automatically, and Saved will appear at the top. The area has seven tabs:
Basic data: Title, status, date, location, room, description, and cover image, below that Participation, Organization, the Settings, and Share & Group with the public registration and the group for the event.
Participants: The list of all registered people with meals, check-in, and status. Here you add people and guests, edit guests, and remove people from the list.
Catering: None, Free choice, or Preset, the standard menu, the order deadline, and the live ordering during the event, for multi-day events individually for each day.
Files: Documents for the participants and the organization's storage.
Program: The schedule with times, for multi-day events individually for each day.
FAQs: Answers to frequently asked questions.
Messages: Messages to the participants, with templates.
At the very bottom are Delete event and Cancel event.
Settings in the Master Data#
The settings are located in the Master Data tab below the description.
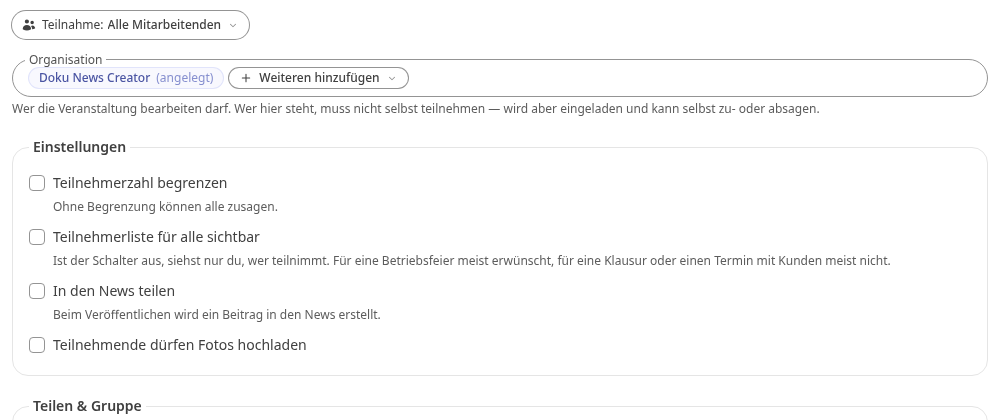
Limit number of participants determines the number of available spots. Additional confirmations are placed on the waiting list and move up as soon as someone cancels.
Participant list visible to everyone decides whether others can also see who is participating. If the switch is off, only you can see the list.
Share in the news creates a post in the news when publishing.
Participants may upload photos allows everyone who has confirmed to add their photos to the gallery, even during the event in the Review tab on the event page.
Create group under Share & Group turns the event into a group so that participants can stay in contact.
Use a different room on individual days#
For a multi-day event with a room, the room is booked for each day during the event time. If one day takes place elsewhere, you can specify this in the Master data tab:
Click on Different room on individual days below the room.
Next to each day, the booked room is displayed. Click on it for the desired day and select a different room. Here too, you can see whether the room is Free or Occupied on that day.

Specifying who can participate#
In the Manage area, open the Master data tab.
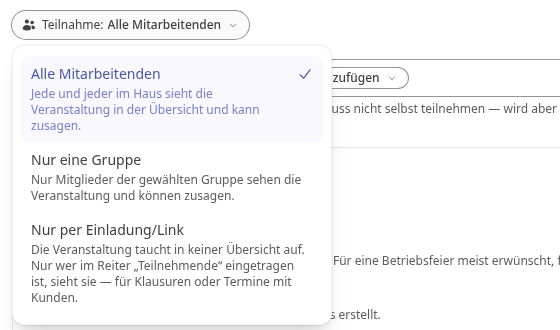
Click on Participation and select All employees, Only one group, or By invitation/link only. An event with By invitation/link only does not appear in any overview; only the people listed in the Participants tab can see it.
Name co-organizers#
People in the co-organizer role may edit the event, manage guests, and check them in. They do not have to attend themselves, but they are invited and can accept or decline on their own.
In the Master data tab, under Organization, click on Add another.
Enter the name and select the person. They will then appear in the list of participants with the addition Co-organizer.
Important
Name the co-organizer before you enter the person in the Participants tab and before they have responded. Anyone already on the list will not appear in the search; you will then see No results.
Add participants#
In the Manage area, open the Participants tab.
Add colleagues via Add person: enter the name and select it.
Add external people via Add guest: enter the name and optionally the email address, then click on Add. With an address, the person receives a link through which they can change their response and choose their meal. Without an address, you enter both yourself.
Newly added people appear under Invited. If someone confirms or declines, for example by phone, click on the status in the row and select Confirmed, Invited, Waitlist, or Declined.
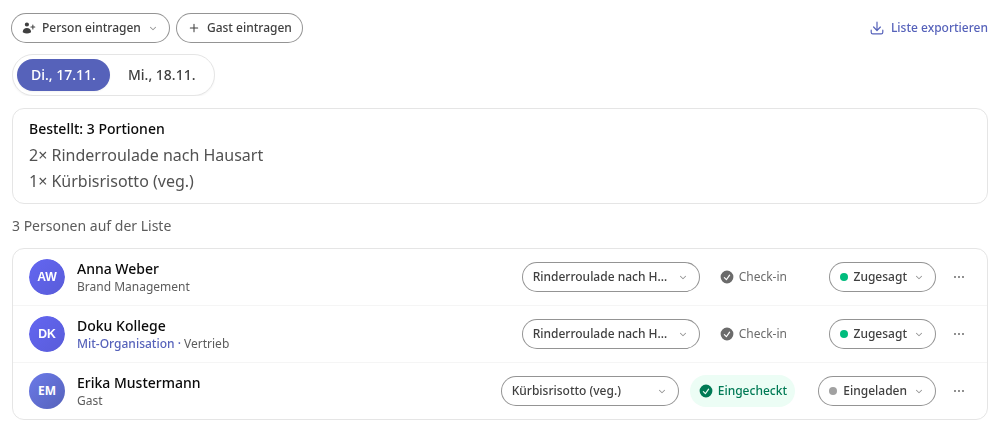
With Export list, you download the list as a CSV file, for example for reception or catering. In the Meal column, the dish is shown with the day before it; for multi-day events, it is shown for each day, for example 17.11.: Pumpkin risotto (veg.). If someone has explicitly not chosen anything, No meal appears there; if the column is empty, the person has not chosen yet.
How to check people in at the entrance is described under How do I check in guests at an event?
Editing guests and removing people#
If a guest has a typo or is missing an email address, you can correct it directly in the list.
Open the Participants tab in the Manage area.
Click on … on the right in the guest's row and then on Edit.
In the Edit guest window, correct the Name or add an address under Email (optional), and click on Save.
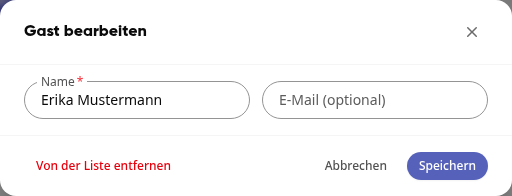
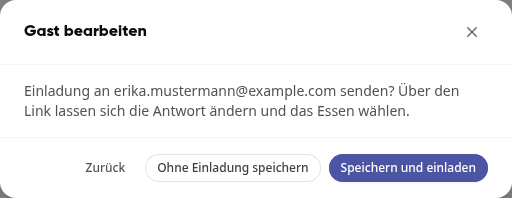
If you have entered a new address, Kibi asks whether the guest should receive an invitation. Choose Save and invite so that they receive the link by email, through which they can change their response and choose their meal, or Save without invitation.
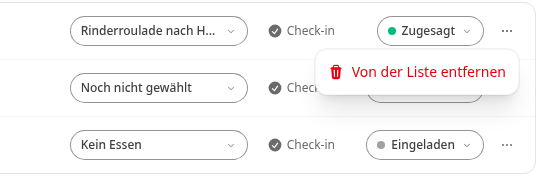
To remove someone completely from the list, click on … in the row for colleagues and then on Remove from list; for guests, click on Remove from list in the Edit guest window.
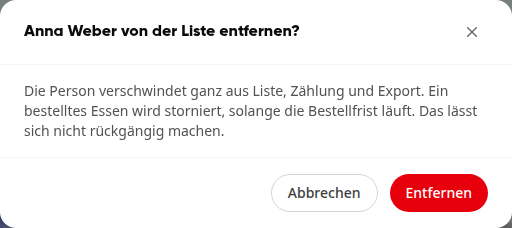
Confirm with Remove.
Warning
The person disappears completely from the list, count, and export. An ordered meal is canceled as long as the ordering deadline is running. This cannot be undone. If you only want to record that someone is not coming, set the status to Canceled instead.
Set catering and order deadline#
If the catering module is set up in the company, you order the food for the event directly via the provider's menu plan. The company bears the costs; participants see neither the price nor the provider.
Open the Catering tab in the Manage area. The event needs a date for this.
If the event lasts several days, select the day at the top, for example Wed., 18.11. Each day has its own catering: menu plan, dishes, and order deadline apply only to the selected day. Set up the following steps for each day on which there should be food.
Select Free choice if the participants choose themselves from the day's menu plan, or Fixed if you determine the dishes that are available to choose from.
If needed, select a standard menu. This is given to those who have not chosen anything by the order deadline. Without a standard menu, these people receive no food.
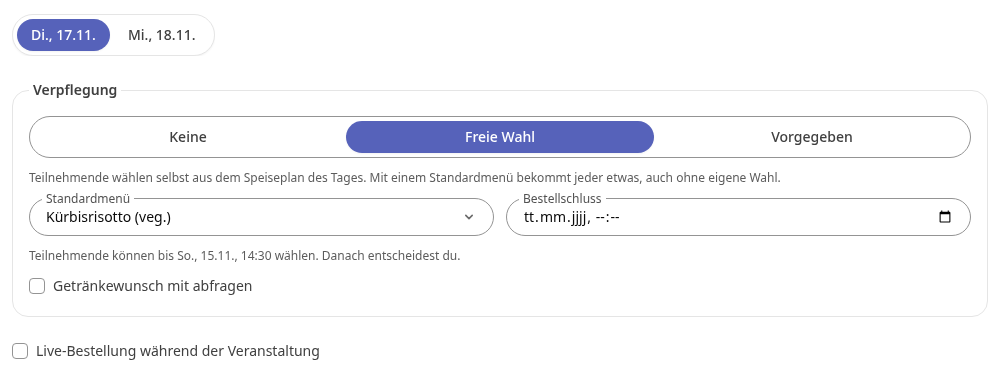
Check Also ask for drink preference if participants should also specify a drink.
Enter under Order deadline until when participants can choose their food. If you leave the field empty, the provider's date applies. Below it states until when participants can actually choose, for example Participants can choose until Sun., 15.11., 2:30 PM. After that, you decide.
Info
The order deadline can only be earlier than the provider's date, not later. If you enter a later time, The order deadline must be no later than …. After that, the order can no longer reach the provider in time. appears, and the previous date remains. After the order deadline, participants can no longer change their food. As the organizer, you then only change it as a reorder, as described under Changing food after the order deadline.
With Live ordering during the event, participants can request something during the event, for example coffee. The request goes to the device and is answered with a tap, only within the event's time window.
Selecting meals for participants#
If there is food at the event, you enter the dish for others in the Participants tab, for example if someone gives you their choice by phone. For this, Free choice or Preset must be set in the Catering tab.
Open the Participants tab in the Manage area.
For multi-day events, first select the day above the list, e.g. Tue., 17.11.; the meal and Ordered then apply to that day.
Click on the meal field in the person's row. As long as nothing has been selected, it shows Not yet selected.
Select a dish. The selection is saved immediately.

If someone does not want to eat on that day, select No meal. An already selected portion is then withdrawn, and the person does not receive a standard menu either.
Above the list, under Ordered, you can see how many portions of which dish have been collected. No meal and Not yet selected are different: No meal is a response that participants can also give themselves with No meal for me, including guests via their invitation link. Those who have not yet selected will receive the standard menu after the order deadline if you have set one.
Info
The selection is available for people with the status Confirmed or Invited, for colleagues as well as for guests. If you set someone to Cancelled or Waitlist, the portion is withdrawn. The person does not receive a message that you have selected for them.
Changing meals after the order deadline#
Once the order deadline has passed, a notice appears above the list, e.g. The order deadline was on 18.11.2026, 7:00 PM. Changes to meals are only possible as a reorder and will be marked in the order overview. If someone calls you afterwards, you still enter the meal:
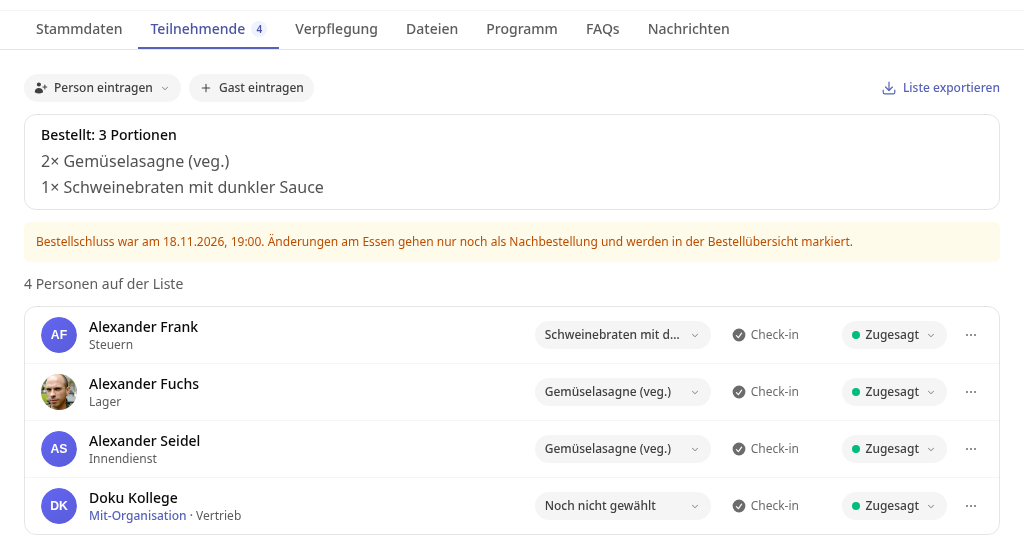
Click on the meal field in the person's row and select the dish or No meal.
Kibi asks Save as reorder? and names the order deadline and the person.
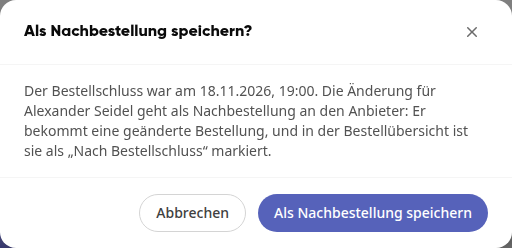
Click on Save as reorder. With Cancel, everything remains as it was.
The provider then receives a changed order, and the change is marked as After order deadline in the order overview. This keeps it traceable what was added after the order deadline.
Info
Reorderings are only possible as long as the provider still accepts them. Once their deadline has also passed, the meal can no longer be changed.
Enable public registration#
This allows external guests to register themselves without a Kibi account:
In the Master data tab, under Share & group, click Activate next to Public registration.
Share the link via Copy or display it via Show QR code.
The link is only accessible while the event is published. Then the globe next to Public registration is green. For a draft or a canceled event, it is gray, external guests receive error 404 when accessing it, and the reason is listed directly below the link:
Draft: The link only works once the event is published. Change the status under Master data.
Canceled: The event is canceled, so the link is not accessible.
Tip
Copy and Show QR code are also available for the draft. This way you can prepare invitations and notices and publish the event later.
If registered colleagues open the link, they see Accept as internal participant at the top of the page. After accepting, the link takes them directly to the event in Kibi. This also applies to you: if you have accepted yourself, you will only see the guest page in your browser's private window.
To close registration, click More options next to Public registration, then End public registration and Confirm. External users can no longer register afterward, but already registered guests remain. If you activate registration again, a new link is created; the old one remains invalid.
Add files and frequently asked questions#
In the Files tab under Documents, upload the agenda, directions sketch, or slides via Add attachment.
For each file, define who can see it and from when: Under Visible to, select All, Confirmed, or Checked in, for example for solutions or slides that should only be available after the event. Use Visible immediately to set a date and time from which the file will be visible.
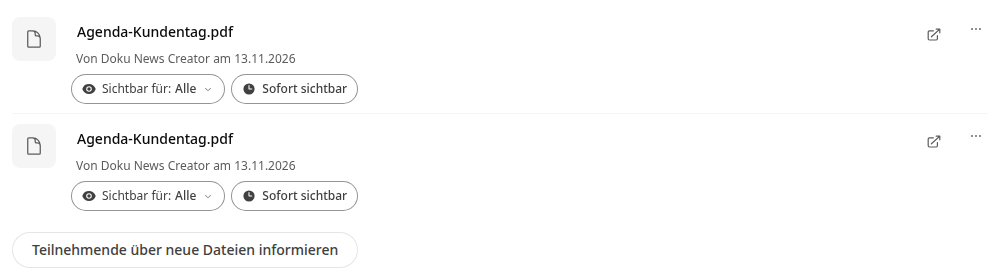
Click on Notify participants about new files once everything is uploaded. The message is only sent upon this click.
In the FAQs tab, enter Question and Answer and click on Add question. With Only for participants, for example, a Wi-Fi code remains reserved for those who have confirmed or replied with maybe.
Under Organization storage, you store what only the organization needs, such as offers or drafts. Only organizers can see this storage. Via Share, a file from there becomes a document; via … and Move to organization storage, you move a document back.
Messages to Participants#
In the Messages tab, you write to everyone who is taking part, for example the day before. Choose a template like It starts tomorrow, Thanks for the first day, Reminder to reply, Thanks for coming, or Review with photos, or start with Empty message. What you send will then appear in the list, along with everyone who received it.

View the event the way participants do#
With Preview at the top of the event, you can see the page the way others see it, without changing anything.
Click on Preview in the event. A banner appears at the top with View as and Time.

Under View as, choose whose view you want to see: Accepted, Invited, no response yet, or Without invitation.
Under Time, choose when: Now, Shortly before start, midday on a day of the event, After the end, or Custom time. This way, you can check, for example, what participants see in the catering after the ordering deadline or whether a file appears at the right time.
Click on End preview to return to the normal view.
Cancel or delete an event#
At the bottom of the Manage section, you will find both options:
Cancel event: The event remains and is marked as canceled for everyone. The link to the public registration is then no longer accessible.
Delete event: The event is removed, along with the associated news post and calendar entry. This cannot be undone.
Info
Only the person who created the event, content managers, and system admins can delete it. The co-organizer can see the button, but when clicked, they receive the Forbidden message.