
How do I manage rooms?
Updated Reading time: 5 min
On this page
- Creating a room
- Tab "General": Room Information
- Bookable rooms and rooms only in the plan
- Tab "Availability": Times and Rules
- Tab "Booking": Who is allowed to book?
- Creating questions at booking
- Tab "Public Booking": Make room available for external parties
- Buildings and Floor Plans
- Deactivating or deleting a room
You create the rooms for your company, determine when and by whom they can be booked, and release them for external parties if needed. Rooms such as a warehouse or a heating room are only shown in the building plan and are not bookable.
Info
This function is available to HR managers and system administrators.
Creating a room#
Open Administration and click on Rooms under Organization. You will see all rooms with room number, location, capacity, equipment, availability times, and status. Rooms that only appear on the building plan also have Not bookable under status. Use the search field to find a room by name, room number, or location.
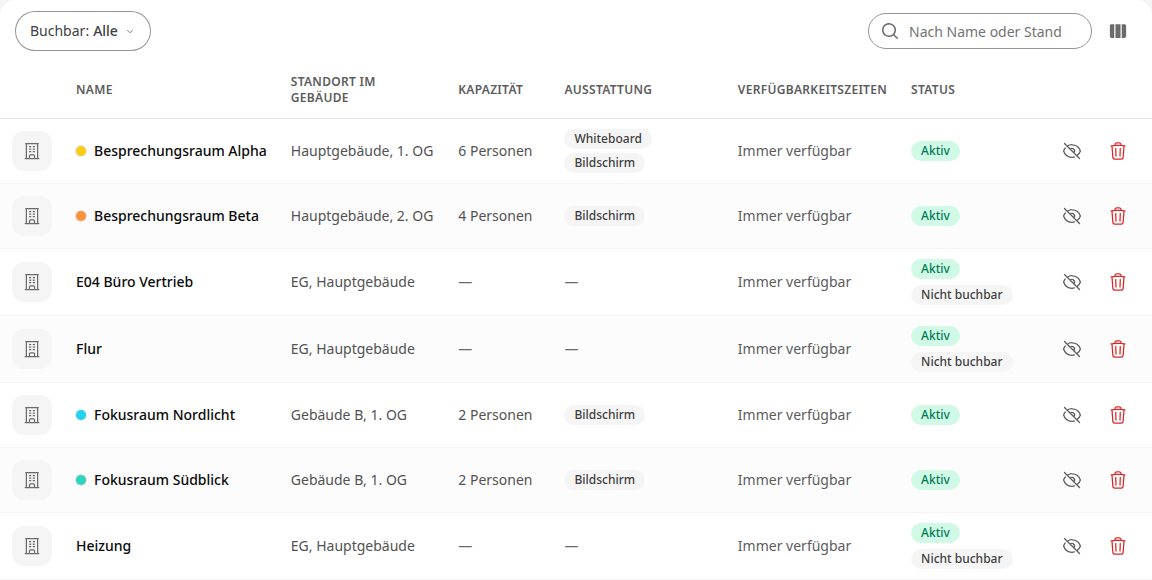
Click on Create room.
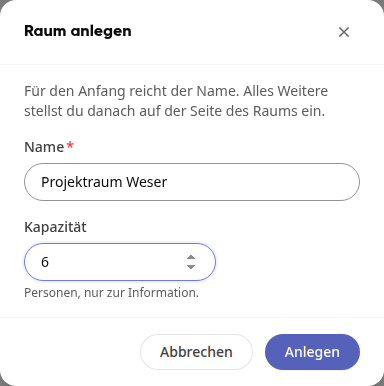
Enter the name of the room under Name, optionally the capacity, and click on Create. The capacity is for information only.
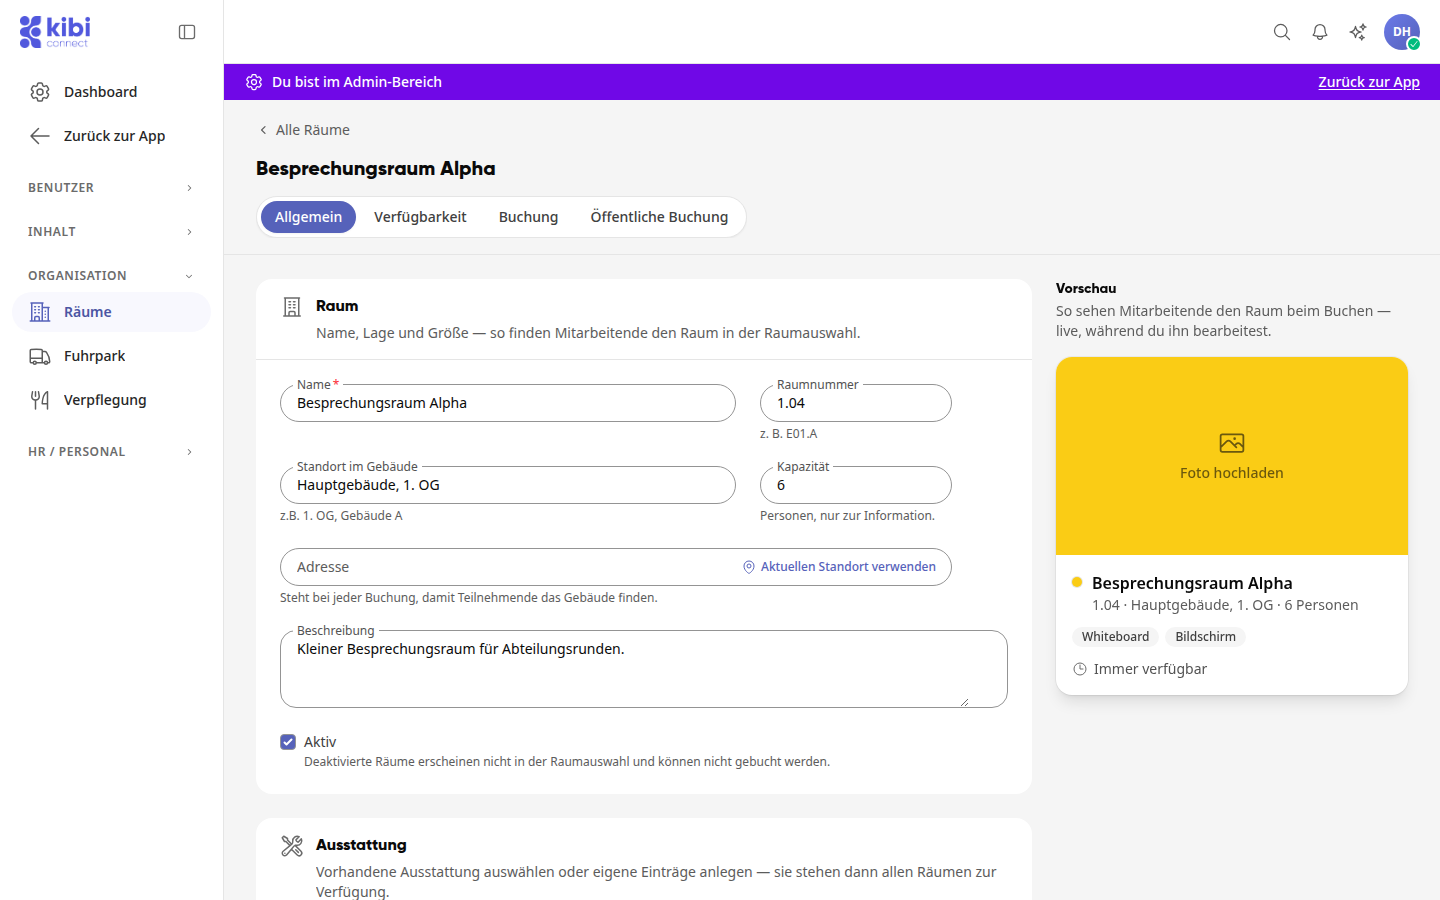
The room page then opens with the tabs General, Availability, Booking, and Public booking. Your changes are saved automatically, and Saved appears at the top right. The Preview on the right shows how employees see the room when booking.
Tab "General": Room Information#
Here you maintain the name, room number, location in the building, capacity, address, and description, the equipment (from the suggestions or as a custom entry), the color, as well as photos and files. The first photo is the cover image in the overview and room selection. Under files, you can, for example, store instructions for projectors or air conditioning systems.
The room number is optional, for example "E01.A". It appears in the room list, in the preview, and in the room selection when booking, before the name, and employees can also find the room by its number.
Bookable rooms and rooms only in the plan#
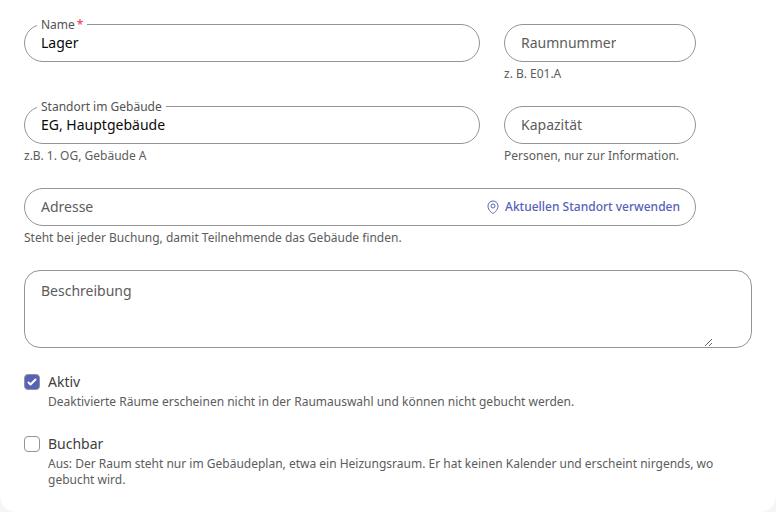
A room is either bookable or is only in the building plan. Only in the plan are, for example, a storage room, a kitchenette, or a heating room: they belong to an area on the floor plan, but have no calendar and do not appear anywhere where bookings are made, i.e., neither in the room selection when scheduling an appointment nor in the room finder or in the room overview.
Switching: In the General tab, you set or remove the Bookable checkbox. Next to the room name at the top, Not bookable then appears. The Bookable toggle is also available on the area in the building plan.
Filtering: Using Bookable: All above the room list, you can show only the bookable rooms (Bookable) or only the rooms that are in the plan (Only in the plan).
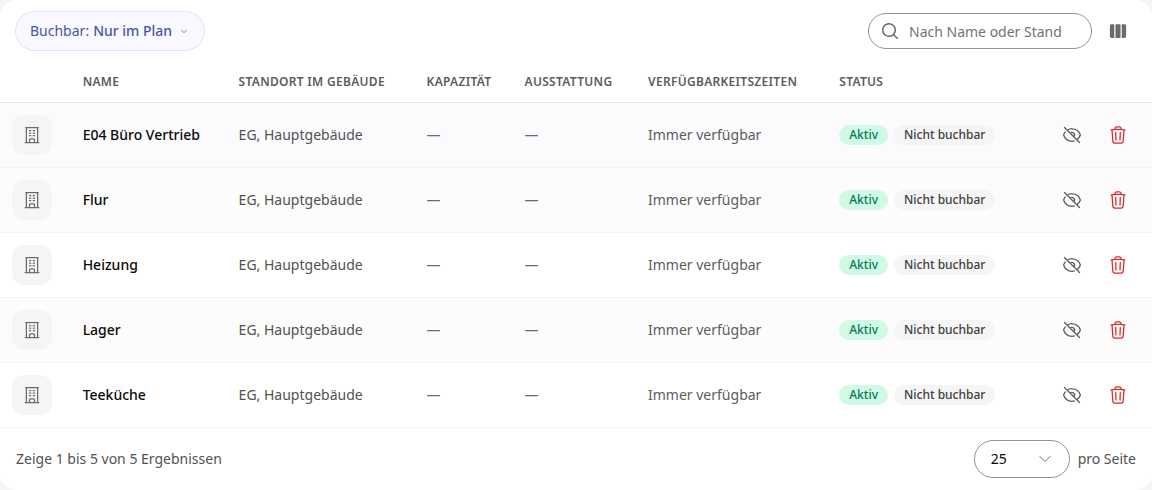
New rooms that you create via Create room are bookable. If you create a room from an area in the building plan, it only becomes bookable for the type Meeting.
Info
Bookable and Active are two different things. A deactivated room is temporarily out of service. A room that is not bookable permanently belongs only in the building plan.
Tab "Availability": Times and Rules#
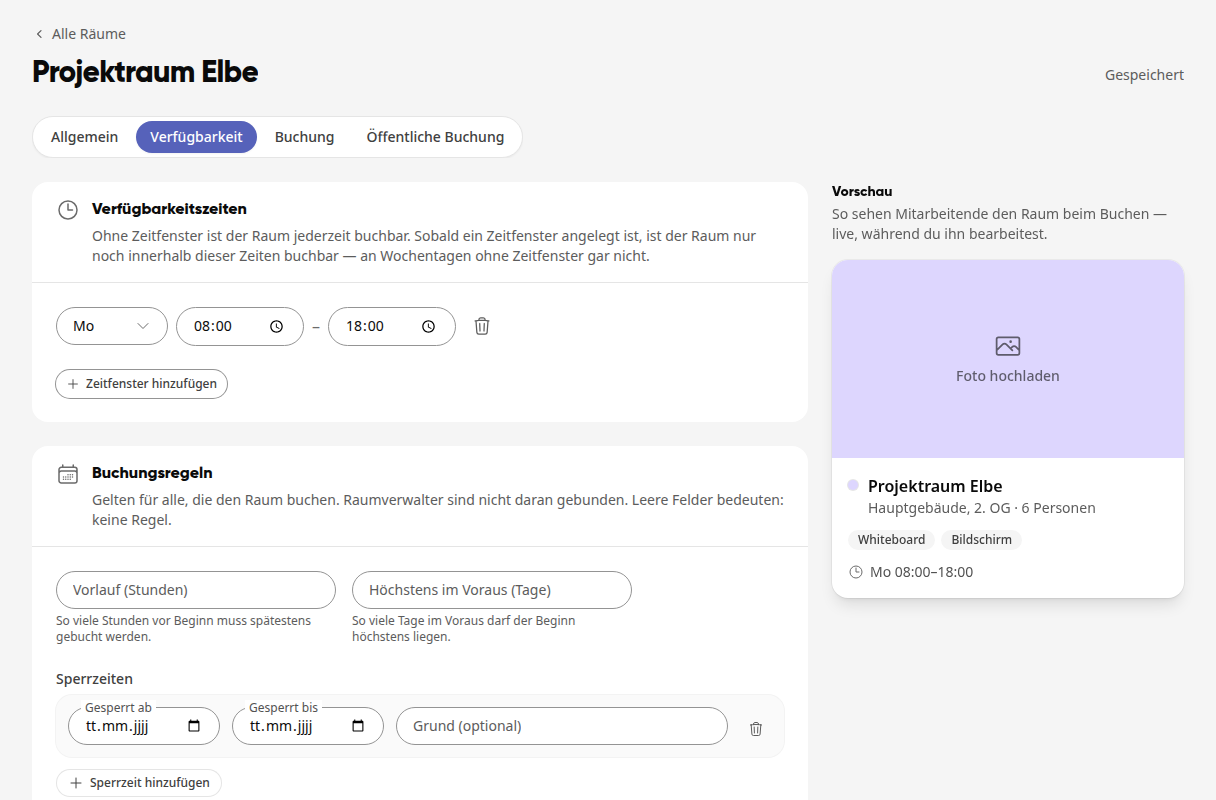
Availability times: Without a time window, the room can be booked at any time. As soon as you create one with Add time window, it can only be booked during these times, and not at all on weekdays without a time window.
Lead time (hours): This is how many hours before the start the booking must be made at the latest.
Maximum in advance (days): This is how many days in advance the start may be at the most.
Blocked times: With Add blocked time, you block the room for a period, for example due to renovation. Existing bookings are retained.
Empty fields mean: no rule. Those who manage rooms are not bound by the booking rules.
Tab "Booking": Who is allowed to book?#
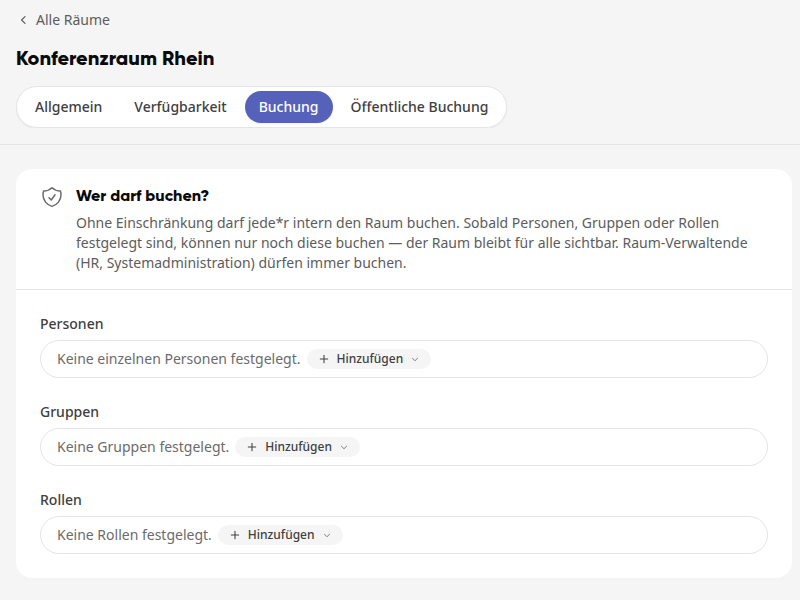
Who is allowed to book? Without restriction, all internal users may book the room. As soon as you specify persons, groups, or roles, only these can book. The room remains visible to everyone, and those who manage rooms may always book.
Questions at booking: Here you create fields that appear when booking under the room selection, for example the number of people or the desired seating arrangement.
Catering: A room can be a place with catering. If it is, Catering: appears here with the providers that supply the room. If it is not yet, it says "This room is not yet a place with catering." Which offers and items are available in the room is defined in the catering settings.
Info
The button Add as place with catering and the link Edit for the place are only visible to persons who manage the catering. For all others, the tab only shows whether the room is a place with catering.
Creating questions at booking#
Click Add field under Questions at booking.
Enter the question under Field name, for example "How many people are coming?". Under Hint, you can add a short text that appears below the field.
Select the field type: Short text, Long text, Number, Email, Phone, Date, Selection, Rating, Scale, Yes/No, Consent, File, Photo, Signature, or Location.
For Selection, enter at least two answers under Answer options and confirm each with Enter. With Multiple selection, several can be checked.
For File and Photo, specify under Maximum files how many may be uploaded.
Check the Required field box if the question must be answered before the room is booked.
Click Done.
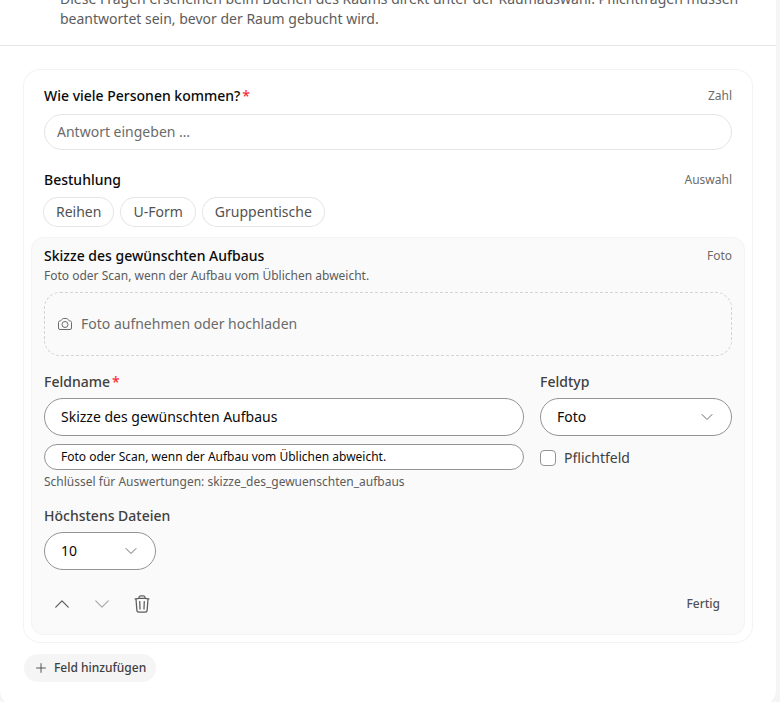
Above each field you see a preview, just as employees fill it out when booking. A click on a completed field opens it again for editing. With the arrows Up and Down you change the order, with the trash can you remove a field. Your changes are saved automatically.
Tab "Public Booking": Make room available for external parties#
External parties such as clubs, customers, or partners can book the room via a link, without any account on the platform.
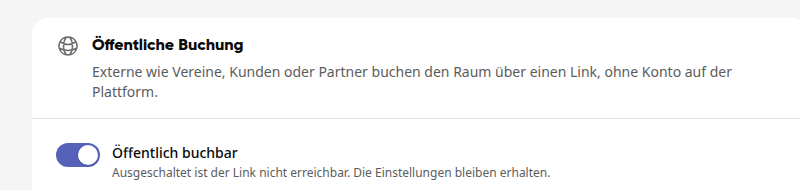
Open the Public Booking tab and enable Publicly bookable. The platform generates the link to the booking page.
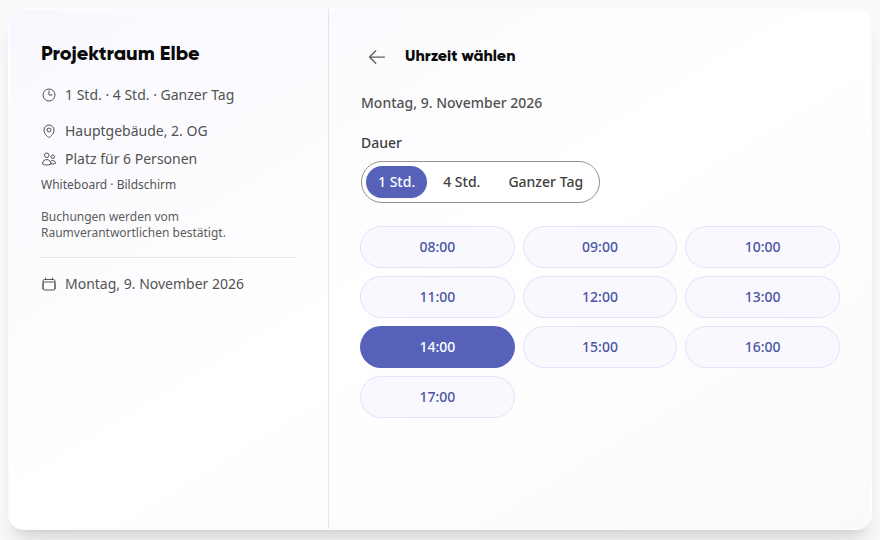
Under Rules for public booking, set Booking duration, Bookable times, and if needed Lead time, Maximum in advance, Break between bookings, Maximum bookings per day, and Blocked days.
Under Booking page and process, set the Title of the booking page and the Notes for guests. There you also determine whether Confirm bookings and Catering bookable apply and who is notified under Notify.
Copy the link using Copy link and share it.
Guests select date, duration, and time on the booking page, enter at least Name and Email under Your data, and click Request now.
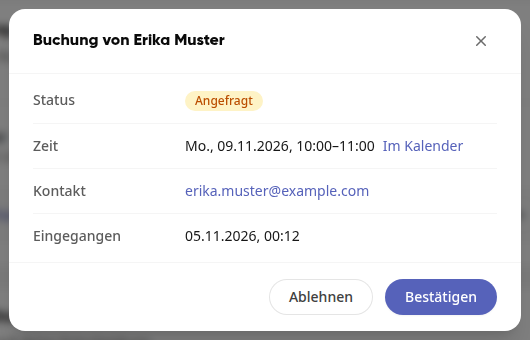
You can see what comes in via the link under Requests and bookings, with open requests listed first. Click on an entry and decide with Confirm or Reject. If Confirm bookings is enabled, a request holds the appointment, and guests only receive confirmation after your approval.
Info
The rules for public booking apply only to the link. The occupancy, availability times, and blocked times of the room always apply. If you disable Publicly bookable, the link is no longer accessible, but the settings are retained.
Buildings and Floor Plans#
In the Buildings tab next to Rooms, you create your buildings with floors and floor plans and draw the rooms as areas. From an area, you create a room there using Create as room; when importing a plan set, you adopt all recognized rooms at once. How this works is described under How do I set up buildings and floor plans?.
Deactivating or deleting a room#
Deactivate: In the room list, click the eye icon in the row of the room. A deactivated room does not appear in the room selection and cannot be booked. Use the same icon to activate it again. Alternatively, use the Active checkbox in the General tab.
Delete: In the room list, click the trash can icon or on the room's page click Delete room and confirm with Delete.
Warnung
When deleting, upcoming appointments lose their room booking. The appointments remain, and the affected employees are notified. If the room should only be temporarily unavailable for booking, it is better to deactivate it.