
How do I create my own views and share them?
Updated Reading time: 3 min
On this page
With a custom view, you can set up a board exactly as you need it: with your own columns, fixed filters, your display settings, and the order of the cards. You save the view, access it at any time, and share it with colleagues if needed.
Create a custom view#
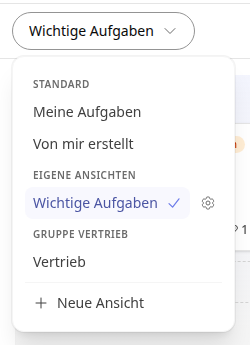
In the navigation, open Tasks and click on the view selection in the top left.
At the bottom of the selection, click New View.
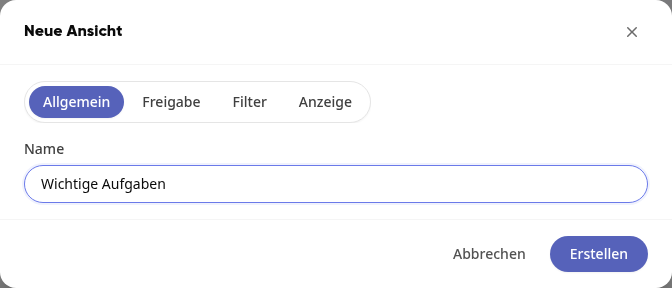
In the New View window, under the General tab, enter a Name, for example, "Important Tasks".
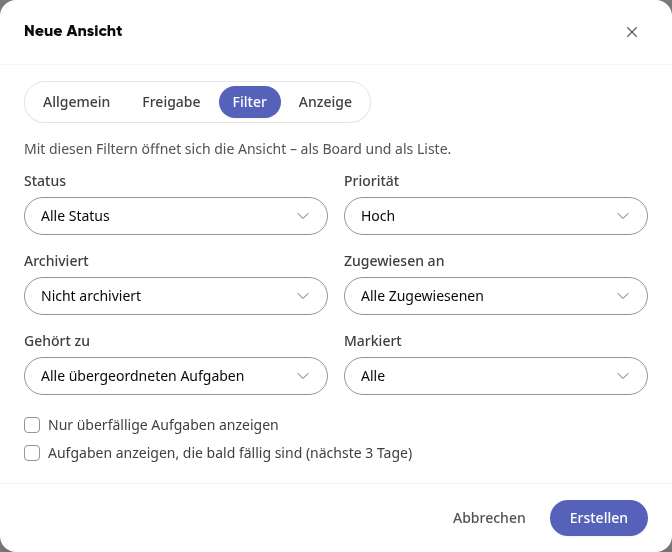
In the Filter tab, define which tasks the view should display, for example, under Priority, only High. Available options include Status, Priority, Archived, Assigned to, Belongs to, Marked, as well as only overdue or soon due tasks.
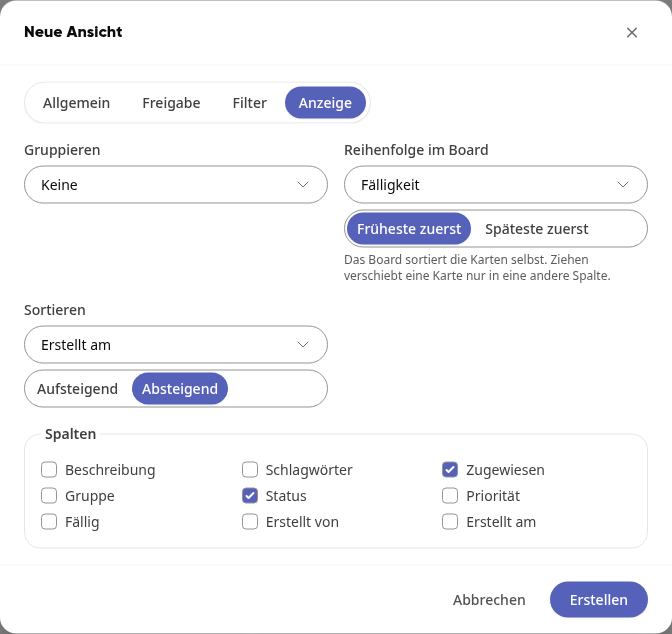
In the Display tab, choose how the tasks are organized. Group by arranges the board by Group, Hierarchy, or Due Date. Order in Board sorts the cards in the columns by Due Date, Priority, or Created On, each with a direction such as Earliest First or Highest First; Manual (by dragging) lets you arrange the cards yourself. Sort (Ascending or Descending) and Columns determine how the list is sorted and which columns it displays.
Click Create.
The message View created confirms it, and the new view opens. The filters apply to both the board and the list. In the selection, you will find it in the future under My Views. The view remembers the selected order in the board: whoever opens it sees the cards sorted the same way.
Info
If an order in the board is selected, the board sorts the cards itself. Dragging then only moves a card to another column. More on this at How do I organize tasks on boards?.
Create custom columns#
A new view starts with the columns To Do, In Progress, and Done. You can add more columns directly in the board:
On the right edge of the board, click the narrow strip Add Column.
Enter the name, for example, "Waiting for Customer," and press Enter. The message Column created confirms it.
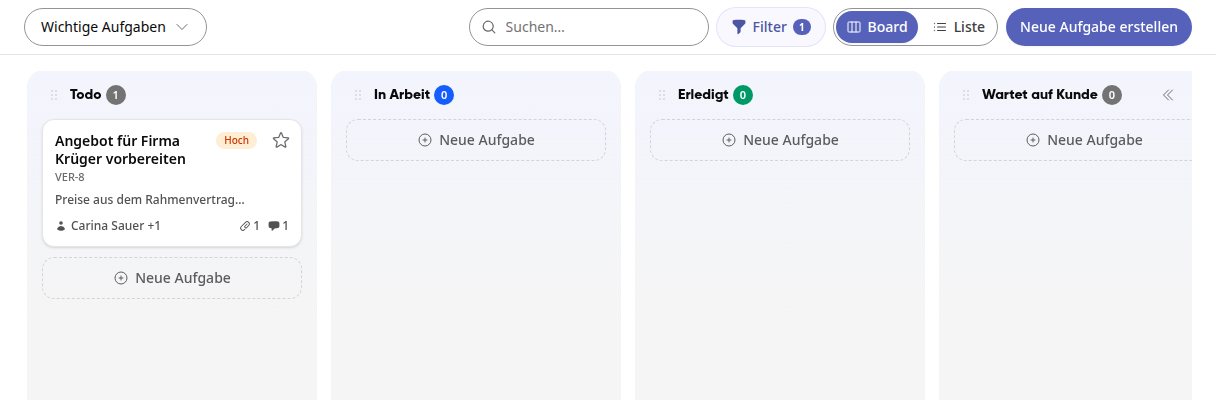
Renaming, adjusting, and deleting works the same as in a group board; see How do I organize tasks on boards?.
Info
The columns belong to the view. Which column a task is moved to only applies in this view. The task itself remains the same.
Share a view with colleagues#
Open the view selection and click the gear icon next to your view. For a new view, go directly to the New View window.
Switch to the Sharing tab and click Add under People.
Search for the person using Search for person... and select them. Use Add More to include additional people; the x next to a name removes the person.
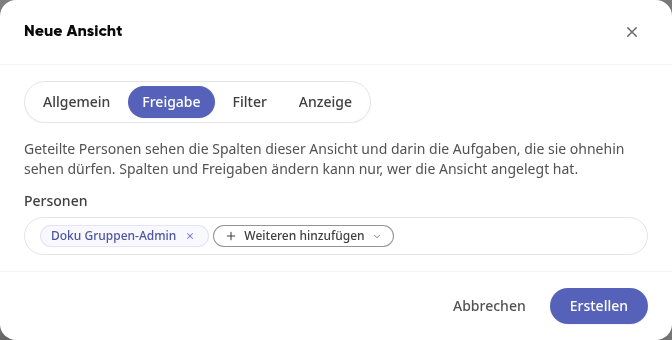
Click Create or, for an existing view, Save.
The shared individuals will find the view in their selection under Shared with Me, with a note indicating who shared it.
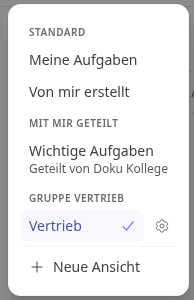
Info
Shared individuals see the view's columns and only the tasks they are already permitted to see. Only the person who created the view can change its columns and sharing settings.
Save changed filters in the view#
If you modify filters in a saved view via Filter or the sort icon in the column header, two icons appear next to the selection:

-
The bookmark (Save View) applies the filters, grouping, board order, sorting, and list columns to the view. Everyone who opens it will start with these settings. The message View saved confirms it.
-
The arrow (Restore Saved View) discards your changes and reverts to the saved view.
Tipp
If you set filters in My Tasks or Created by Me, the bookmark next to the selection suggests saving them as a custom view.
Edit or delete a view#
Open the view selection and click the gear icon next to your view.
In the Settings "Important Tasks" window (with your view's name), modify the name, sharing, filters, or display, and click Save.
To delete, click Delete View at the bottom left and confirm the prompt.
When deleted, the tasks remain intact; only their arrangement in this view's columns is lost.