
How do I manage work time models?
Updated Reading time: 3 min
On this page
A work schedule model defines how many hours employees should work on which days. Kibi Connect uses this to calculate target hours and balances.
Info
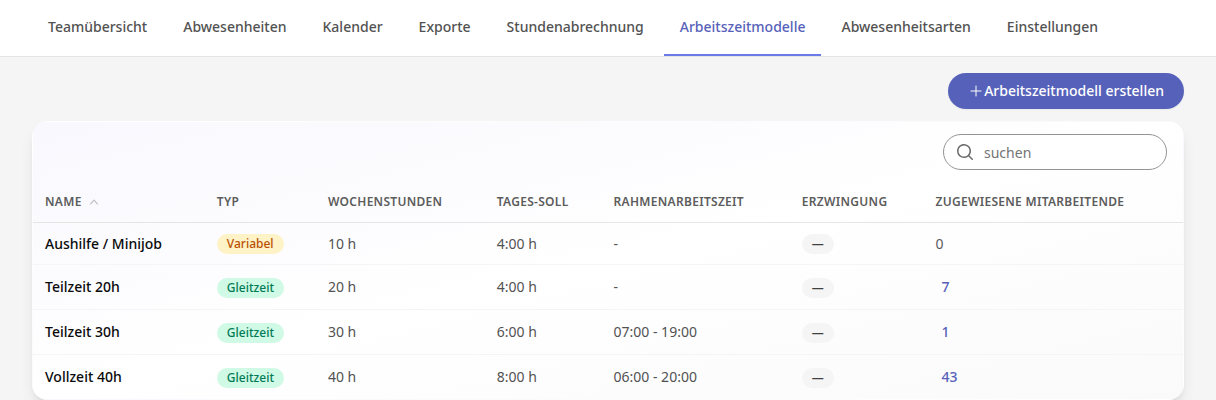
This function is available to HR managers and system administrators. You can find it in the admin area under HR / Personnel > Time & Absences in the Work Schedule Models tab.
Create a work schedule model#
In the Work Schedule Models tab, click Create Work Schedule Model.
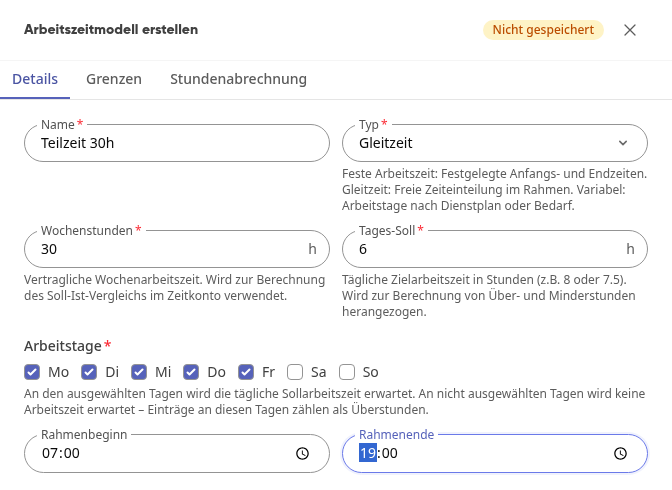
In the Details tab, fill in the fields (explanation below).
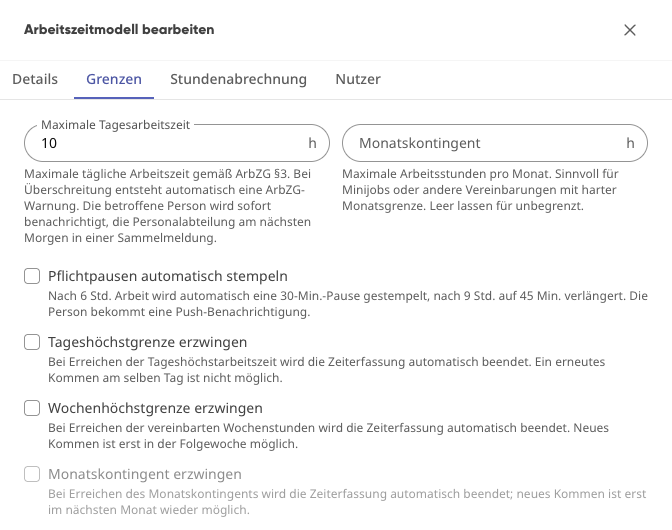
In the Limits tab, set upper limits and automation if needed (see below).
Click Create. The model will then appear in the list.
The fields in the Details tab:
Name: for example, "Part-time 30h".
Type: Fixed working hours has set start and end times, Flexitime allows free time allocation within a framework, Variable workdays according to duty roster or demand.
Weekly hours and Daily target: the contractual working hours and the daily target working hours.
Workdays: On the selected days, the daily target is expected. Entries on other days count as overtime.
Framework start and Framework end: optional.
Set limits#
In the Limits tab, you configure:
Maximum daily working hours: If exceeded, an ArbZG warning is generated.
Monthly quota: Hours per month, for example for mini-jobs. Leave blank for unlimited.
Automatically stamp mandatory breaks: After 6 hours, a 30-minute break is stamped; after 9 hours, it is extended to 45 minutes.
Enforce daily maximum limit, Enforce weekly maximum limit, and Enforce monthly quota: When the limit is reached, time tracking is automatically ended. Check-in is only possible again in the next period.
Enable hour billing#
With hour billing, worked hours are not automatically paid out at the end of the month. They remain open until you settle them in a billing run.
Open the Hour Billing tab in the model and enable Hour Billing.
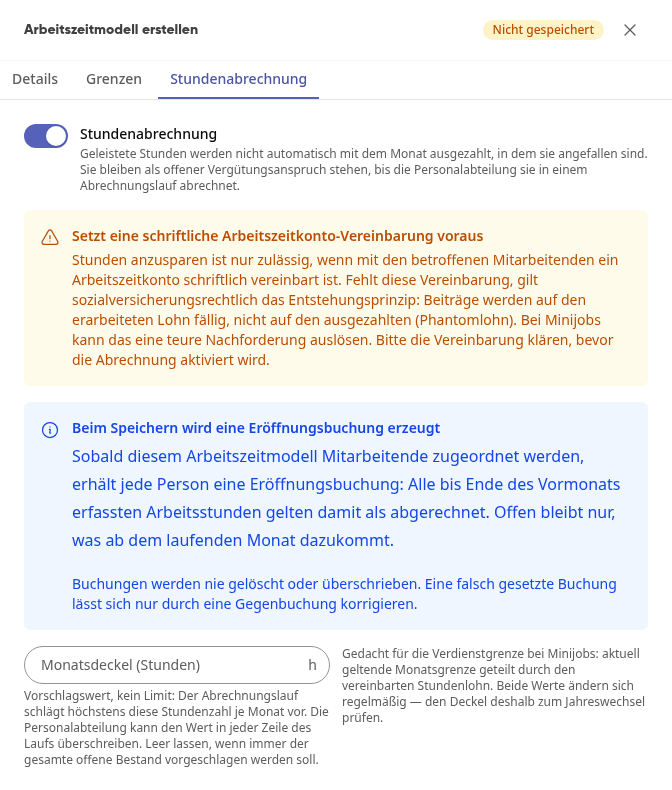
If needed, enter a Monthly cap (hours). This is a suggested value for the billing run and not a limit.
Click Create or Save.
Reload the page. The Hour Billing tab now appears in the administration.
Warning
Saving hours requires a written working time account agreement with the affected employees. Clarify this before activating billing. Without the agreement, this can trigger expensive subsequent demands, especially for mini-jobs.
Important
When enabling, each assigned person receives an opening entry: All working hours until the end of the previous month are considered settled. When disabling or deleting the model, they receive a closing entry: The open balance is frozen and remains owed. Entries can only be corrected by a reversing entry.
Assign or change a model for a person#
Open the Team Overview tab and click on the person's name.
Open the HR Settings tab.
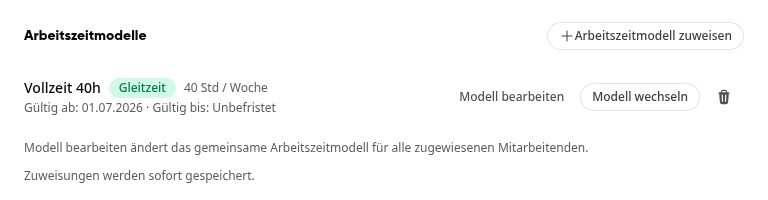
Click Change Model. If the person does not yet have a model, click Assign Work Schedule Model.
Select the Work Schedule Model and Valid from. Valid until is optional.
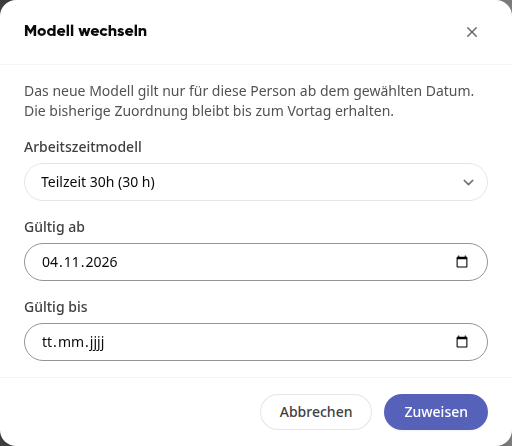
Click Assign. The assignment is saved immediately. When changing, the previous assignment remains valid until the day before.
You can see who is assigned to a model in the model's Users tab.
Tip
Under Settings, you can set the Default Work Schedule Model to determine which model new employees automatically receive when created.
Change or delete a model#
In the Work Schedule Models tab, click on the model's row.
Change the values and click Save.
Confirm the prompt with Save if people are already assigned to the model.
To delete, click Delete in the opened model and confirm the prompt.
Warning
Changes apply to all assigned persons, including past and planned assignments. If only one person should have changes, use Change Model. Deletion cannot be undone.