
How do I manage task types?
Updated Reading time: 3 min
On this page
With task types, you define what information a task requests, for example, in a damage report, the type of damage, the location, and a photo. For each type, you also set when Kibi reminds about the due date and when an overdue task escalates.
Info
These settings are available to system admins.
Open task types#
Open Administration and select Tasks under Organization. Under Task types, all types are listed with their kind and a summary, for example Reminds 1 working day before · escalates 1 working day after due date.
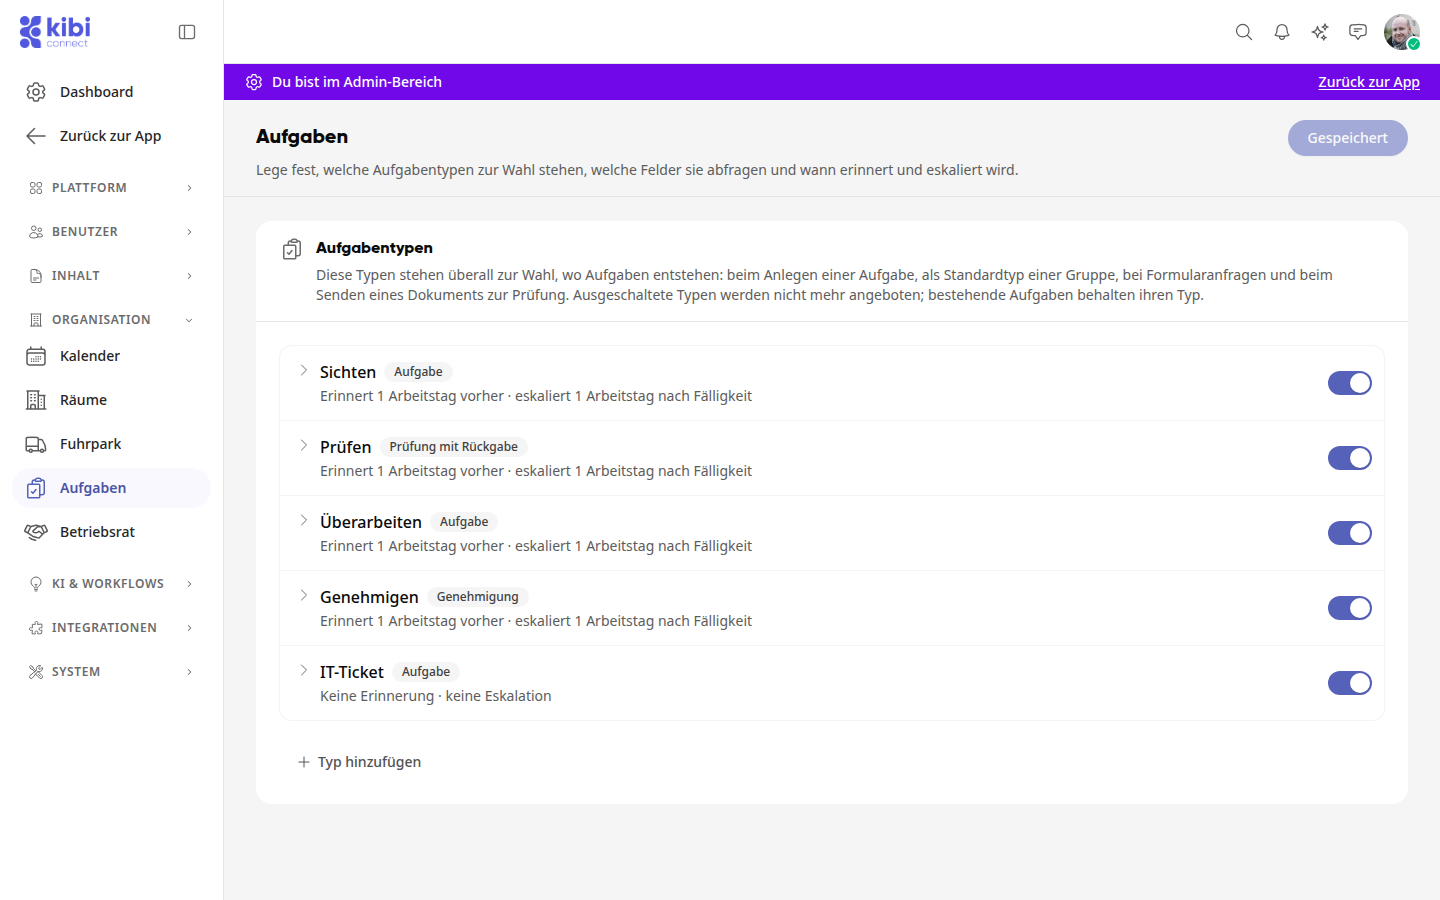
Four types are already set up: Review and Revise (kind Task), Check (kind Review with return) and Approve (kind Approval). You can rename, adjust, and disable them like any other type.
These types are available for selection wherever tasks are created: when creating a task, as the default type of a group, for form requests, and when sending a document for review. Reviews and approvals only start from the file storage.
Create a new type#
Click on Add type below the list. The new type expands.
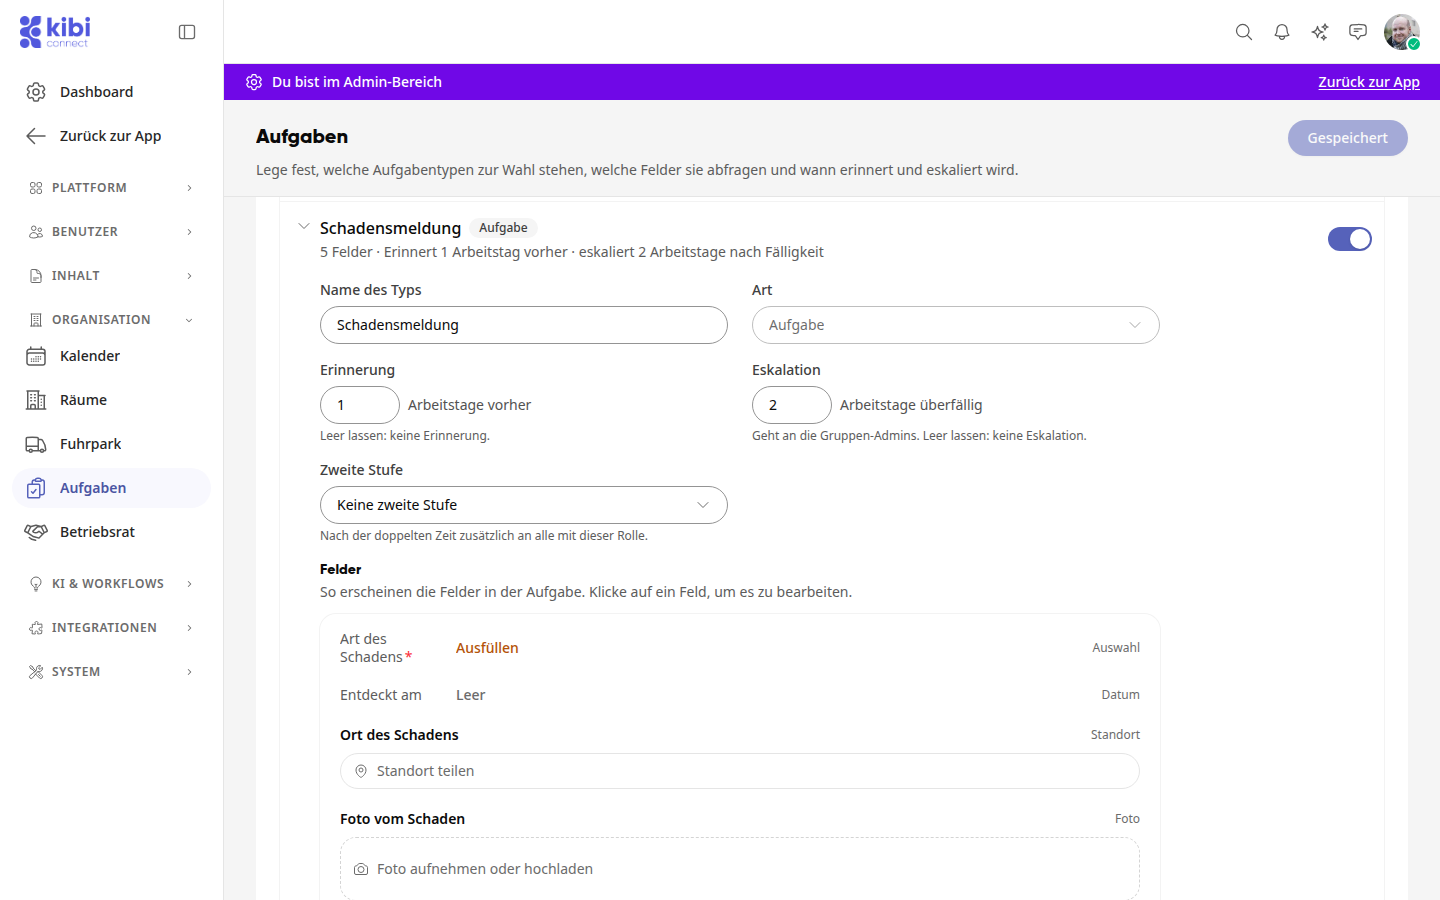
Under Type name, enter the name, for example "Damage report".
Under Type, select how the type works: Task for a normal task with its own fields, Review with return or Approval for documents that need to be reviewed. The type cannot be changed after saving.
Under Reminder, enter how many working days in advance the responsible persons should be reminded of the due date. Leaving it blank means: no reminder.
Under Escalation, enter after how many working days overdue the group admins should be notified. Leaving it blank means: no escalation.
If needed, select a role under Second level. After double the time, everyone with this role will also be notified.
Click on Save in the top right corner.
Info
An escalation names the task, the group and the role, but never the person who is overdue.
Add fields#
Under Fields, you can see a preview of how the fields will appear in the task later.
Click on Add field.
Enter the Field name and, if needed, a hint that appears below the field.
Select the Field type: Short text, Long text, Number, Email, Phone, Date, Choice, Rating, Scale, Yes/No, Consent, File, Photo, Signature, or Location.
For Choice, enter at least two answers under Answer options, confirming each with the Enter key. With Multiple choice, several answers may be selected.
Check the Required field box if the information is necessary.
Click on Done and then on Save at the top.
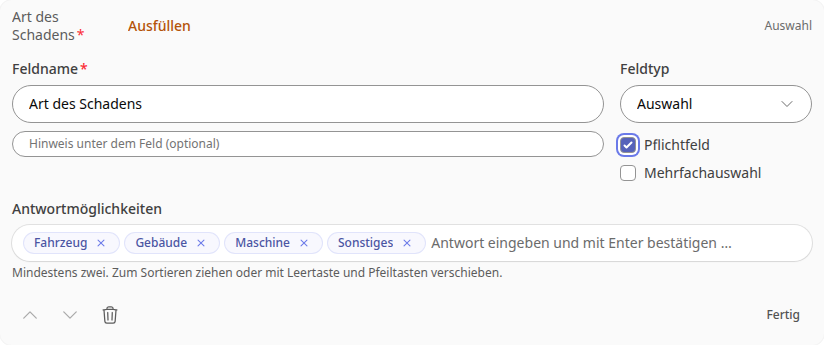
Clicking on a field in the preview opens it again. Use the arrows to change the order, and the trash can to remove the field.
Tip
A required field does not hold anyone back when creating a task. A task can only be completed when all required fields are filled in. This way, Kai, workflows, and forms can also create tasks that are half filled out.
Disable or remove a type#
Using the toggle next to a type, you no longer offer it. Existing tasks keep their type.
To completely remove a type, expand it, click Remove at the bottom, and then click Save.
Set a default type for a group#
A group can specify which type its new tasks start with. This is set by the group's admins: Open the group, click Edit, then select the type under Default task type. The field appears when the group uses tasks.

Anyone who creates a task in the group's board will find the type and its fields already filled in and can change them.