
How do I manage domains for email?
Updated Reading time: 3 min
On this page
Here you set up the domains on which your organization uses email addresses and specify which domain will receive new mailboxes. This is how you also integrate your own domain such as team.your-company.com.
Info
This function is available to system administrators. You can find it under Administration → System → Mail.
Set general settings#
On the General tab, you will find the settings for the entire mail module.
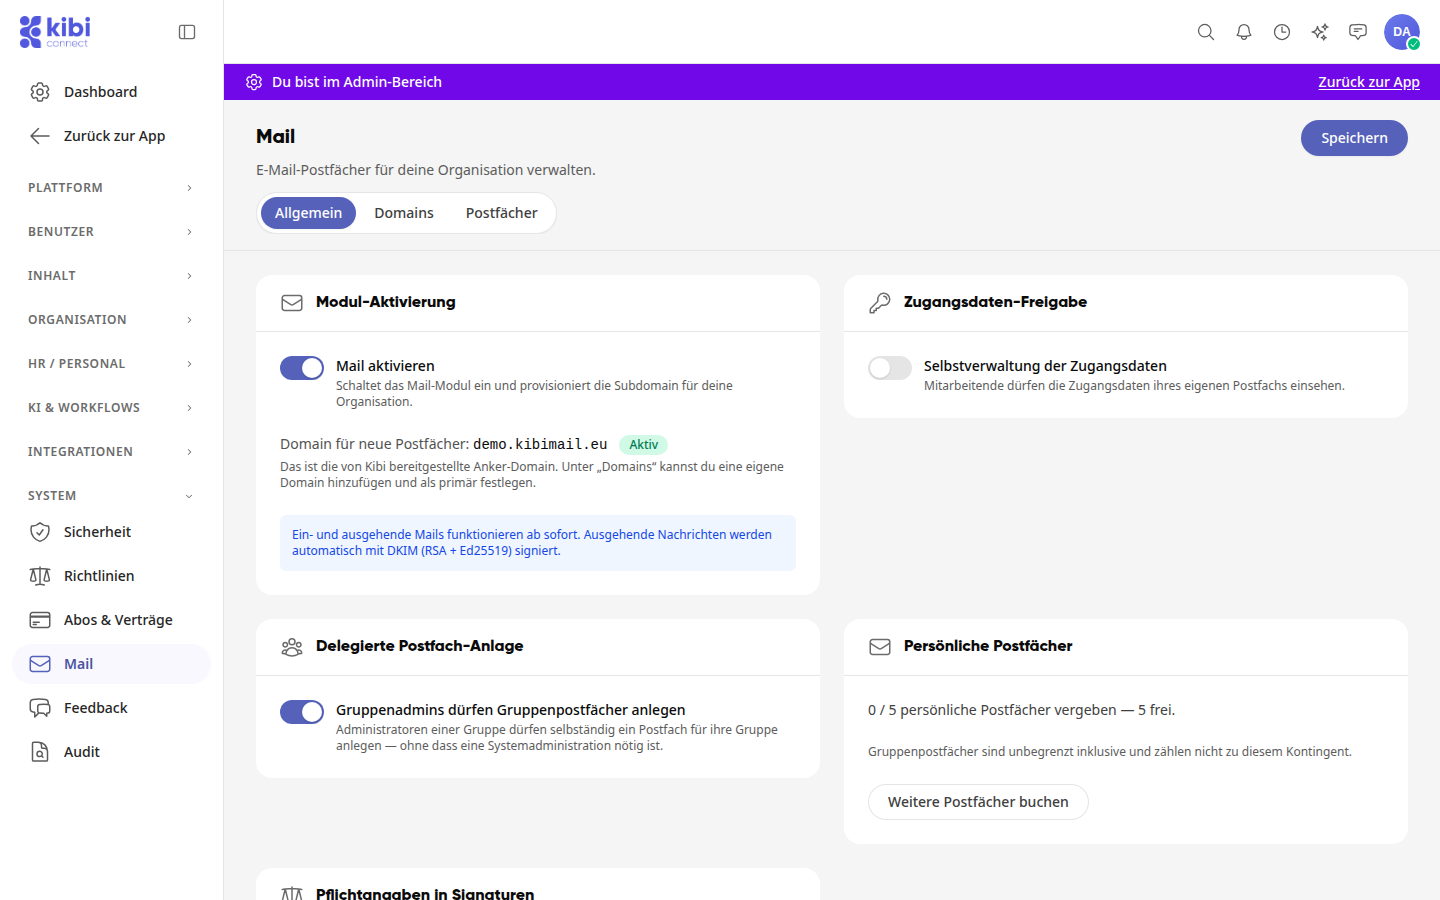
Enable mail activates the mail module and provisions the subdomain for your organization. This takes effect immediately and usually takes a few minutes. Below this, you will see the Domain for new mailboxes.
Self-management of access data allows employees to view the access data for their own mailbox.
Group admins can create group mailboxes allows group administrators to independently create a mailbox for their group.
Personal mailboxes shows how many mailboxes have been assigned and how many are still available. Use Book additional mailboxes to expand your quota. Group mailboxes are unlimited and not included in this count.
Mandatory information in signatures specifies, using country and legal form, which notices employees see when editing their signature.
You save Self-management of access data, Group admins can create group mailboxes, and Mandatory information in signatures together:
Change the settings you want to adjust.
Click Save at the top right of the page. Afterward, it will display Saved.
Add your own domain#
Warning
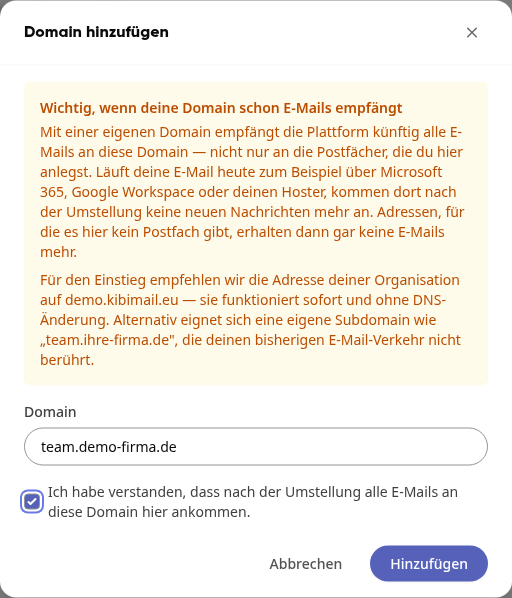
With your own domain, the platform will receive all emails sent to this domain after the switch. Addresses for which there is no mailbox here will no longer receive emails. For this reason, it is recommended to start with your organization's address on the anchor domain provided by Kibi: it works immediately and without DNS changes. Alternatively, you can use your own subdomain such as team.your-company.com, which does not affect your existing email traffic.
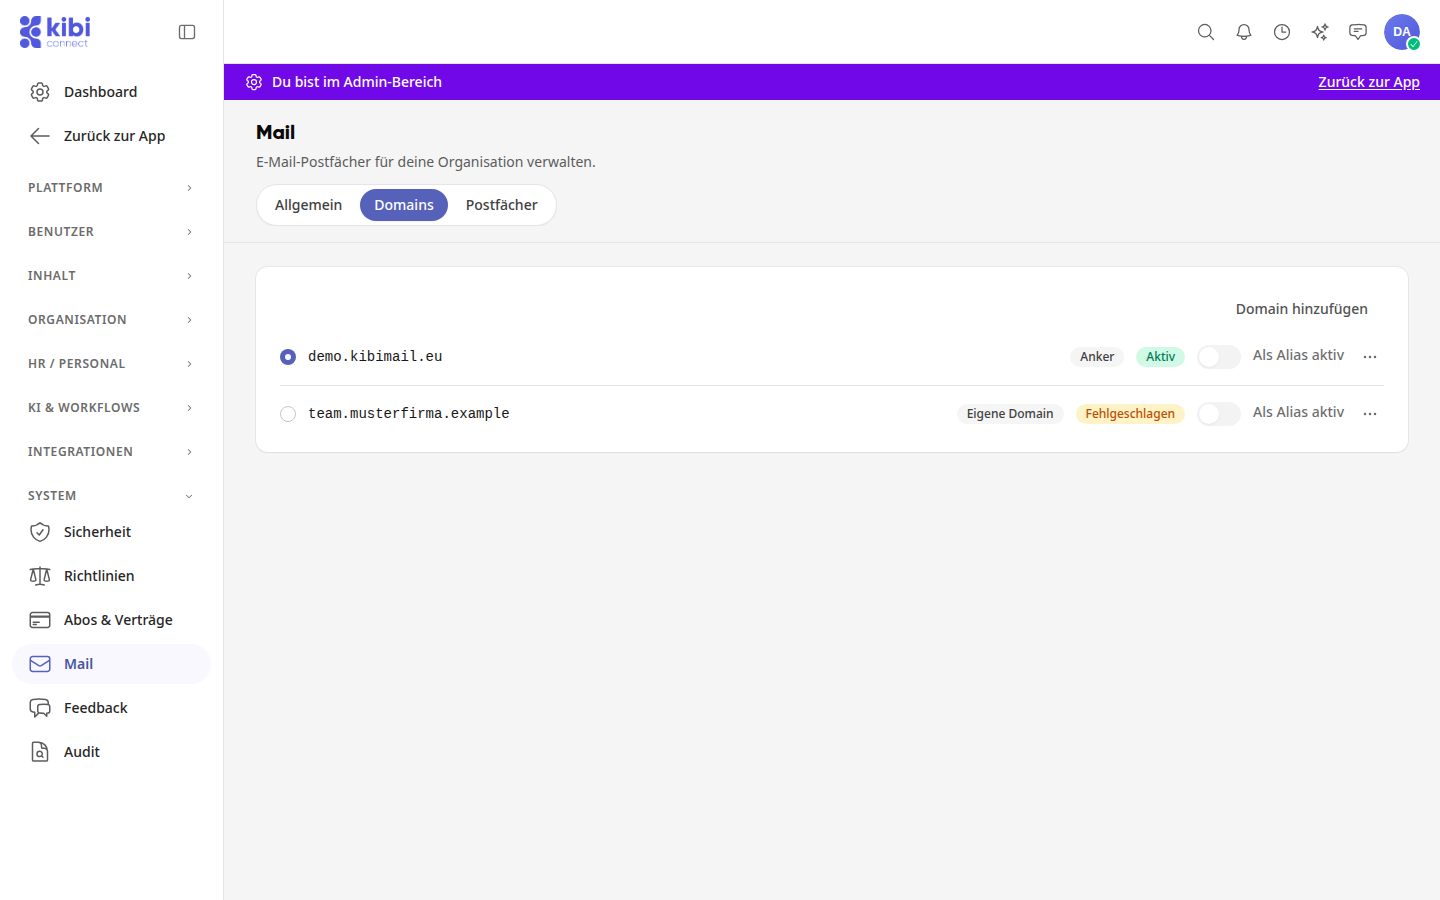
Open the Domains tab and click Add domain.
Enter the domain, check the confirmation box, and click Add.
Enter the displayed TXT record with Host (Name) and Value with your DNS provider.
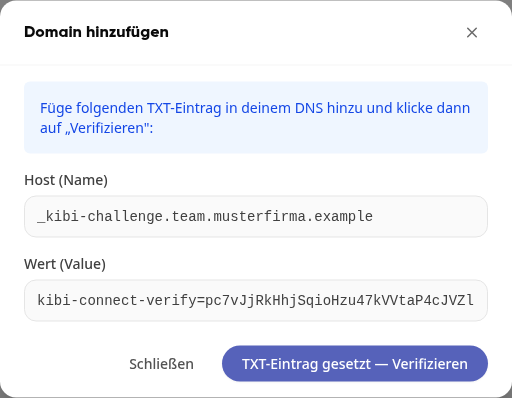
Click TXT record set — Verify.
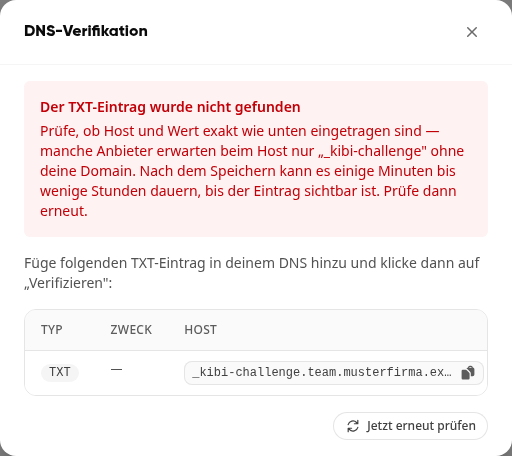
As long as the entry is missing, the domain status will be Pending. If the platform cannot find it, an error message will appear, and the domain status will be Failed. Check the entry and restart the verification via … → Verify. You can view the entry at any time via … → Show DNS records; you can also start the verification there with Check now.
Enter and check DNS records#
Click … in the domain row and then Show DNS records.
Follow the Order of migration in the dialog: First create the mailboxes, then enter all records except the MX record, and set the MX record last.
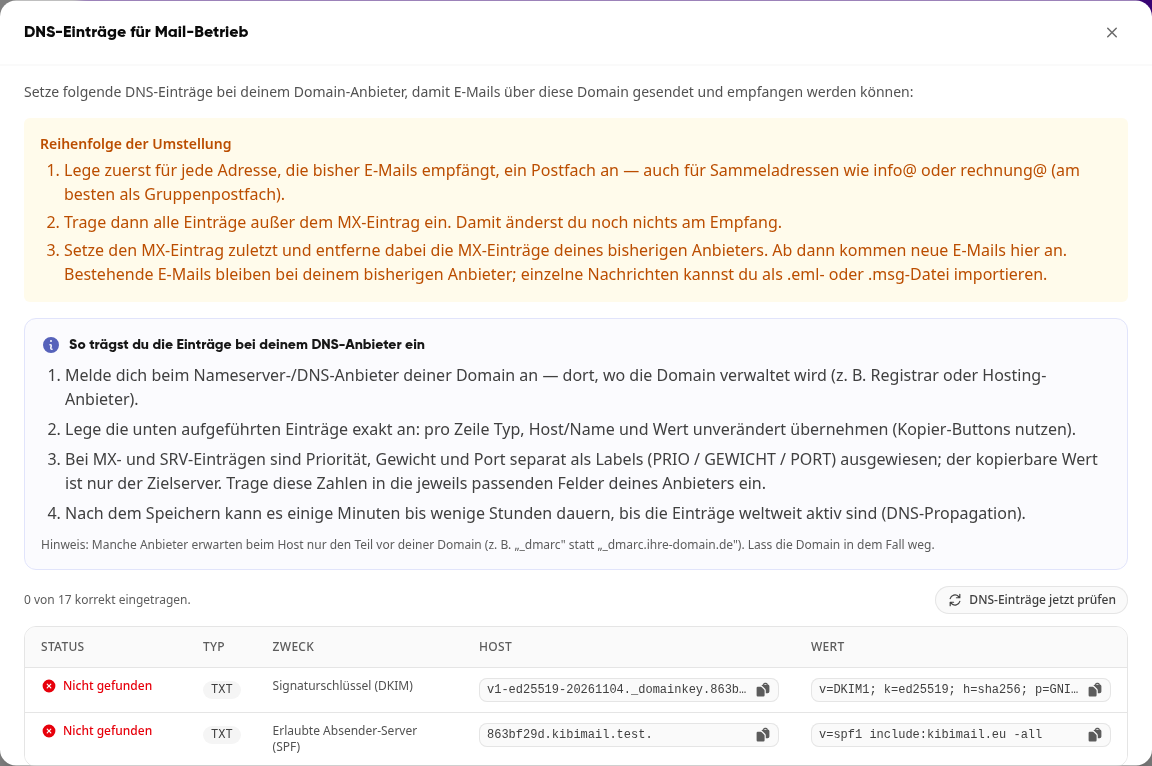
After entering the records, click Check DNS records now. In the Status column, you will see the result for each entry.
Info
It may take a few minutes to several hours for new DNS records to become active worldwide. Existing emails will remain with your current provider. You can import individual messages as .eml or .msg files.
Set primary domain and alias#
Both settings are only possible for domains with the status Active.
Select the radio button next to a domain to make it the primary domain. A primary domain cannot be removed.
Enable Active as alias to use the domain as an additional address for all mailboxes. This switch is disabled for the primary domain.
Remove domain#
Click … in the domain row and then Remove.
Confirm with Confirm.
Warning
This will delete all mailbox aliases on this domain. This cannot be undone.