
How do I plan the program for an event?
Updated Reading time: 6 min
On this page
You define the schedule for your event: agenda items with start and end times, room, image, relevant documents and links, and for multi-day events, individually for each day. Once the event is published, each agenda item automatically receives its own calendar entry. The finished program can be downloaded as a PDF and printed. If workshops run simultaneously, participants can register for one of them, optionally with limited spots.
Info
The program can be edited by whoever created the event or is listed in the event's Organization. As an employee, you don't need a special role for this: it's enough if the organization adds you under the Master Data tab in Organization. If you don't see the Manage button on the event page, you're not listed there yet.
Creating agenda items#
Click on Events in the menu and open the event.
Click on Manage in the top right corner, then on the Program tab.
If the event spans multiple days, select the day at the top. Each day has its own program; the number next to the day shows how many items it already has.
Click on Add agenda item.
Enter the time and the name of the agenda item, for example "09:00" and "Welcome and keynote". Below that, you can add a description (optional), for example who is speaking. Web addresses in the description become clickable on the event page.
Under End, enter when the item ends, for example "09:45". This field appears as soon as the item has a time and is optional: without an end time, the item runs until the next one.
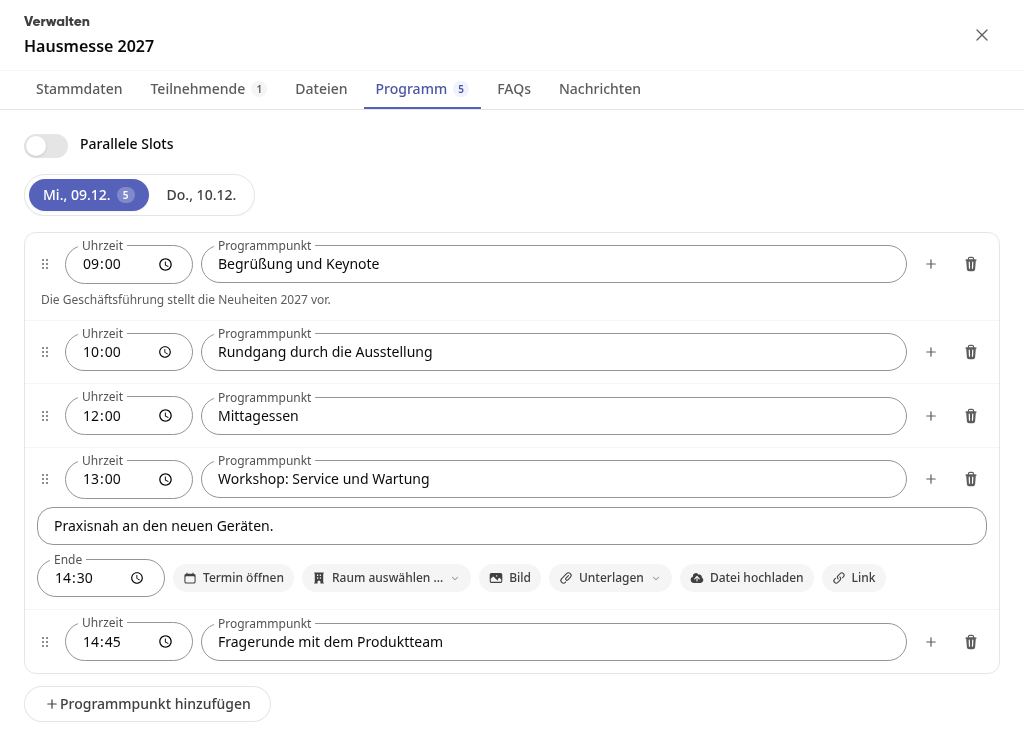
Repeat steps 4 to 6 for each additional item.
Each item is saved as soon as you leave the field. There is no separate save button. If you click on an item, its additional details expand; for the remaining items, a short summary appears below, for example "Conference room Rhine · 1 document · 1 link" and the beginning of the description.
Tip
The time is optional. If it is not yet fixed, leave the field empty: the item will then appear in the program without a time. You can only enter an end time once the item has a time.
Info
An item without a name is not saved.
Change order and insert points#
The program appears exactly in the order of the list, not sorted by time. You can change it at any time:
Move: Grab a point on the left at the handle with the six dots (Move program point) and drag it to the desired position. The new order is saved immediately.
Insert: Click the plus symbol (Insert before) to the right of a point. A new, empty point appears directly above this point, which you fill in as described above. Add program point below the list appends a new point to the end instead.
Tip
If you forgot a point, such as "Arrive and have coffee" before the welcome, insert it in the right place with Insert before instead of creating the points anew.
Add room, image, documents and links#
If you click on a program item, these buttons appear below it:
Select room …: Choose the room where the item takes place. The list shows the building, seats and equipment for each room and whether it is Free at the selected time. Therefore, first set the day and time. With Remove room you undo the selection.
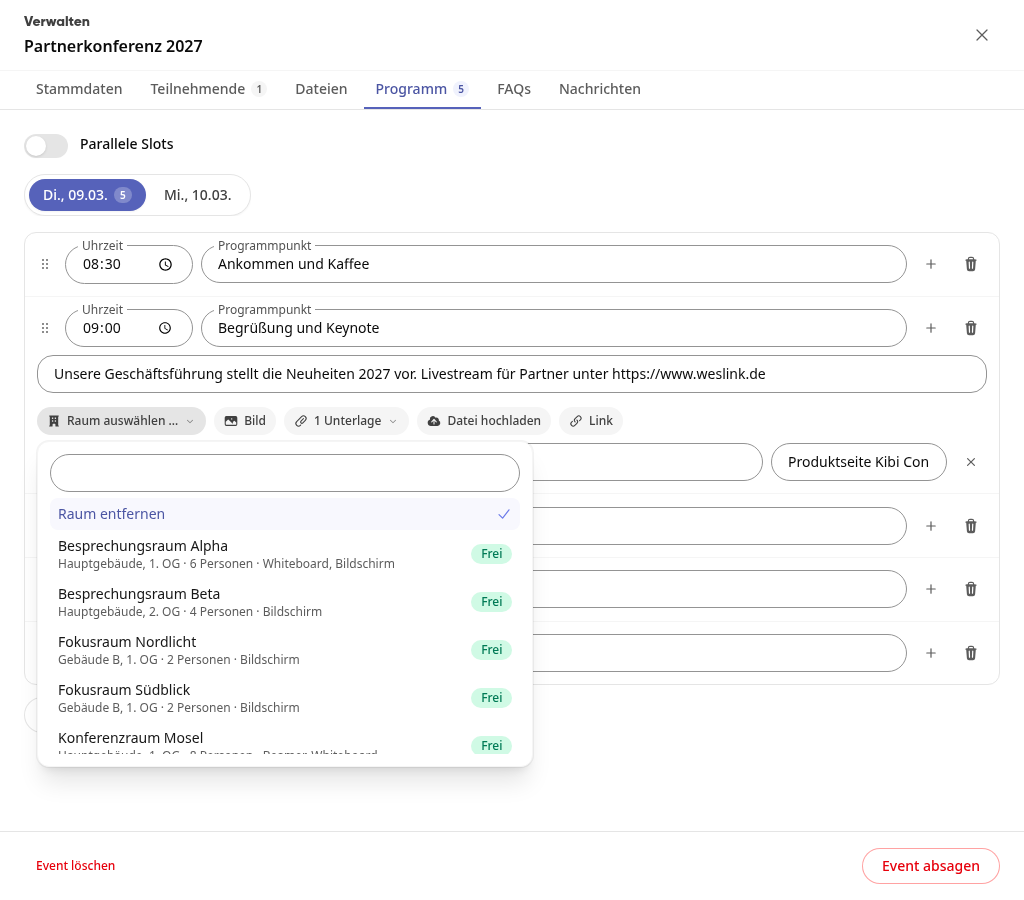
Image: Upload an image, for example a photo of the speaker or a motif for the workshop. It appears in the program next to the item. With Change image you replace it, with the cross next to it you remove it.
Documents: Link files of the event to the item, for example the slides for the keynote. The files of the event are available for selection; via Search file you find them faster.
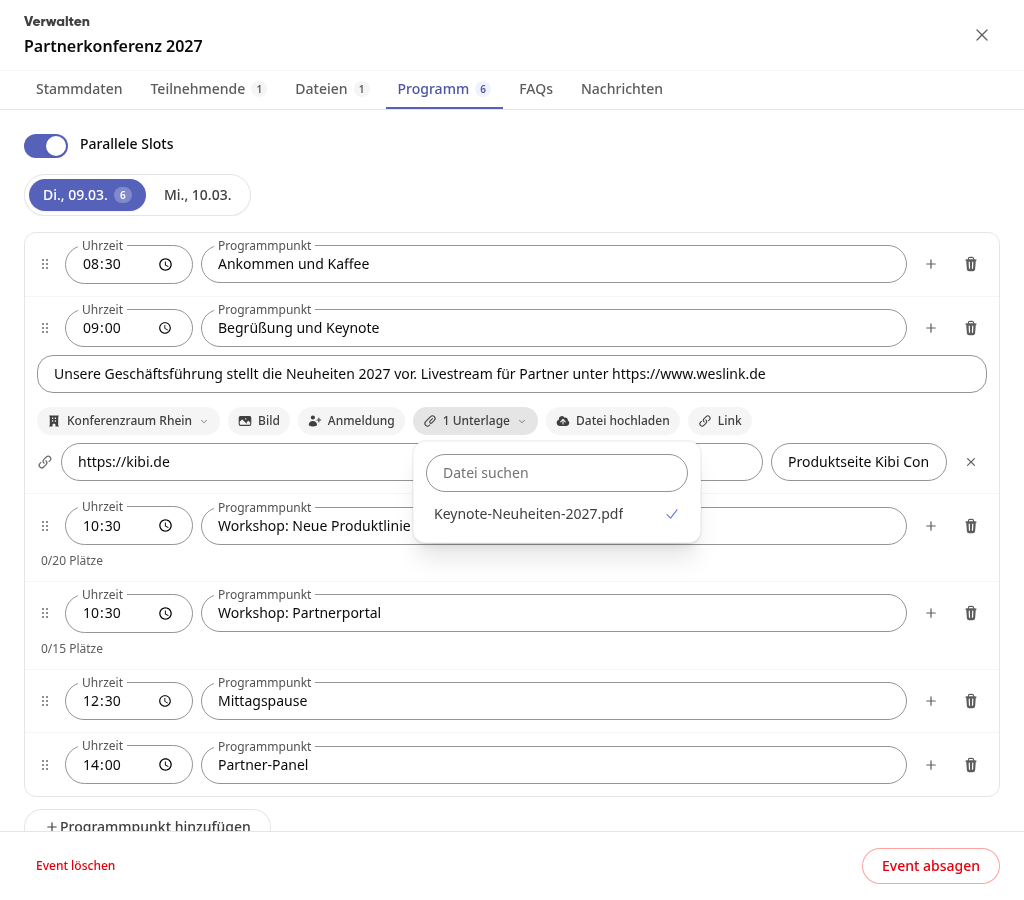
Upload file: Upload a document directly at the program item, without the detour via the Files tab. The file is then linked to the item (1 document) and is also located in the files of the event: for a multi-day event in the folder of the respective day, for a one-day event in the documents.
Link: Add a web address, for example for registering for a livestream or to a product page. Enter the Address (it must start with http:// or https://) and, if desired, a Title (optional) that is displayed instead of the address. With the cross next to it (Remove link) you remove the link again. An item can have multiple links.
Info
Select room … appears only if room booking is used in your company.
Info
For a linked document, it still applies who can see it and from when. How to set this is described in How do I store documents for an event?.
Parallel Program Items with Registration#
If multiple items run at the same time, such as two workshops, participants can register for one of them.
Create the items with the same time.
In the Program tab at the top, turn on the Parallel Slots toggle. It appears as soon as the program has at least two items.
Click on one of the items and then on Registration.
Under Spots, enter how many people can participate. If you leave the field empty, the number is unlimited.
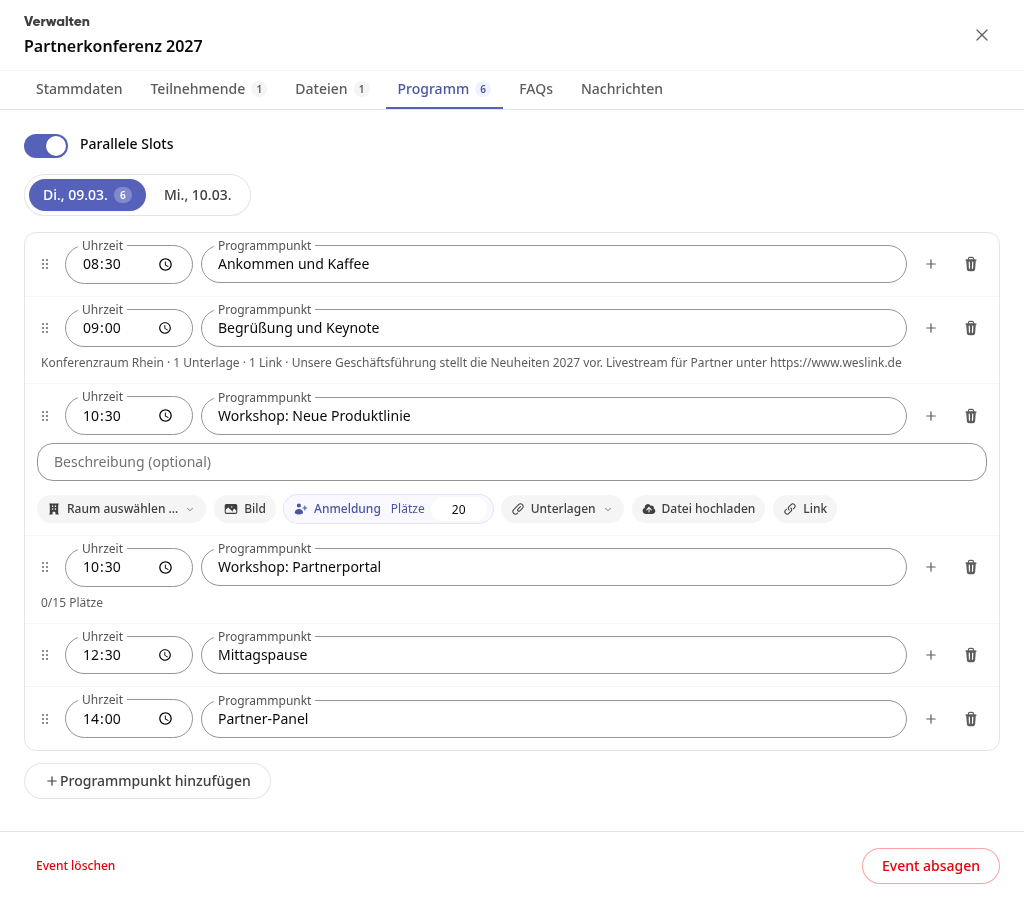
Repeat steps 3 and 4 for the other parallel items.
Under an item with registration, you will then see how many spots are taken, for example "0/15 spots".
Info
Only those who have confirmed attendance for the event can register. If an item is full, registration is no longer possible.
Change or remove an agenda item#
To change an item, click in the field, overwrite the time, name, or description, and leave the field. The change is saved immediately.
To remove an item, click the trash can icon to the right of the item (Remove agenda item). The item disappears without confirmation, and its calendar appointment is removed as well.
Each program item as its own appointment#
As soon as the event is published, Kibi Connect creates a separate appointment in the calendar for each program item. You plan the item there like a meeting: with its own agenda, meeting link, participants, and attachments.
Open the program item in the Program tab by clicking on it.
Click on Open appointment below the item. The event closes, and the calendar shows the appointment of the item with day, time from start to end, location, and description.
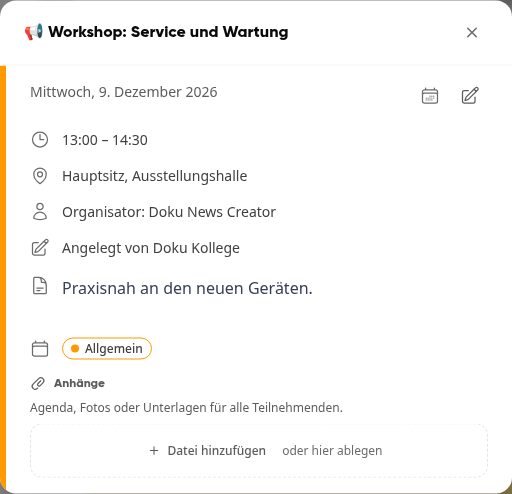
Click the pencil icon at the top of the appointment to edit it. There, for example, you can invite speakers under Participants, create a Meeting link, or plan the item's schedule in detail with Edit agenda.
Day, time, end, name, description, and room always come from the program. If you change them in the program, the appointment changes accordingly. If you change them in the appointment instead, the program overwrites them the next time you save. You can only delete the appointment by removing the program item.
So that your calendar does not overflow, the appointments of the program items do not appear on their own. In the calendar, under Events on the left, you will find the ongoing and upcoming events with programs that you organize or have accepted. If you check the box for an event there, you will see its program in purple next to the event's appointment.
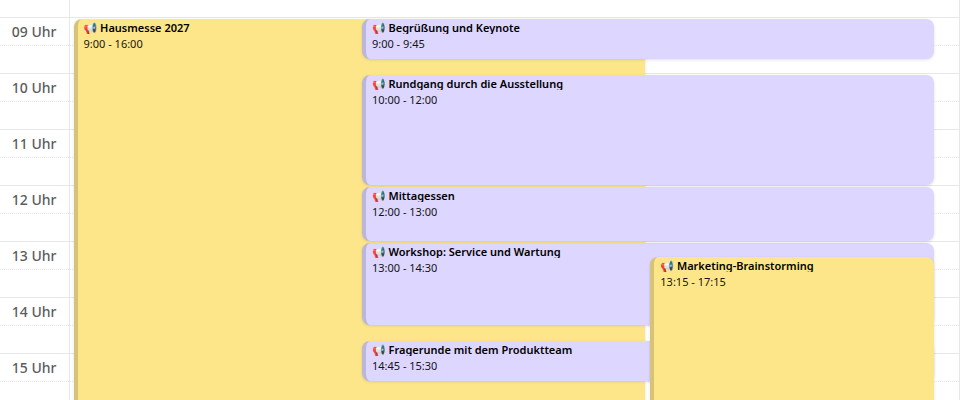
Info
If the event is still a draft, there are no appointments and no Open appointment button. If you cancel or delete the event, the appointments of the program items disappear. An item without a time becomes an all-day appointment on its day. Without an end, its appointment lasts until the next later item of the day, otherwise until the end of the event.
Info
The participants of the event are not invited to these appointments and do not receive reminders. Anyone who can see the event can, however, open the appointment of a program item.
This is how participants see the program#
As soon as the event has at least one program item, the Program tab appears on the event page next to Details. For a multi-day event, you select the day at the top, for example Wed., 03/10 or Thu., 03/11. Each day is shown with its heading above it, for example "Program on Tuesday, 03/09". For each item, participants see the time, room, description, image, the linked documents, and below that the links. Web addresses in the description are clickable; links and addresses open in a new tab.
For parallel items, it says "Running simultaneously – you can register for one of them." Those who have confirmed click Register on the desired item and then see "You are registered". With Unregister you free up the spot again, and with Register here instead you switch to another item. Below that, it shows how many spots are taken, for example "1 of 20 spots taken".
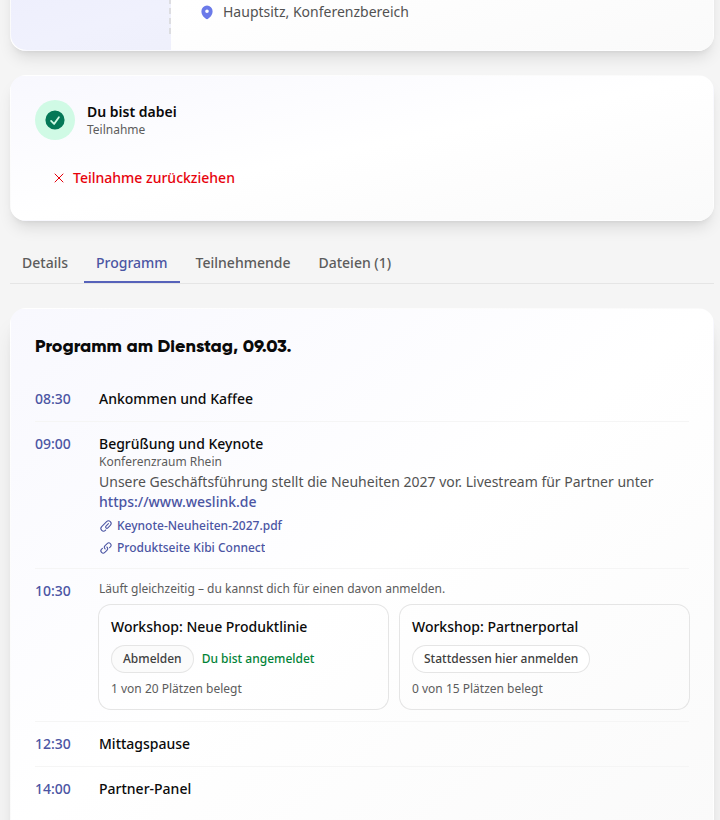
External guests who have registered via the public registration will also find the program on their guest page under the Program tab.
Download and print the program as a PDF#
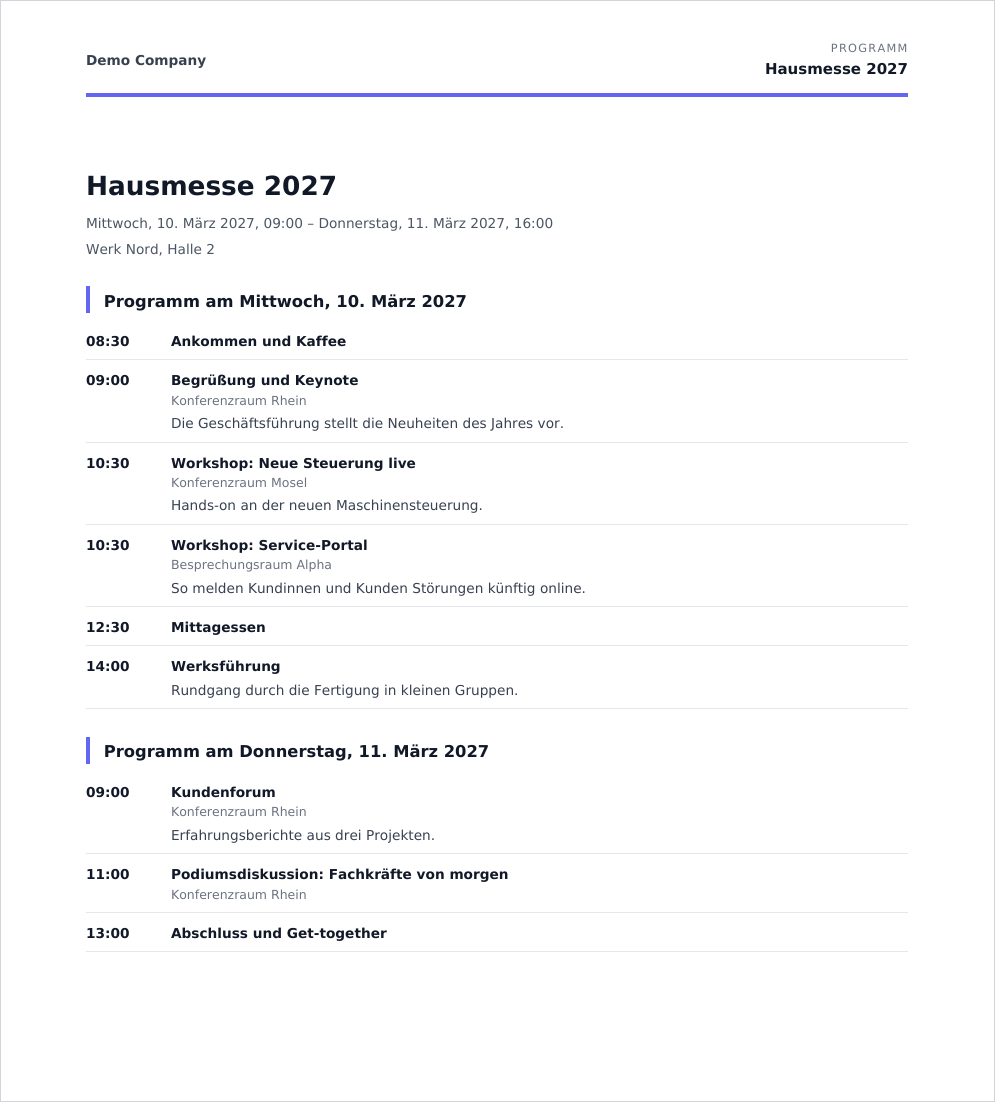
To post, use as a table display, or take with you, save the complete program as a PDF.
Open the event and click on the Program tab.
Click Download as PDF above the program on the right.
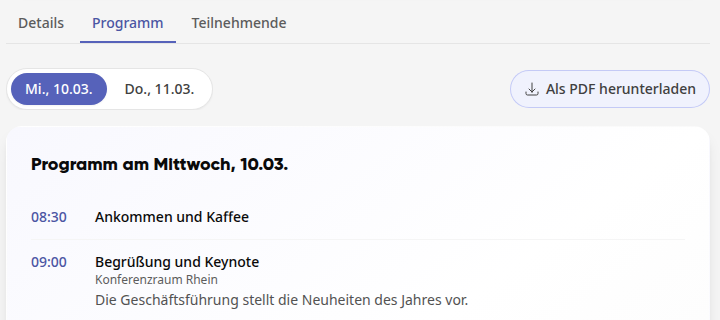
The PDF is saved, for example as “program-house-fair-2027.pdf”. Open it and print it if needed.
The PDF includes the event name, date, time, and location at the top. Below is the program for all days, each day with its own heading, and for each item the time, name, room, and description. It always includes all days, regardless of which day you have selected.
Info
Anyone who can view the event can download the program, not just the organizers. Images, documents, and links from the program items are not included in the PDF.