
How do I manage orders, quotes, and accounts in catering?
Updated Reading time: 8 min
On this page
In meal management, you maintain employee accounts, settle orders, evaluate uncollected portions, keep track of orders and order deadlines, and print guest cards. You open it via Administration and then Organization › Meals.
Info
HR managers see only the Accounts, Settlement, and Not collected tabs by default. The Orders, Offers, and Locations tabs are managed by system administration by default.
Manage accounts#
In the Accounts tab, you can see each person's balance, the outstanding amount, and the payment method. At the top, it shows how many people have an outstanding amount and how high it is in total; for balance accounts, it also shows the total balance. With the Only with outstanding amount toggle, you can hide all others; use Search for person to find a specific person.
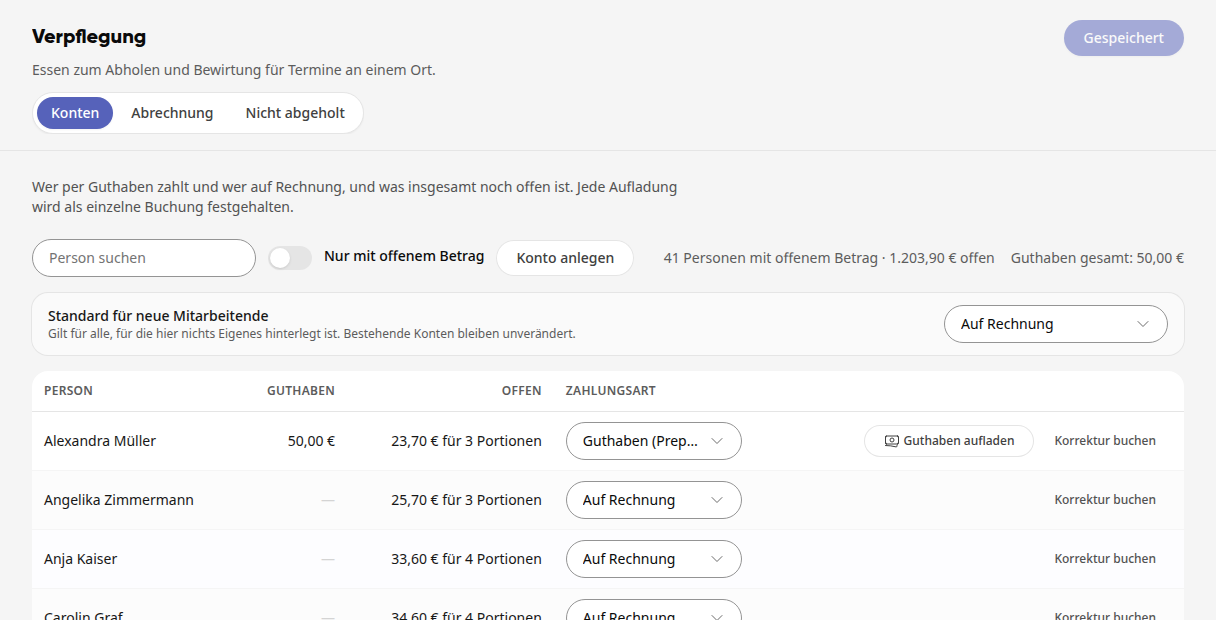
Change payment method: In the person's row, select Invoice, Balance (prepaid), or No account. Without an account, the person cannot order. The change takes effect immediately.
Set default: Under Default for new employees, you determine the payment method for everyone for whom nothing of their own is stored. Existing accounts remain unchanged.
Select the payment method under Default for new employees.
Click Save at the top right of the page header. The button then shows Saved.
Create account:
Click Create account.
Search for the person, select them, and set the payment method.
Click Create account.
Top up and correct credit#
Top up credit appears in the row as soon as a person pays via credit.
Click on Top up credit.
Enter the amount (euros), select the payment method (Cash, Bank / transfer or Other) and add a note if needed. The transaction is recorded with your name and the time.
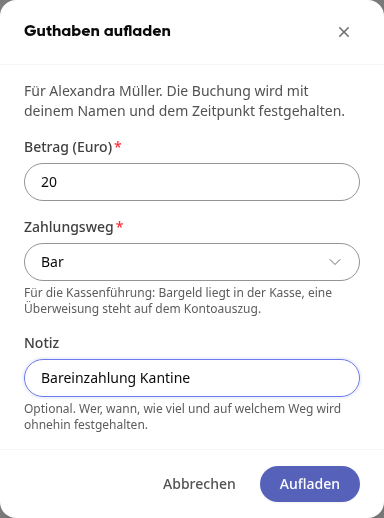
Click on Top up.
For a correction, click on Book correction. A positive amount credits, a negative one debits. The note is mandatory here, and existing transactions remain unchanged. With Save you book the correction.
Credits for orders also affect the credit balance. If a person receives a credit for an order paid via credit, the amount is credited as a refund. If the credit is reduced or withdrawn, the platform debits the difference from the credit again as a correction. For accounts on invoice, the credit only reduces the invoiced amount.
Download account statement#
A click on the name shows all transactions of the person. There you download the account statement (PDF) or export the transactions As CSV.
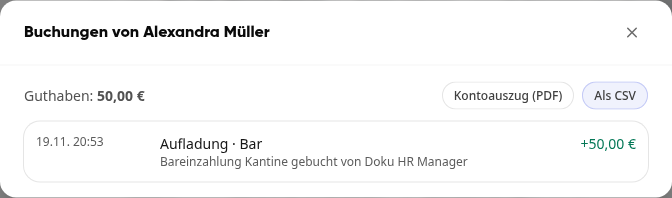
The account statement shows from the beginning of the year to today the opening balance, each transaction with running number, process, details and balance as well as the closing balance. It appears in the language you have set for the platform, with the matching date and number format. In the CSV file, the amounts are shown with the decimal separator of your language, i.e. with a comma in German.
Tip
If you need the account statement in another language, for example for a person who does not speak German, switch your own language before downloading.
Settle a month#
Open the Settlement tab. At the start, the previous month is displayed; under Month, you can switch months using the arrows. You will see persons, portions, total, and the open amount, below that the list per person.
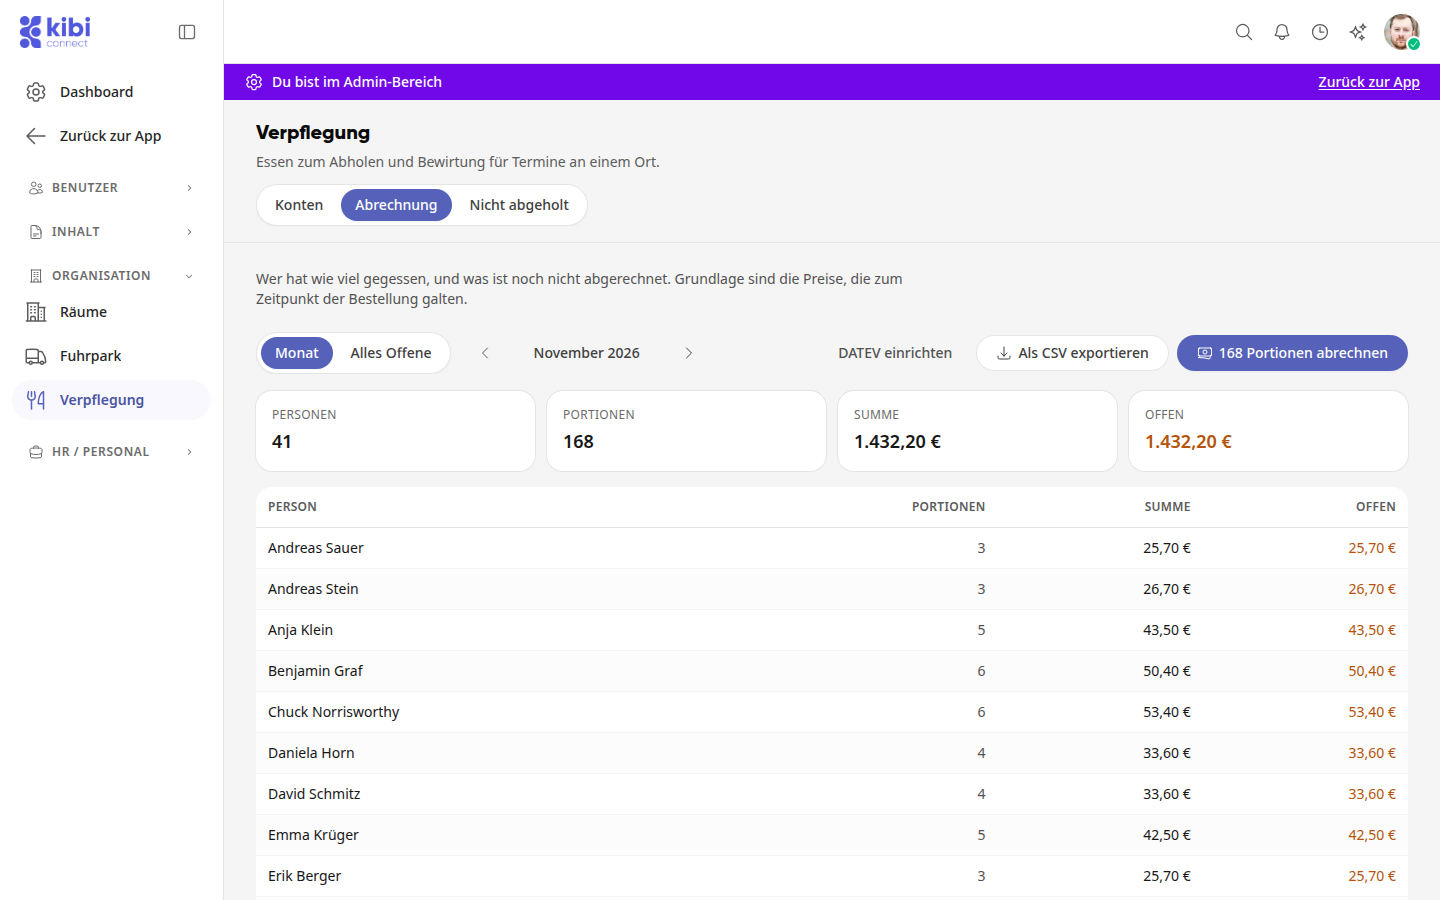
Click on the button with the number of portions, for example Settle 168 portions.
If necessary, enter a number under Receipt, for example that of the payroll run, and click on Settle. The month will then be marked as Fully settled.
Using Undo settlement, all orders for the month are considered open again. Using Export as CSV, you can download the statement with personnel number, name, period, portions, total, credit, and open amount.
Settle all open items up to a specific day#
If you don't want to settle by month, you can settle everything that has been consumed up to a specific day and has not yet been settled, including items from previous months.
In the Settlement tab, click on All open items.
Under Up to and including, select the day.
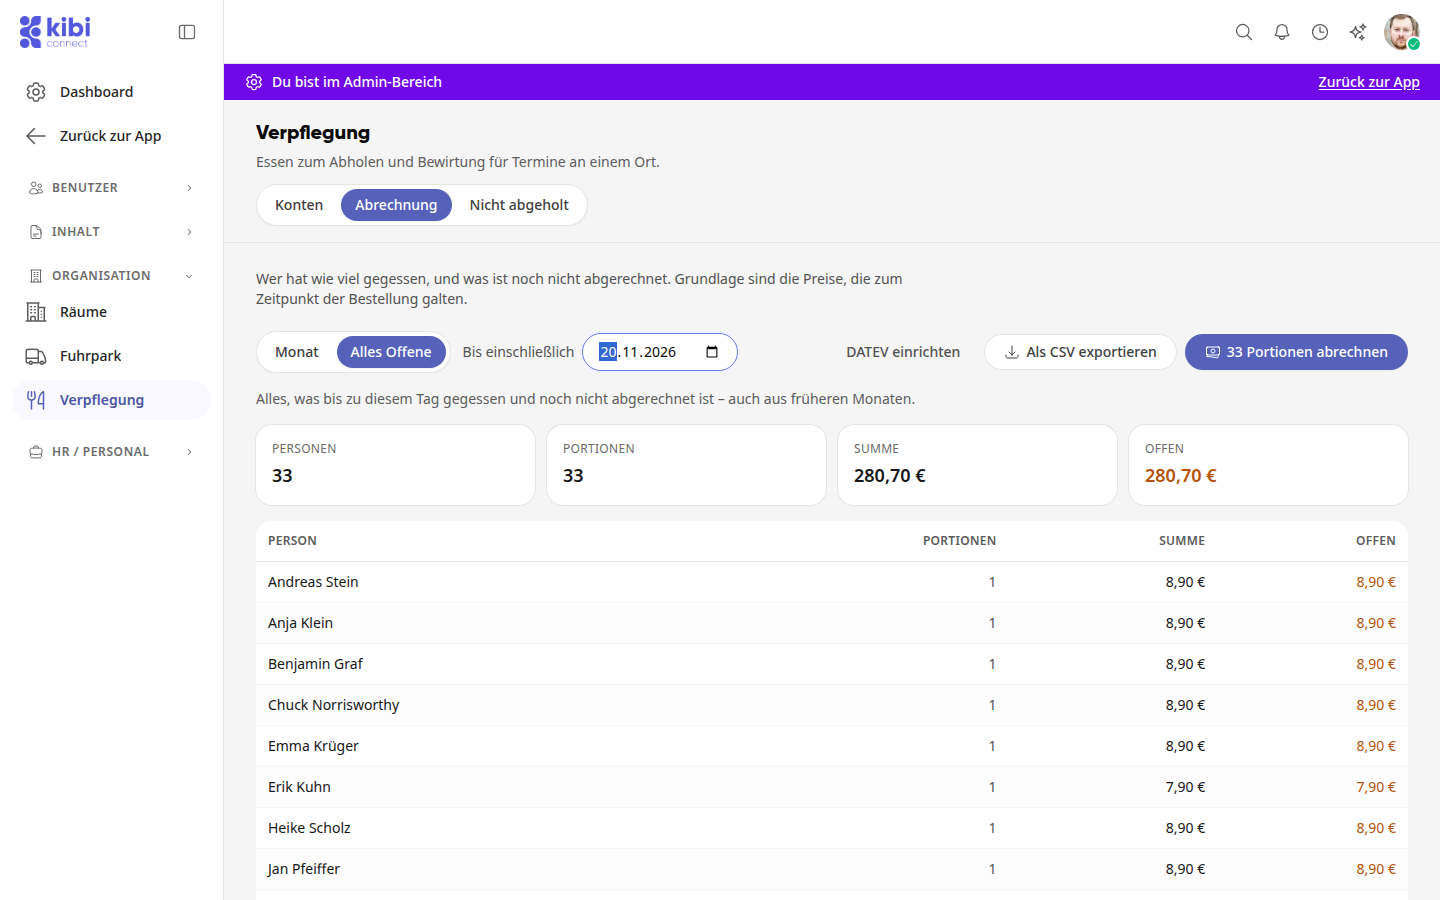
Click on the button with the number of portions, for example Settle 33 portions.
In the prompt Settle open items?, check the number, day, and amount, add a receipt if needed, and click on Settle.
Info
A settlement can only be reversed on a monthly basis. To do so, switch back to Month and select the month.
Deducting meals from salary via DATEV#
If you deduct meals via the payroll, the platform will create a LODAS file for DATEV on request when processing the payroll.
In the Payroll tab, click on Set up DATEV.
Enter the Advisor number, Client number, and the Wage type for meal deduction, then click on Save. Your payroll office creates the wage type in DATEV, for example as a net deduction.
Process the payroll as described above and select Create LODAS file for DATEV in the prompt. The file contains exactly the portions you are currently processing, so nothing is included in the salary twice.
Warning
The advisor number and client number also apply to time tracking. Each person needs a personnel number in their user profile, otherwise DATEV cannot assign the deduction and the platform will name the people for whom it is missing.
If a file was not imported into DATEV, you can recreate it for the month via Recreate DATEV file. If you import it twice, the meal will be deducted twice.
Evaluate uncollected portions#
In the Not collected tab, you can see ordered portions from past days that were not picked up at the distribution point. Set the period to, for example, Last 14 days or Last 30 days. If the distribution was offline, pickups may be missing, and the figures will have gaps.
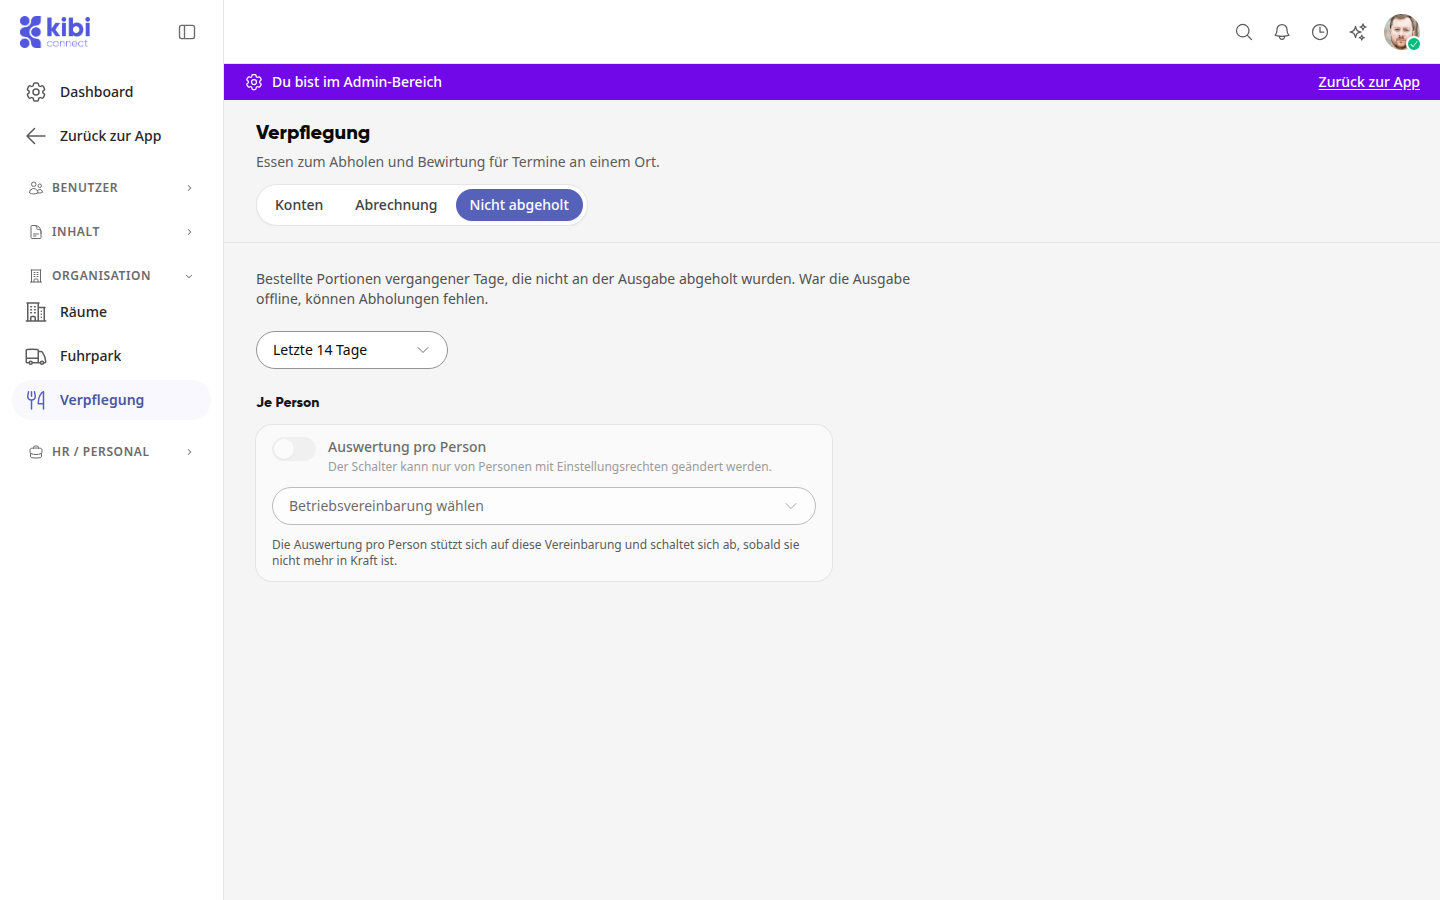
The Per dish evaluation only appears with the right to maintain meal plans. The Per person evaluation is only available if the Works council module is used with works agreements. It must first be enabled:
Enable Evaluation per person.
Under Select works agreement, choose a published works agreement that is in effect. Without it, the evaluation cannot be enabled. When the agreement ends, the evaluation is disabled.
Click Save at the top right of the page header.
Info
Only people with settings rights can change the switch, by default the system administration. HR managers see it grayed out and see the evaluation once it is enabled.
Viewing Orders#
The Orders tab displays food and catering in a list. You select the time period via Today, Tomorrow, This Week, or Next Week, via More Periods, or via the arrows and the date field for any day, including retrospectively. With All, Food, and Catering, you hide a portion, and via Print, you print the list.
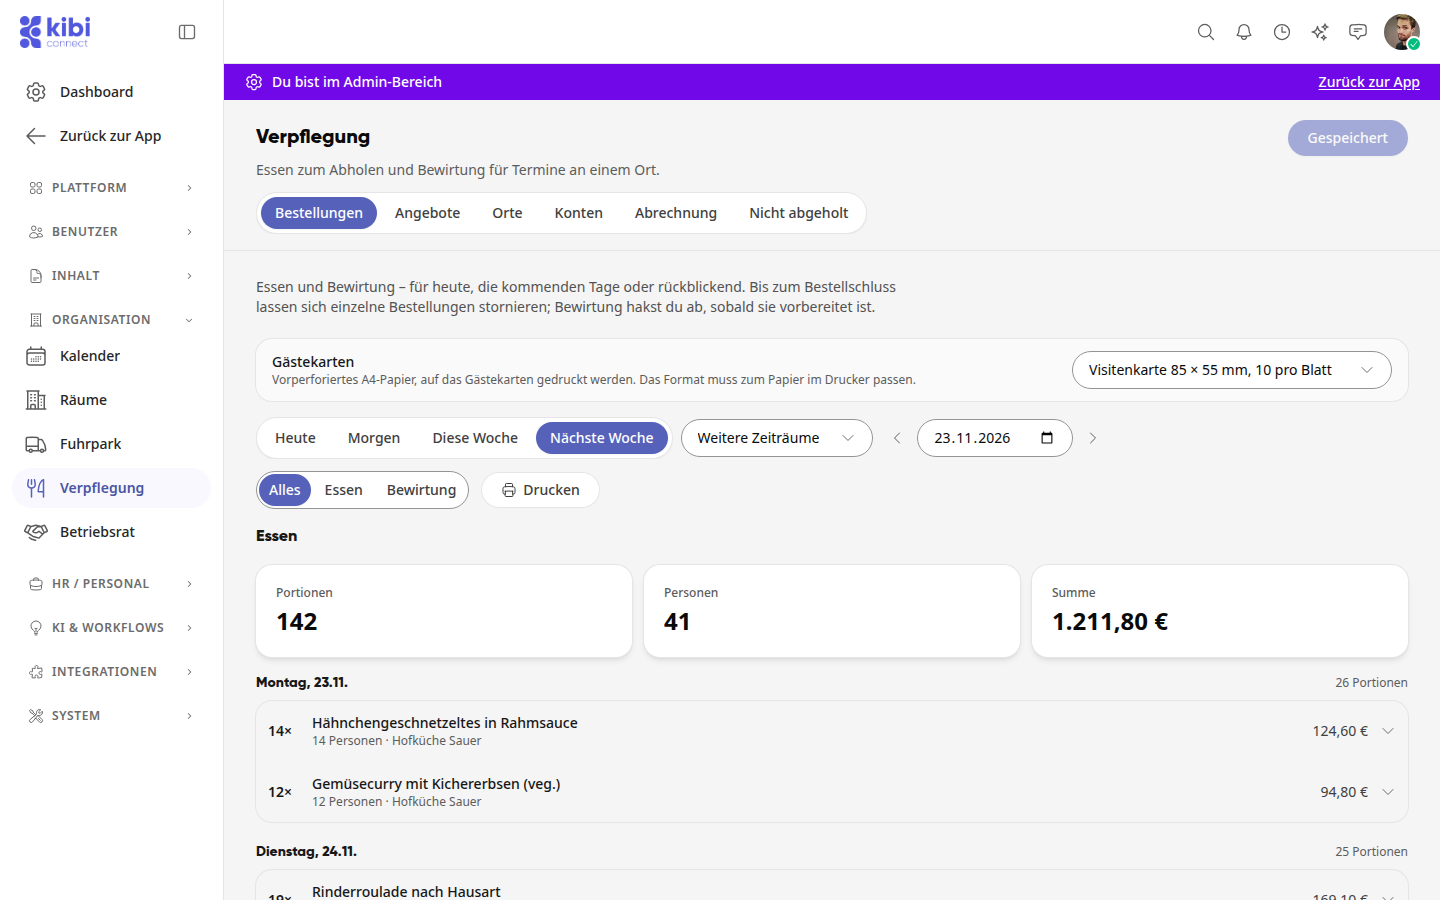
The food is summarized per day by dishes, for example, "14× Chicken strips in cream sauce." A click on the row expands the individual orders. Under each name, it shows when the order was created (Ordered with date and time) or when it was last modified (Modified with date and time). There, you issue a credit, revoke it via Revoke Credit, or cancel an order as long as the ordering deadline is still running; afterward, the row shows Ordering closed. How a credit affects a credit account is described above under "Top up and correct credit." In the Catering section, you check off prepared catering, as described in How do I process catering orders?
Tracking order deadlines and transmission#
For meetings and events with catering, the organization sets an order deadline. After this, no one can order, change, or cancel on their own. Only the organization can still add entries to the participant list and must explicitly confirm this as a reorder. In the order overview, you can see what is affected by this and what the provider last received.
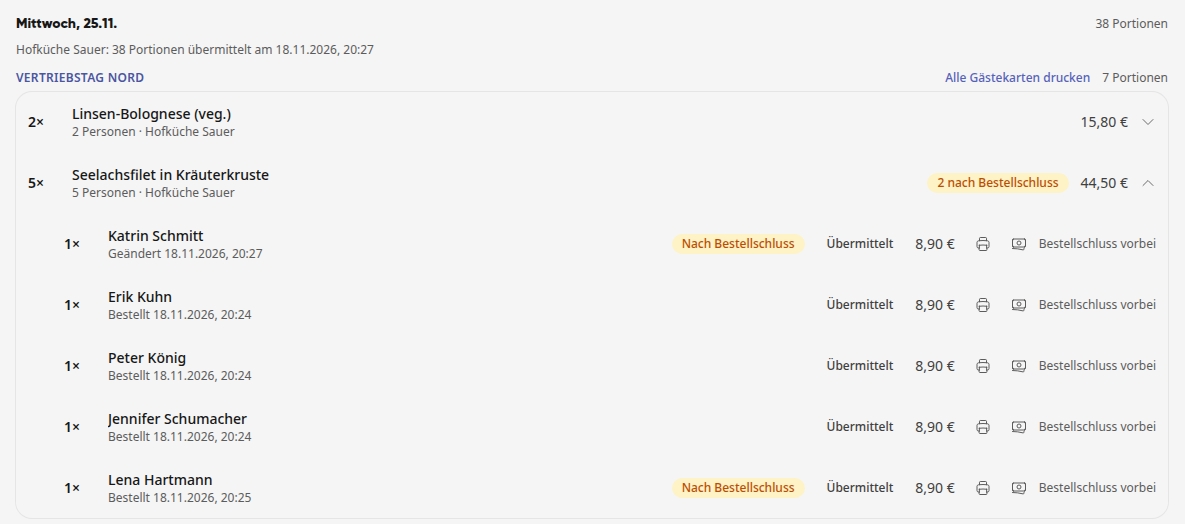
Last transmission: Under each day, per provider, you can see how many portions were transmitted and when, for example "Hofküche Sauer: 38 portions transmitted on 18.11.2026, 20:27". If the transmission failed, it says "Transmission failed, will be retried".
After order deadline: Orders that were created or changed after the order deadline carry the note After order deadline. On the collapsed line of the dish, the platform counts them, for example "2 after order deadline".
No cancellation after order deadline: You can no longer cancel orders for catering whose order deadline has passed in the overview. The line shows Order deadline passed.
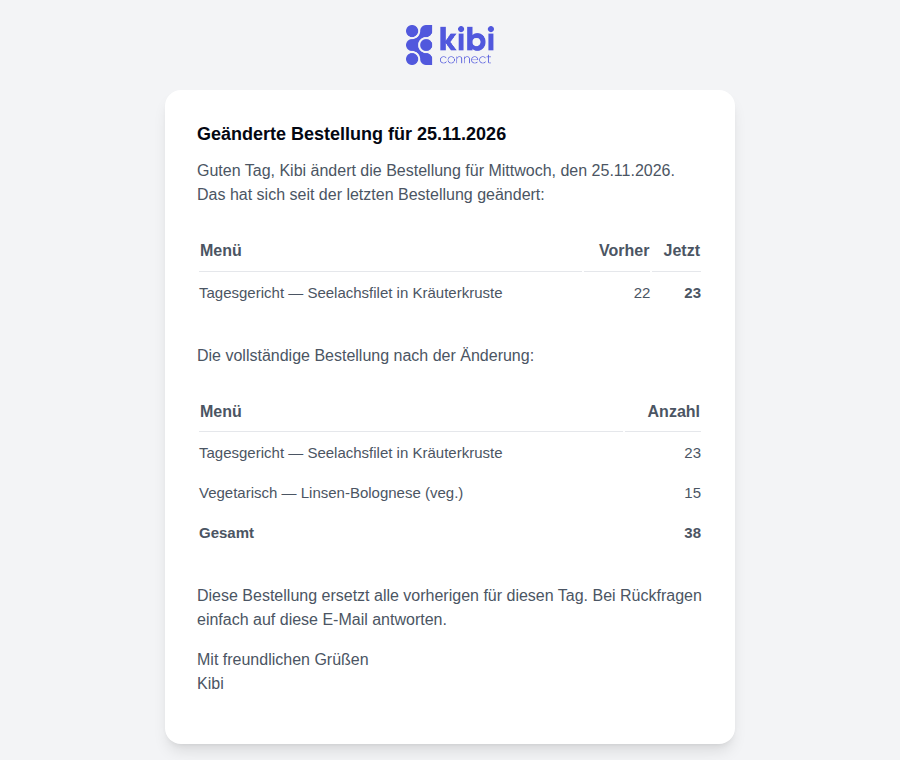
If anything changes after a transmission, the provider receives a Changed order by email. It shows the number Before and Now per dish, and below that the complete order, which replaces all previous ones for that day.
Printing Guest Cards#
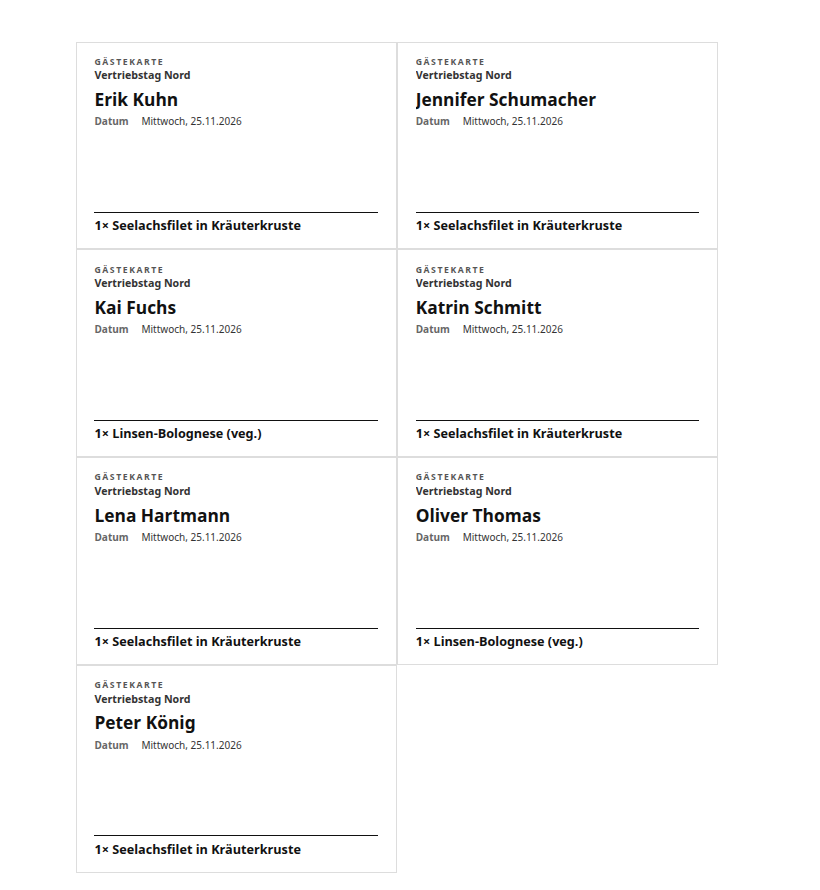
If attendees of a meeting or event order food, you print a guest card for each person, for example as a place card at the table. The card shows the name, the occasion, the date, and the ordered dish, but no prices. Canceled orders do not receive a card.
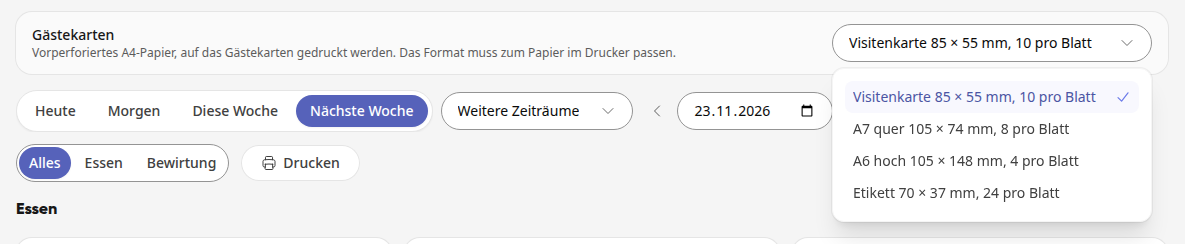
Choose paper: Above the order list, under Guest cards, you specify which pre-perforated A4 paper is used for printing.
In the Orders tab, click the field to the right of Guest cards.
Select the format that matches your paper: Business card 85 × 55 mm, 10 per sheet (standard), A7 landscape 105 × 74 mm, 8 per sheet, A6 portrait 105 × 148 mm, 4 per sheet, or Label 70 × 37 mm, 24 per sheet.
Click Save at the top right of the page header. The button then shows Saved.
Print cards: Orders for an occasion are listed in the tab under its title, for example "Sales Day North", all others under Individual orders.
Select the period in which the occasion falls, for example Next week.
Next to the title of the occasion, click Print all guest cards. You get one card per order, sorted by name.
For a single card, expand the dish and click the printer icon in the person's row (Print guest card).
In the print dialog, set the original size (100%) so that the cards fit exactly on the paper, and print.
Tip
First print a single card on normal paper and hold it against your card paper. This way you can see whether the format and print size are correct.
Set up offers and locations#
You define what is available in the Offers tab, and where it is available in the Locations tab. Previous suppliers are now called offers.
Click Create offer in the Offers tab.
Enter the Name, select the Provider behind it, and specify whether the offer is Internal (own team) or External (company).
Under What does this offer include?, select Menu (changing dishes per day for pickup), Assortment (delivered to a room at a scheduled time), or both, and click Save.
The offer then has its own page with the tabs Menu or Assortment, Locations, and Settings. In the Menu, you enter dishes via Add dish, regular dishes under Permanent offers, and days without delivery under Blocked days. In the Assortment, you create items via Create item or Quick create, such as coffee, water, or tea, with price, Billing, and Lead time. The platform saves changes to an item immediately. You manage who is behind an offer under Provider, as described in How do I manage the providers behind the offers?.
In the Locations tab, you add your rooms as locations with catering via Add rooms or create a pickup point via Create location. In the location, you select what is available there via Add offer and enter who is responsible under Responsible persons. The details are explained in How do I set up locations with catering?.
Wichtig
If no one is listed as responsible at a location, no one will be notified of an ordered catering service. The list of locations indicates this with “No one can order catering there.” or a note about missing responsible persons.