
How do I manage the data of my own modules?
Updated Reading time: 4 min
On this page
Custom modules store what your employees enter in them. In the data view of a module, you see these entries, open and edit them, restore deleted ones, and export or import a module's data.
Info
System administrators see the data of all custom modules. Other people only see a module if their role is allowed to manage that module's data. You set this under Administration → Roles: for the module, the level Administer. Which roles these are is shown in the Module Studio under Settings → General in the Manage data section, with the Open roles button. Forms do not appear here; their responses can be found under Forms.
Selecting a module#
As a system administrator, proceed as follows:
Open the administration and select the Modules entry under Platform.
Switch to the Own tab and click on the module.
Switch to the Data tab and select Real data at the top. When opening, the view here is set to Test data.
If your role is allowed to manage the data of a module (level Administer) without building modules, proceed as follows:
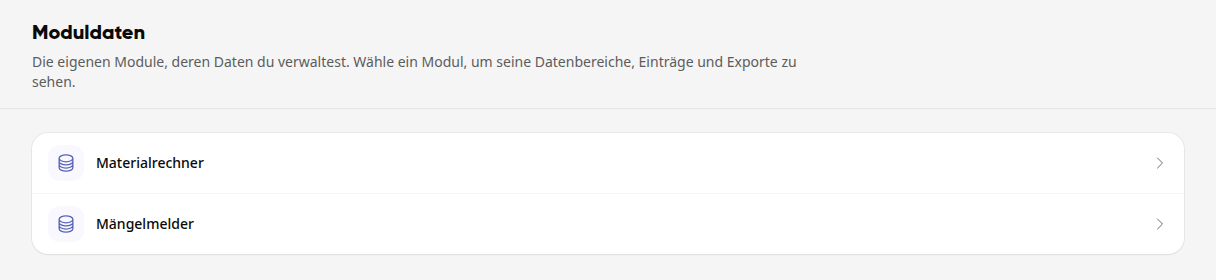
Open the administration and select the Module data entry under Platform.
The page lists all own modules whose data you manage. Click on a module.
Tip
If No modules is displayed here, there is no own module yet or you do not manage the data of any module. How to create an own module is described under Modules and module manager.
Viewing Entries#
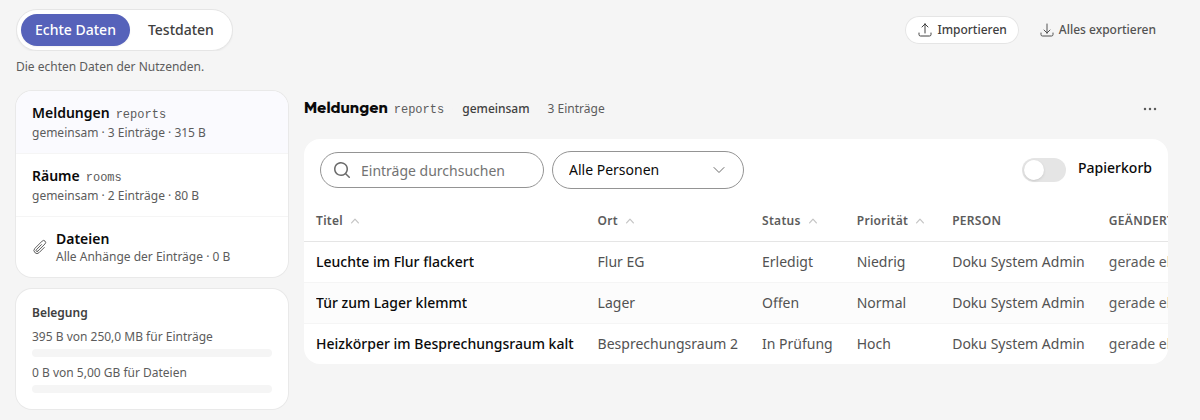
Real data shows the data of the users. Test data shows the preview test data in the module studio. The toggle between the two is only visible to people who edit modules.
On the left are the module's data areas with the number of their entries, below them Files with all attachments and the Usage of the storage space. Click on a data area.
On the right, its entries appear with the person who created them and the time of the last change. Use Search entries and All persons to narrow down the list; clicking a column header sorts it.
Labels Instead of Technical Names#
If the module provides labels for its data areas and fields, you will see these instead of the technical names:
Data areas are shown with their label, for example Reports. The technical name is shown in small text next to it, for example reports. You only need it when working on the module's code. If a data area has no label, only its technical name is shown.
Selection values are shown in the list with their label, for example In review instead of review.
Info
The technical value is still saved. You will see it in the view of a single entry, in its history, and in the export. The labels are defined by the module. If they are missing, please ask Kai in the module studio to add them.
Marking health data#
If a module stores health data, for example about accidents or care, you mark it. Kai agents working with this module then point out that data protection should be involved.
Open the Module data page. If your role allows you to manage a module's data, you will find it in the administration under Platform. As a system administrator, you have no menu entry there and access the page directly: Append /administration/module-data to your platform's address.
Click on the module.
At the top, enable Contains health data (e.g., accident, care). The setting is saved immediately.

Info
The switch is only available on the Module data page, not in the Data tab under Modules. The tab shows the same entries, but not this setting.
Editing or deleting an entry#
Click on an entry. Its view opens on the right with all fields, the history of changes, and details such as person, version, and identifier. With Show as JSON, you can see the entry as raw data.
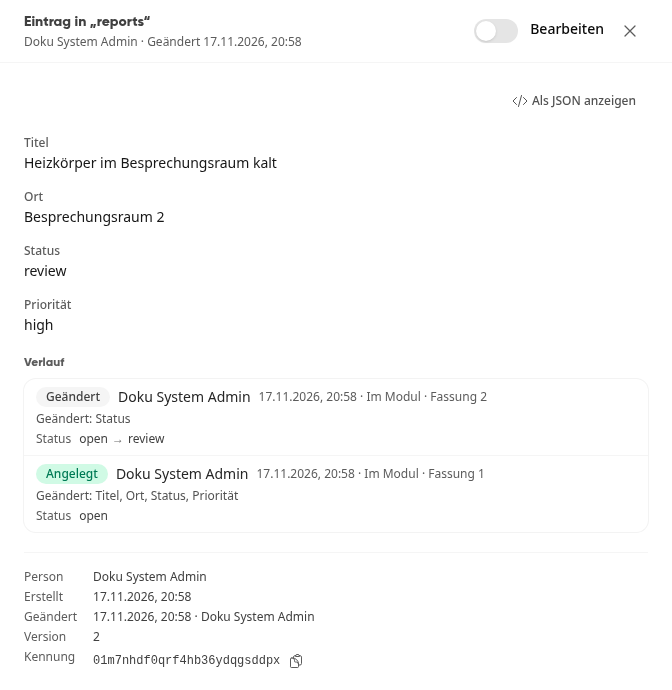
Turn on Edit at the top and change the fields. The changes are saved automatically as you type.
If you want to remove the entry, click Delete at the bottom left and confirm the prompt. The entry goes to the trash.
To view deleted entries, use the Trash toggle above the list. Open an entry there and click Restore to bring it back.
Warning
As data management, you can also change and delete entries from other people. Deletions, restorations, exports, and changed rules are recorded in the change log.
Reading an entry's history#
The history shows the most recent change first. Each line lists the action (Created, Changed, Deleted, or Restored), the person, the time, where the change was made (for example In the module or In data administration), and the version. Below that are the changed fields.
For fields where the module also records the values, you will additionally see the value:
When creating, only the initial value is shown, for example Status open.
When changing, the old and new values are shown, for example Status open → review.
Exporting and importing data#
Click on Export all at the top right to export all data from the module. You can export a single data area via the … menu next to its name using Export data area.
Select the format: Excel (.xlsx) creates one worksheet per data area that you can edit and import again; file contents are not included. ZIP archive (JSON, CSV and files) contains all entries completely plus all uploaded files.
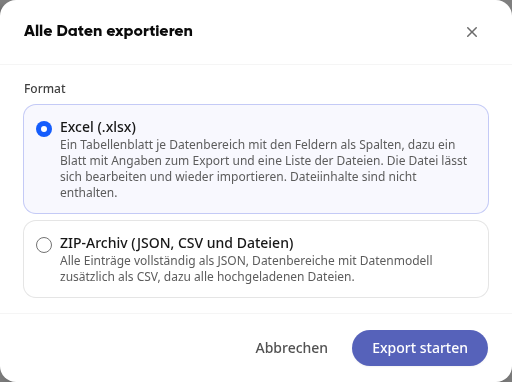
Click on Start export. The message Export is being created. You will receive a notification as soon as it is ready. appears. You can see the status at the top in the Data export line.
To import data, click on Import at the top right. The wizard guides you through four steps: File, Mapping, Review and Result. It starts with the data area you currently have open; under Data area you can select a different one. Before the import, it shows you how many entries will be newly created or changed. With Download template you get an Excel file with the fields of the data area as columns.
Warning
In the first step, check the Environment: The wizard is set to Test data there, even if you are currently looking at the real data. If the data should reach the users, select Real data.
Info
In the … menu of a data area you will also find Adjust rules to define who can see and change which entries in the module, and Delete data area.