
How do I create a meeting minutes?
Updated Reading time: 3 min
On this page
Capture notes and images during a call. After the conversation, Kai turns them into a protocol with a summary, decisions, and suggested tasks.
Info
The protocol summarizes what was captured during the call. If no one has noted, recorded, or had anything transcribed, no protocol is created.
Hold during the call#
During the ongoing call, click on Protocol (document icon) in the bar. The side column opens on the right with the tabs Agenda, Notes, and Tasks.
Under Notes, write in the field Write note … and click on the arrow next to it (Add note).
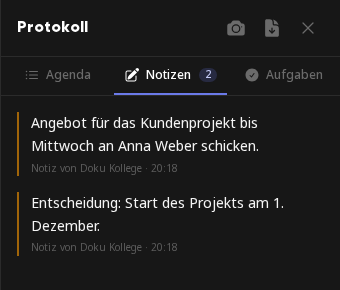
With the camera icon at the top of the side column (Capture everything), you take a picture of the current view. Using the camera icon on a tile, you capture only that person or screen share.
Warning
Everyone in the room can see notes. They will also appear later in the protocol.
Tip
An image can only be captured if there is something to see. If no camera is on and no screen is shared, The image could not be captured appears.
Have Kai take notes#
If transcription is enabled for your platform, the bar will also show Have Kai take notes (pen icon). Click it so Kai can record the conversation's audio and write the minutes from it. Use the same button to stop the transcription again.

Info
If the button is missing, transcription is not enabled for you or your role is not allowed to start it. Notes and images still work. If you have questions, contact your administration.
Important
Everyone in the room will be notified when Kai is taking notes. The audio recording is deleted after transcription, only the text remains.
Open the completed protocol#
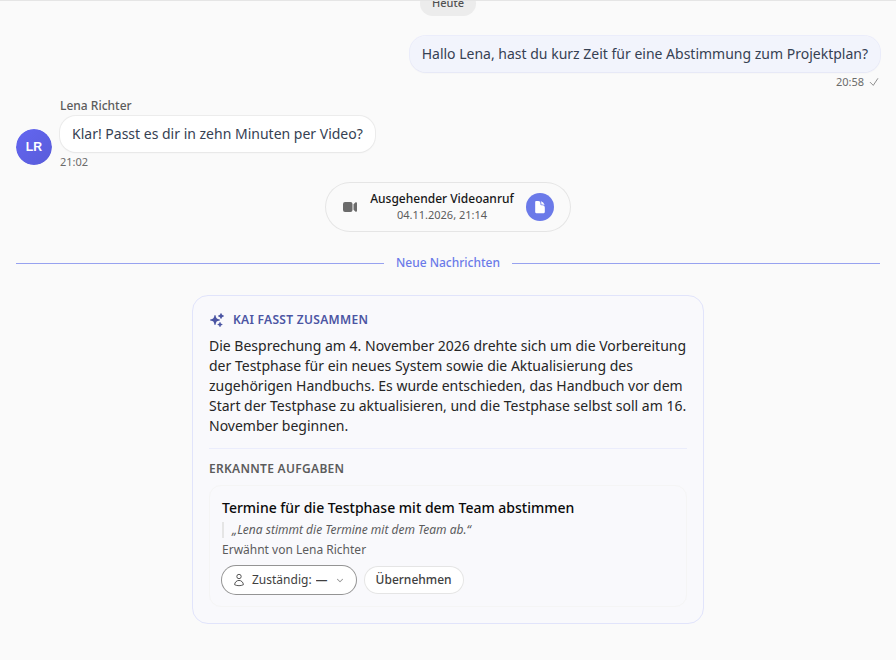
Shortly after the call, a card Kai summarizes appears in the chat with the summary and the recognized tasks. At the call entry above it, you open the protocol via View protocol (document icon).
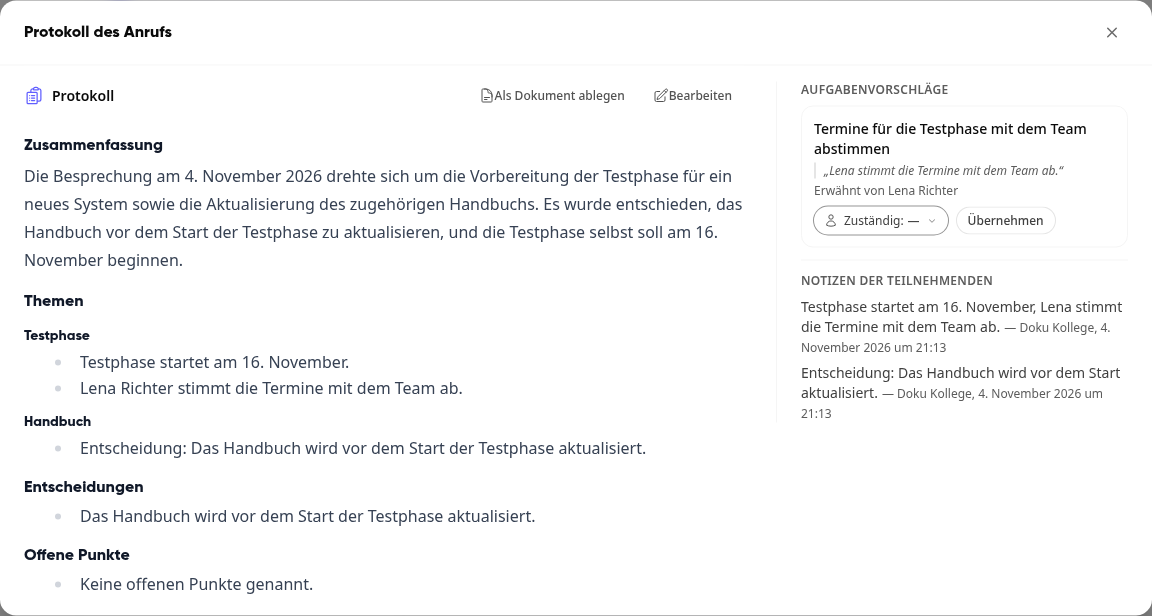
In the Call protocol window, you see the text on the left and the task suggestions and the participants' notes on the right.
Warnung
Kai creates the protocol automatically. Read it through before forwarding it and correct it if necessary via Edit.
Accepting Tasks#
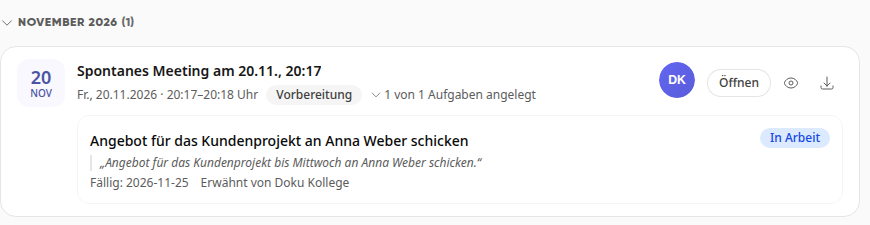
Kai does not create tasks on its own, but only makes suggestions. You can find them in the protocol and under Files > Protocols on the respective protocol (click on … tasks created).
Select the responsible person under Assigned to on the suggestion.
Click on Accept. The suggestion becomes a real task.
On an accepted task, you can see its current status, for example To Do, In Progress, or Done. If someone changes the status in the tasks, the protocol shows the new state. Click on the title to open the task directly.
Info
You can only see the status and the link to the task if you are allowed to open it. Otherwise, it will still show Accepted.
Tip
If the task suggestions could not be loaded, a message with Try again appears. Already loaded suggestions remain visible and can still be accepted.
Save and send as document#
In the Call log window, click on Save as document. The log becomes a Word document, and it is then edited in the document.
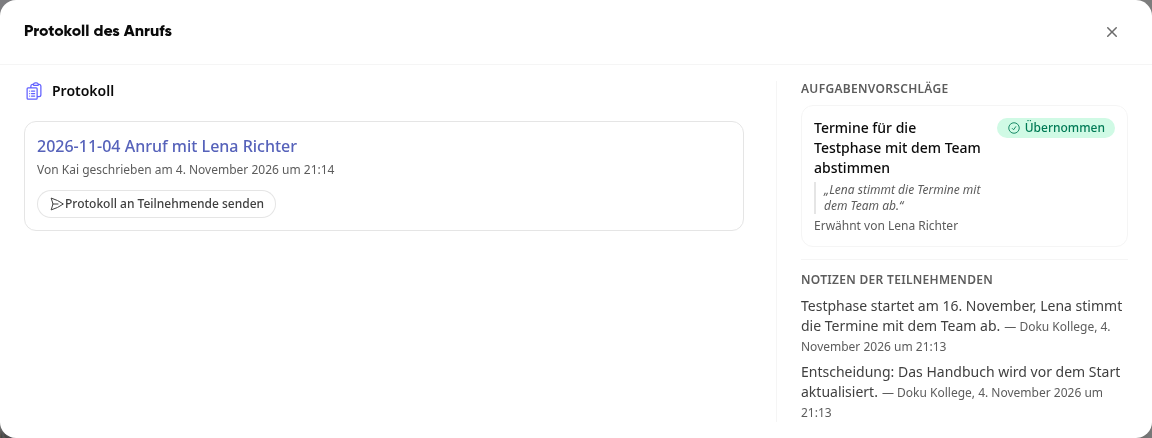
Click on Send log to participants.
Check the content, select the recipients, and click on Send. Participants receive a notification with the link to the document.
You can find saved logs under Files > Logs. There, you can search by title or person and filter by month. Additionally, under Meetings in the Recent meetings tab, the Log button takes you directly to the log of a meeting.
Plan the minutes already when scheduling the appointment#
For planned meetings, you enable the minutes directly in the appointment. This requires the activated transcript.
Open the appointment in the Calendar or create a new one via Create.
Activate Meeting link.
Set Kai takes minutes to On.

The minutes document is then created immediately with the agenda you define via Edit agenda. The transcript starts automatically upon joining, and everyone in the room hears the announcement.