
How do I connect Microsoft 365 with Kibi?
Updated Reading time: 4 min
On this page
With an app in Microsoft Entra, you connect your platform to Microsoft 365. Then you enable individually what you need: login with Microsoft, user synchronization, calendar synchronization, mailboxes, and groups.
Info
Setup is available to system admins. You also need access to the Microsoft Entra Admin Center. For admin consent, you need the role of global administrator there or a person who grants it for you.
Open MS 365 page#
Open Administration and select Integrations → Overview in the menu.
Under Microsoft and Google, check if the MS 365 card is enabled. If disabled, it stops calendar synchronization with Microsoft 365.
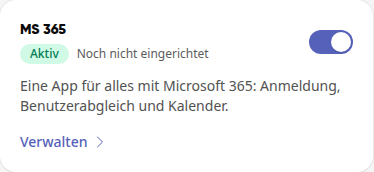
Click Manage or select Integrations → MS 365 in the menu. At the top, you see the setup status, initially Not set up.

Set up connection#
You do the setup once. The Connection section guides you through three steps and shows all values to copy.
Step Register app in Microsoft Entra: Click Open new app registration and create the registration. Select account type "Accounts in this organizational directory only" and platform "Web" with the redirect URI for the calendar.
In the app under "Authentication," add the other addresses shown on the page: the redirect URI for login and the redirect URI for mailboxes. Use the symbol next to the value to copy them.
Step Enter access data: Enter the Application ID (Client ID) and Directory ID (Tenant ID) from the app's overview page. Create the Client secret (Value) in Entra under "Certificates & secrets." Copy its value immediately; Entra shows it only once.
Under Client secret valid until, enter the expiration date from Entra. System admins then receive reminders 30, 14, and 3 days in advance.
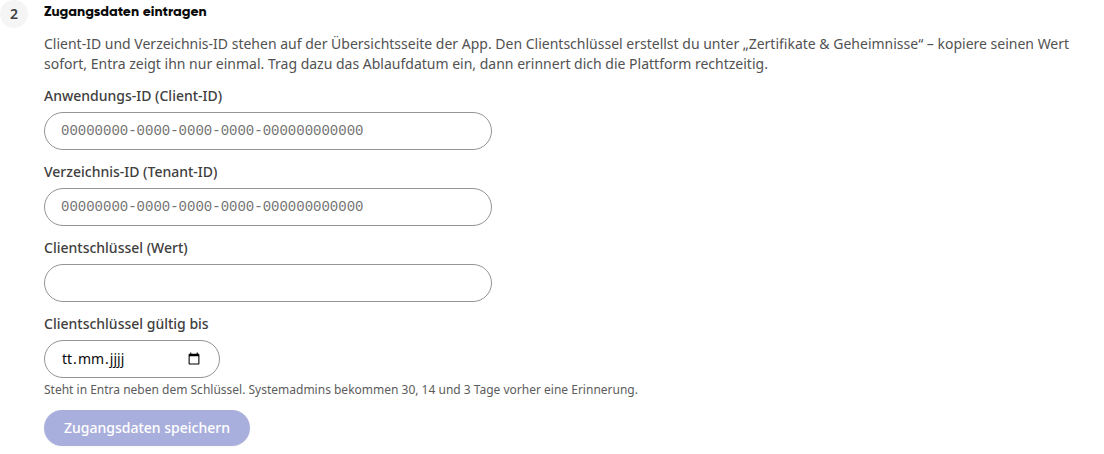
Click Save access data. The message Access data saved. appears, and the status at the top now shows Set up.
Step Add permissions: In Entra under "API permissions" → "Microsoft Graph" → "Delegated permissions," add the displayed permissions. The first four are needed for login, the last two for the calendar.

Info
The app also handles login with Microsoft. Therefore, only system admins are allowed to change it.
Test connection#
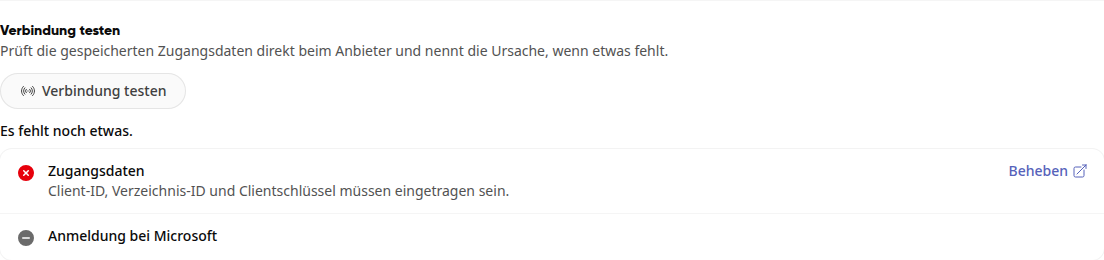
Click Test connection. The platform checks the saved access data directly with Microsoft and indicates the cause if something is missing. Use Fix to go to the appropriate place.
Enable functions#
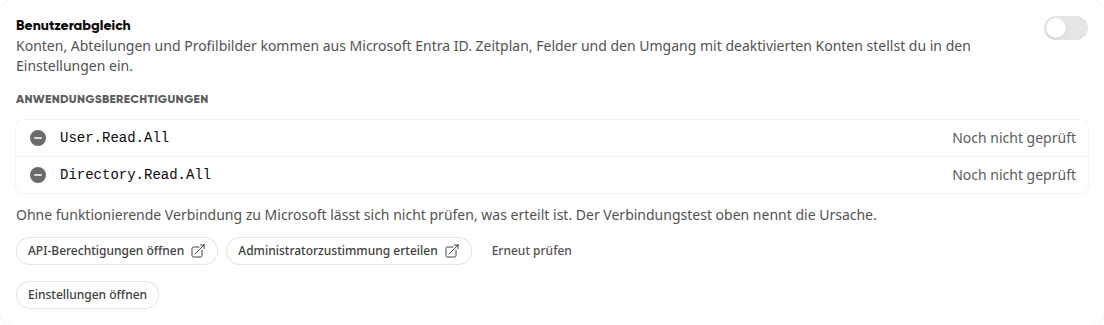
Under Functions, you enable each function individually. If the app lacks an application permission, it is indicated next to the function that requires it. Add it with Open API permissions, grant consent with Grant admin consent, and click Recheck.
Login with Microsoft#
Employees log in to the platform with their Microsoft account. Use Open settings to access the settings under SSO & Directory.
User synchronization#
Accounts, departments, and profile pictures come from Microsoft Entra ID. Requires application permissions User.Read.All and Directory.Read.All. You configure the schedule, fields, and handling of deactivated accounts under Open settings.
Warnung
When enabling, the platform asks for confirmation. In Entra, deactivated accounts are either locked or removed from the platform, depending on the setting. Therefore, check the preview in the settings beforehand.
Calendar synchronization#
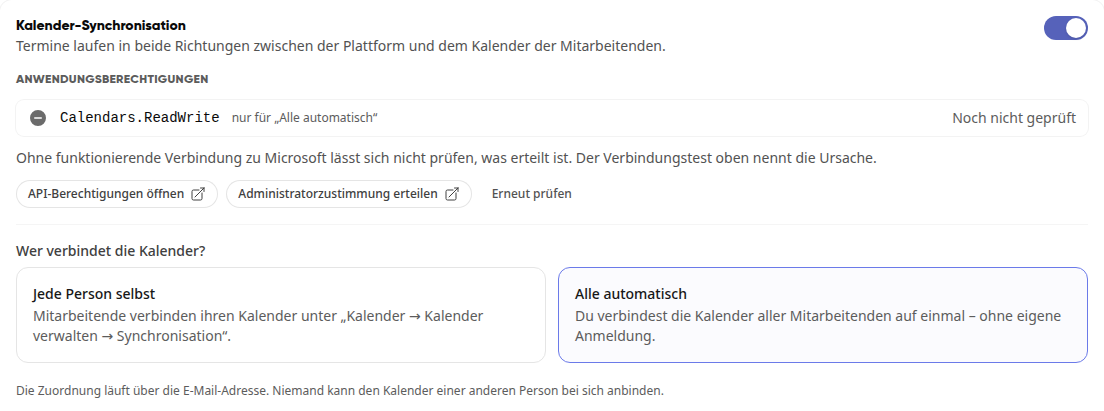
Appointments are synchronized in both directions between the platform and the employees' calendars. Under Who connects the calendars?, you choose:
Each person individually: Employees connect their calendar under Calendar → Manage calendar → Synchronization.
All automatically: You connect all employees' calendars at once, without individual login. For this, the app needs the application permission
Calendars.ReadWrite.
The assignment is based on the email address. No one can link another person's calendar to their own.
With Sync now, you retrieve the appointments from the last week and all future ones from the provider for all connected calendars. Otherwise, this runs automatically every night.
Connect all calendars automatically#
If you select All automatically, additional settings appear:
Consent link: If you need to ask someone else for admin consent, send this link.
Restrict access to specific calendars: Without restriction, the app can read and modify any calendar in the company. The expandable section shows the appropriate command for Exchange Online PowerShell.
Email domains in Microsoft 365: Only people with an address in these domains will be connected. Separate multiple domains with commas. Leave blank for no restriction.
Under Connect calendars, proceed as follows:
Enter an address under Test person (email address) and click Test with this person.
Click Connect for this person to first connect only this calendar.
Click Connect for all employees if the test is successful, and confirm the prompt with Connect all.
Mailboxes#
Mailboxes remain with Microsoft 365 and appear live in the platform's webmail. Requires Mail.ReadWrite and Mail.Send. For the out-of-office notice, additionally MailboxSettings.ReadWrite, and for migration, User.Read.All and Contacts.Read. When disabled, all Microsoft mailboxes are suspended, but the connections remain.
Groups#
Imports Microsoft 365 groups, Teams, and security groups as platform groups. Members are updated hourly from Microsoft 365, and owners become group admins. Requires Group.Read.All and GroupMember.Read.All. When disabled, synchronization is suspended, but the links remain.
Delete access data#
Click Delete access data at the bottom of the page and confirm with Delete. Afterward, login with Microsoft, user synchronization, and calendar connections will no longer work. Also remove the app in Microsoft Entra afterward.