
How do I create a photo album and upload photos?
Updated Reading time: 7 min
On this page
- Create album
- Display albums as tiles or as a list
- Upload new photos and videos to the album
- Watching videos
- Photos and videos that are already in the archive
- Add existing photos and videos to the album
- Switch view in album
- Editing individual photos
- Edit multiple photos at once
- Creating subalbums
- Subalbum in a shared album
- Share, rename, or delete an album
- Share an album via a public link
- Photos in the desktop app
In the Photos & Videos module, you collect images and videos in your own albums, for example everything from a summer party or from a construction site. You upload new photos and videos directly to the album, and add existing ones from the platform with just a few clicks. You organize albums with sub-albums, and via a public link you can also show them to people without an account.
Create album#
In the navigation, open Photos & Videos and click on Albums on the left.
Click on New album at the top right.
Under Name, enter a name for the album.
Specify who can see the album: All employees (preselected), Specific groups and people, or Only me.
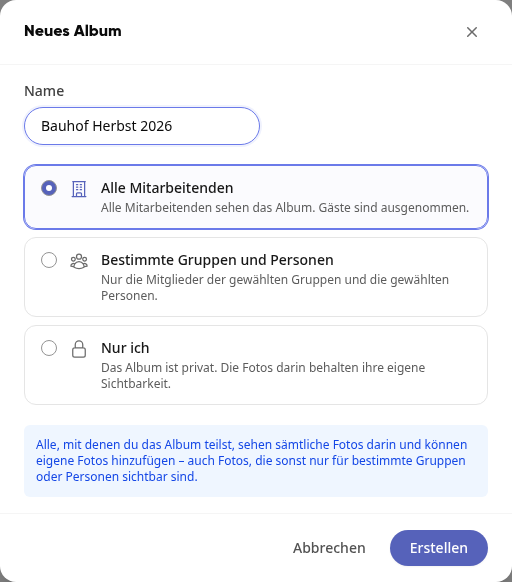
Click on Create.
The album opens directly. As long as it is empty, you will find the buttons Upload new photos & videos and Choose from archive there.
Display albums as tiles or as a list#
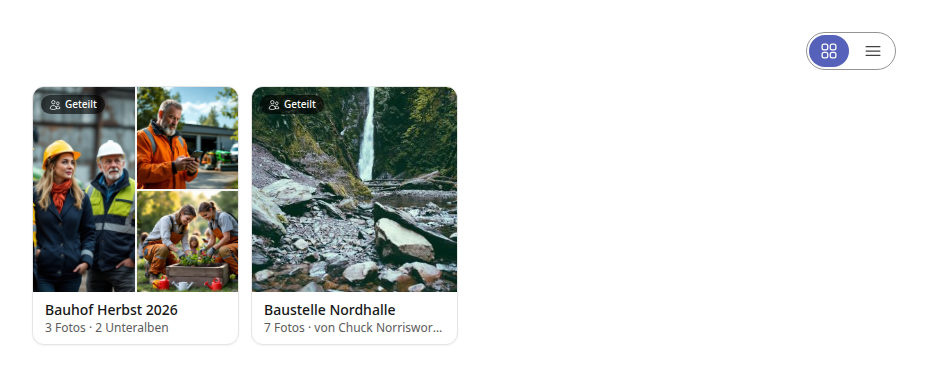
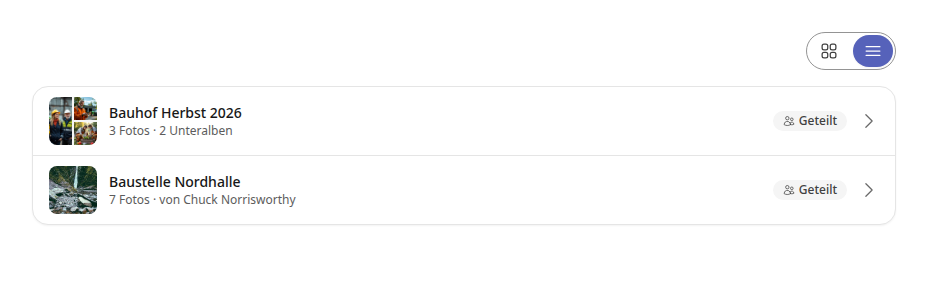
In the Albums area, you can switch between two views at the top right:
Grid view: Each album as a tile with a preview image. An album with sub-albums shows a preview of up to four images in the tile: first a photo from the album itself, then one image from each of the sub-albums. If you have set a cover image, the tile shows only that.
List view: One row per album with a small preview image, name, number of photos and sub-albums, the person who created the album, and the Shared indicator. A click on the row opens the album.
Tipp
Your choice is saved on your device. Right-clicking a tile or row opens the same menu as in the album.
Upload new photos and videos to the album#
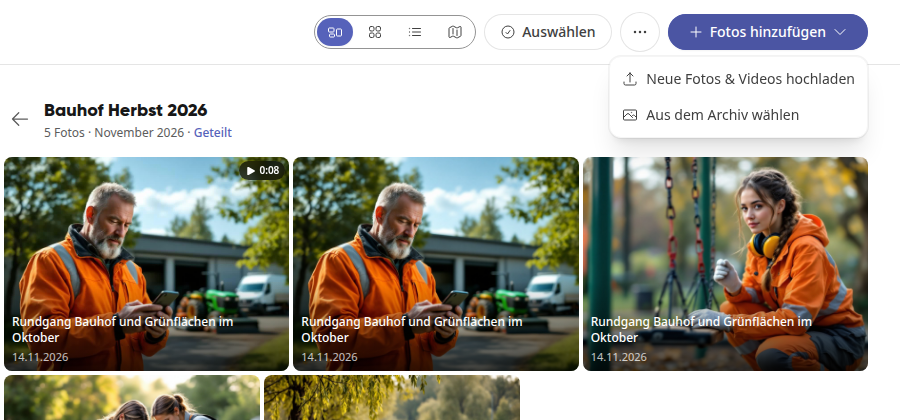
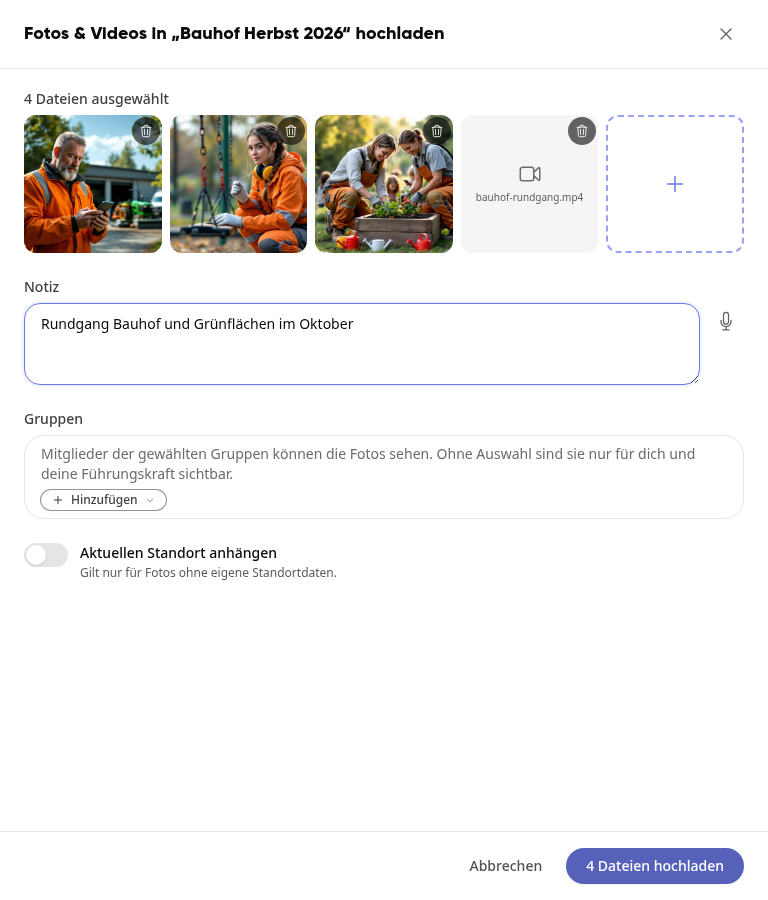
Open the album and click on Add photos at the top right, then on Upload new photos & videos.
Drag the files onto the field Drag photos or videos here or select them or click on it to select them. Use the plus field next to the preview to add more files, and the trash can icon to remove a file from the selection again. Videos appear in the preview with their file name.
If needed, write under Note what can be seen in the photos. You can also record the note using the microphone.
Under Groups, use Add to specify who is allowed to see the photos and videos. Without a selection, they are only visible to you and your supervisor.
If needed, enable Attach current location. This only applies to photos that do not have their own location data.
Click on Upload. The button shows the number of files, for example Upload 4 files.
Photos and videos appear in the album, and you receive a message that they have been uploaded. Videos take a moment longer to appear in the album. They show a play icon with their length on the tile, for example 0:08.
Watching videos#
Click on a video in the album. It opens in the large view and can be played, set to full screen, and downloaded there.
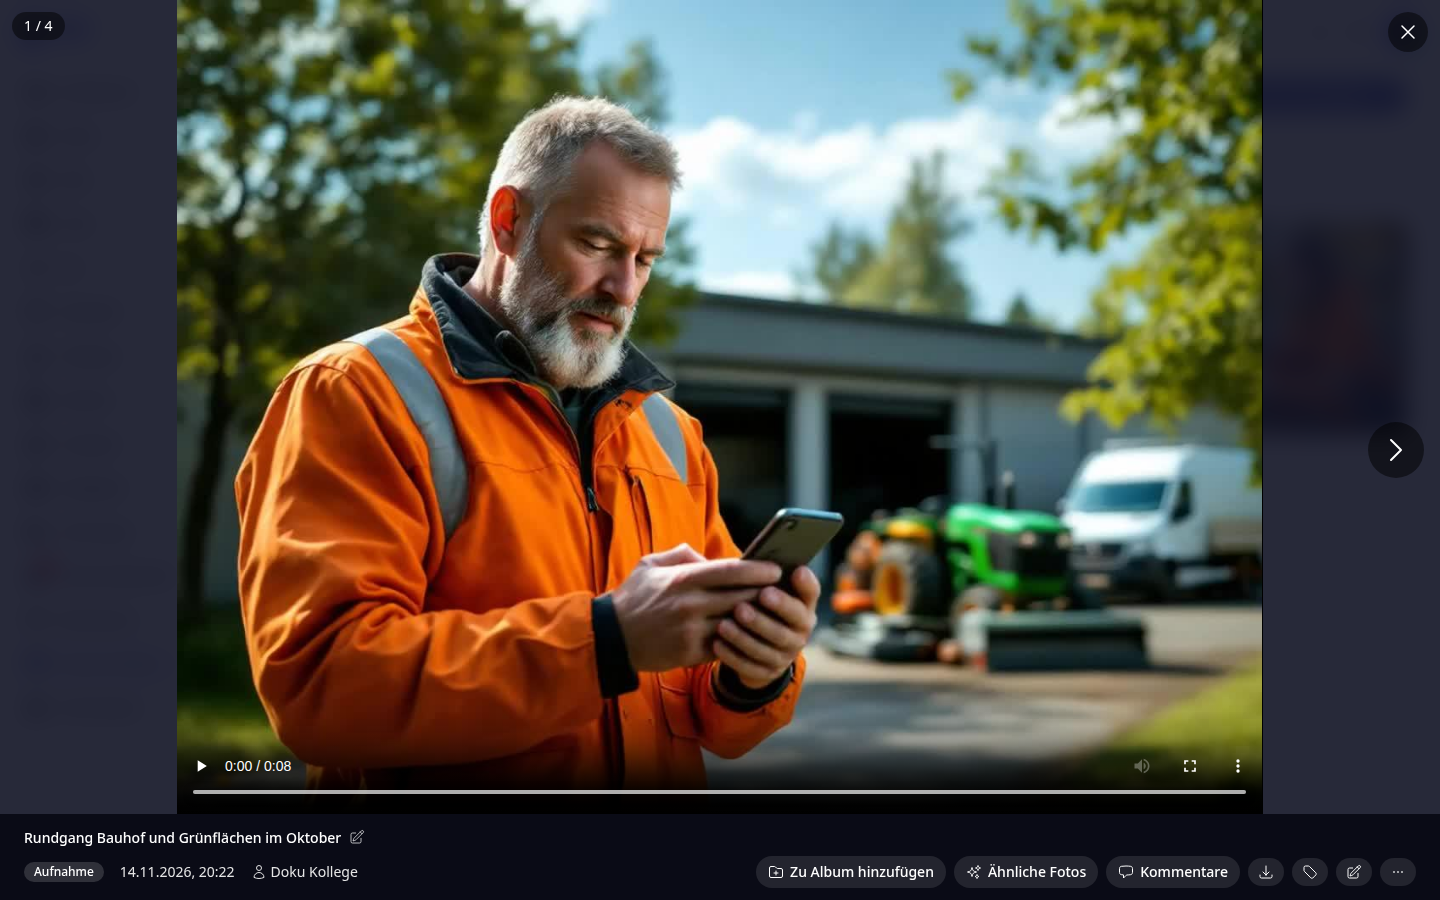
Videos that not every browser can play, for example recordings from an iPhone, are prepared by Kibi Connect after uploading. As long as this is running, the tile shows Being prepared.
Tip
You can also simply drag photos from your file folder into the opened album.
Info
You can upload up to 500 files at once, photos up to 30 MB each, videos up to 500 MB each. Possible formats for photos are JPG, PNG, WebP, GIF, HEIC and AVIF, for videos MP4, MOV, M4V and WebM. If you currently have no connection, the recording waits on your device and is sent automatically as soon as you are online again.
Photos and videos that are already in the archive#
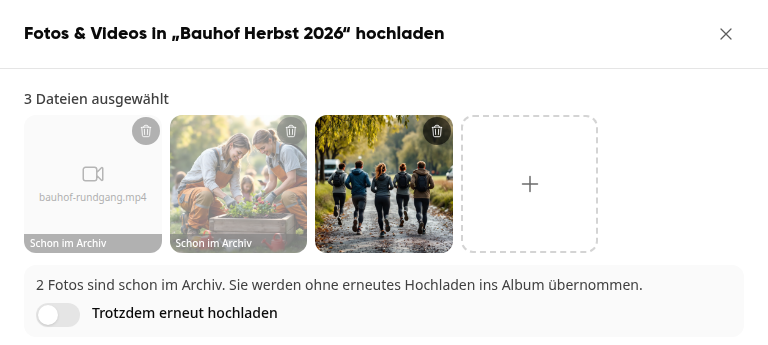
When selecting, Kibi Connect checks whether a photo or video is already in the archive. Such files carry the note Already in archive. When uploading to the album, they are not saved again, but only added to the album; this also applies to videos. If you still want to upload them again, enable Upload again anyway.
Add existing photos and videos to the album#
In Photos & Videos you will see all images that are created in your areas, such as in posts, chats, orders, or in the wiki, and the videos that have been uploaded. You can add these to an album.
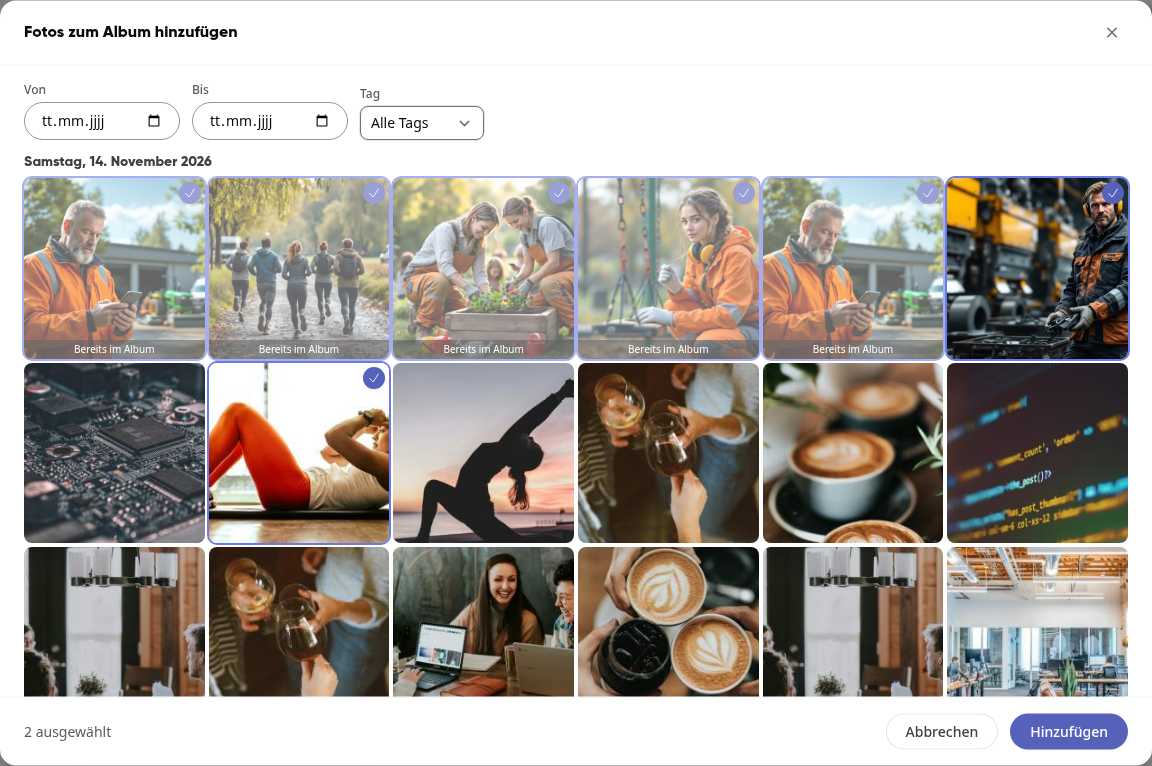
Open the album and click on Add photos and then on Choose from archive.
Click on the desired photos or videos. You can recognize videos by the play icon. Use From, To, and Tag to narrow down the selection. Photos that are already in the album have the note Already in album.
Click on Add.
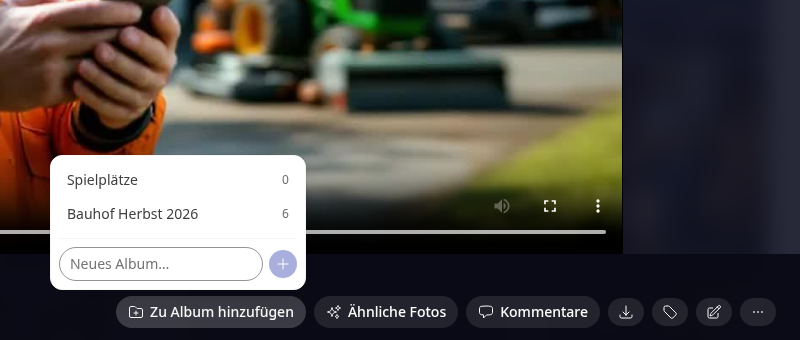
Alternatively, open a photo or video in the Stream in the large view and click on Add to album at the bottom. There you select an existing album or enter a name under New album… to create a new album directly.
Switch view in album#
At the top right, you can switch between four views in the album. The choice applies to the photos and videos and to the subalbums of the album:
Full photos: The photos appear in full, without cropping. Subalbums are displayed as tiles above them.
Small: Many photos at a glance. Subalbums appear as small tiles with only their name.
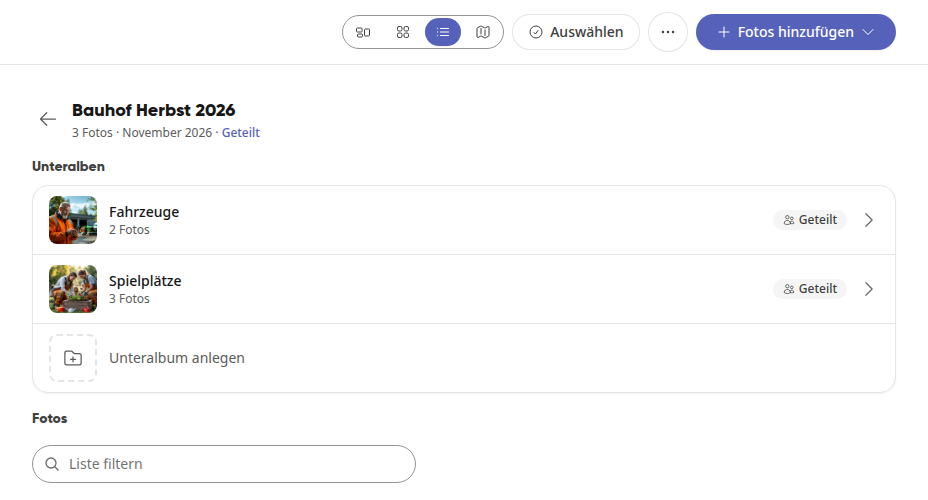
List: A table with capture date, source, person, and tags. You can search within it using Filter list. Subalbums appear above as compact rows.
Map: The photos with location on the map. Subalbums appear as compact rows above the map.
Editing individual photos#
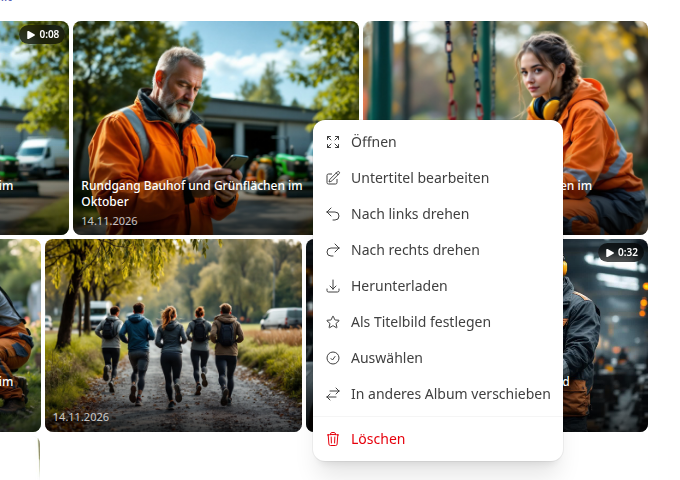
In the album, right-click on a photo or video. In the menu, you can, among other things:
add or change the caption,
rotate the photo using Rotate left or Rotate right (JPEG, PNG, and WebP; these options are not available for videos),
download the photo or video,
set it as the album's cover image using Set as cover image; if you do not choose one yourself, the first photo is the cover image,
move it to another album using Move to another album.
Edit multiple photos at once#
In the album, click on Select at the top.
Click on the photos or use Select all to select all of them.
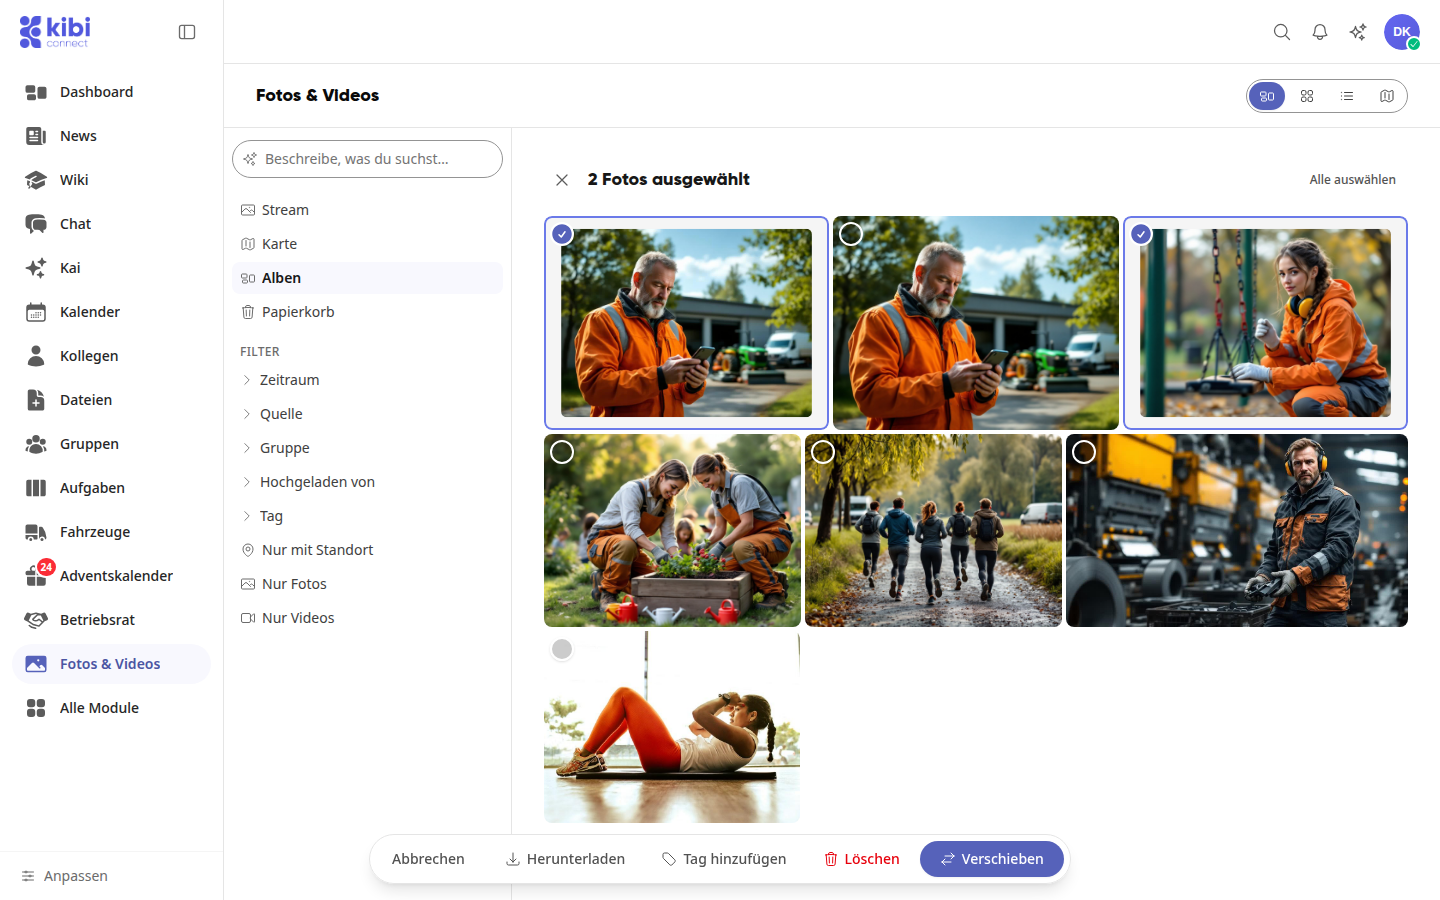
Choose an action at the bottom:
Download: Multiple files are downloaded as a ZIP file.
Add tag: The tag is assigned to photos that you uploaded yourself. Other photos remain without this tag.
Delete: You choose Remove from album only or Delete everywhere.
Move: The photos are moved to another or a new album.
With Remove from album only, the photo remains in the photo archive and in posts or chats. What happens with Delete everywhere is explained under How do I restore deleted photos from the trash?.
Info
Only someone who added a photo can move or remove it.
Creating subalbums#
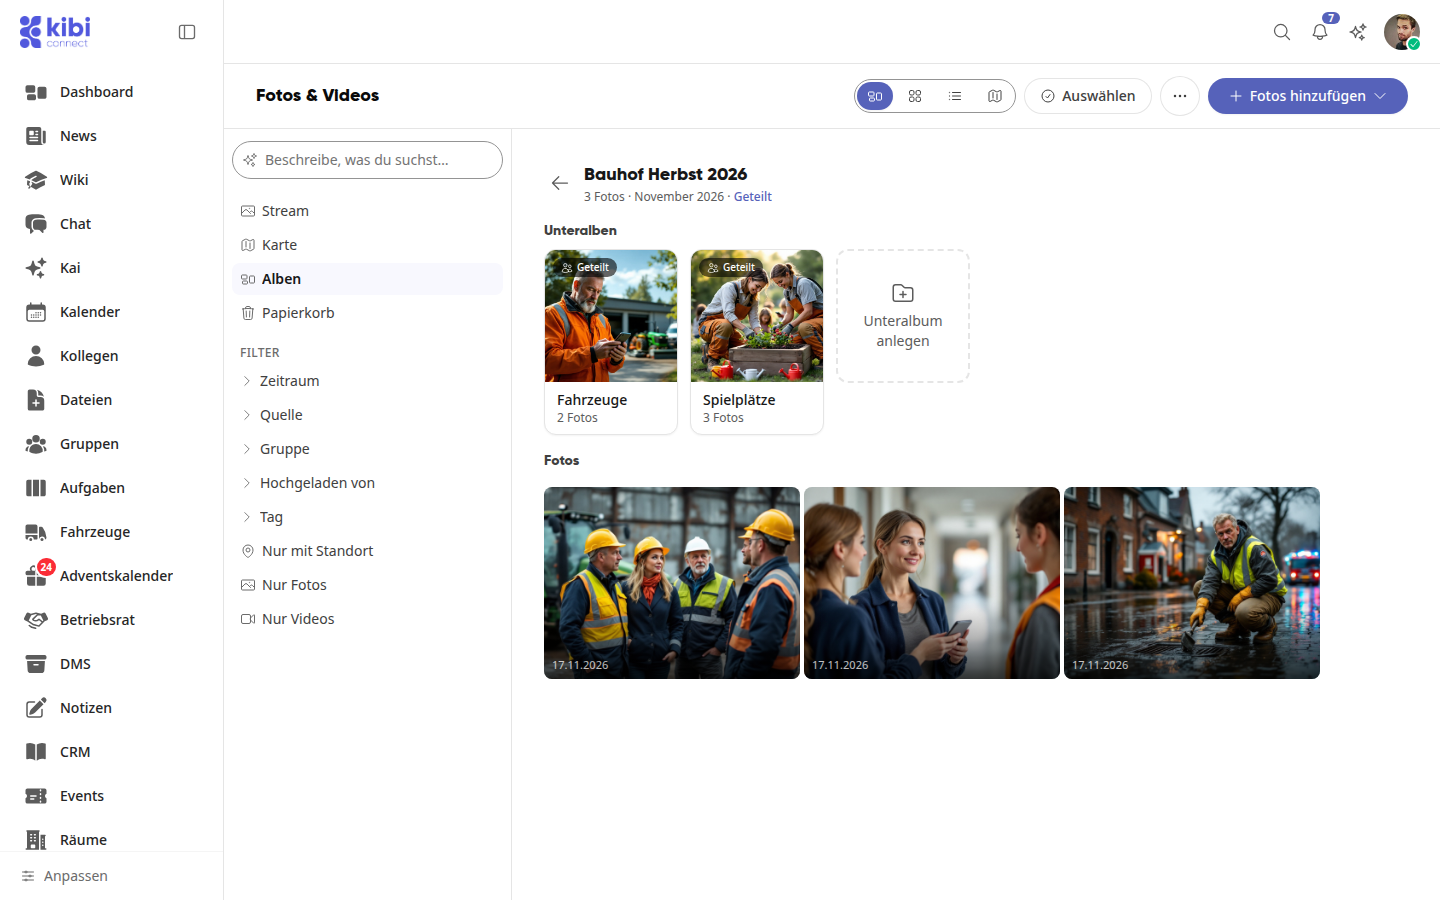
Open the album and click the three dots (More) in the top right corner, then click Create subalbum. Alternatively, click the Create subalbum tile in the album.
Enter a name and click Create. In your own albums, the sharing is preset to that of the parent album; you can change it here.
Subalbums appear in the album above the photos and videos, either as tiles or as rows depending on the selected view. You can nest albums up to five levels deep.
Subalbum in a shared album#
You can also create subalbums in albums that colleagues have shared with you: via More and Create subalbum or via the Create subalbum tile. The subalbum inherits the sharing of the parent album.
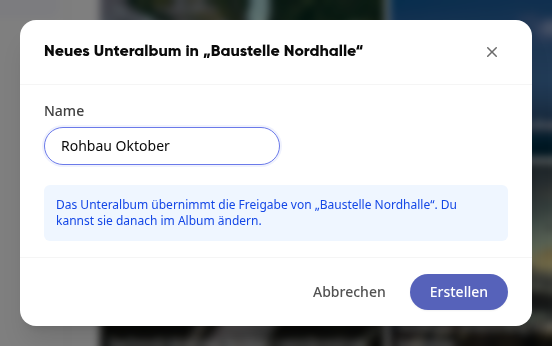
The subalbum belongs to you: Only you can rename, share, or delete it. Whoever owns the parent album can also see your subalbum. However, you cannot rename, share, or delete the parent album.
Info
With More and Move to… you can move your own album into another of your own albums or back to the Top level. You cannot move albums in other people's albums.
Share, rename, or delete an album#
Open the album and click the three dots (More) in the top right corner.
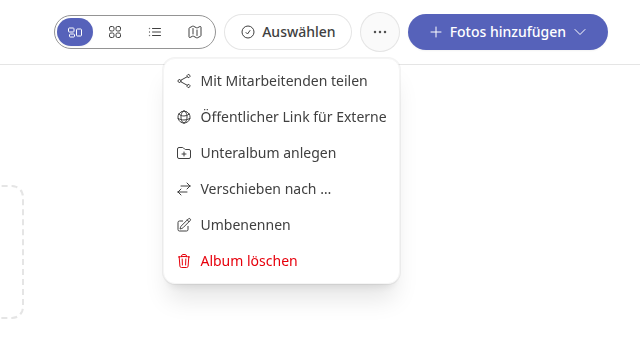
Select the desired action:
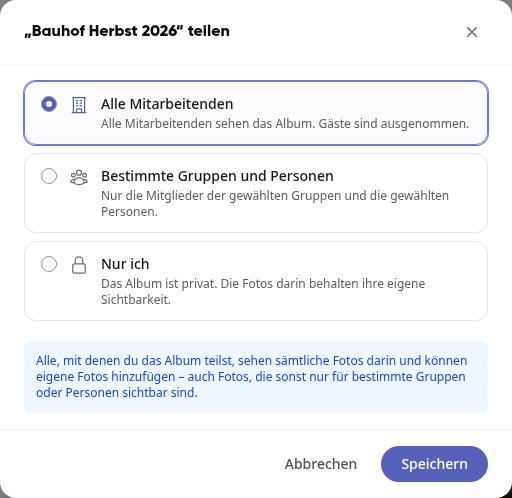
Share with employees: Specify who can see the album: All employees, Specific groups and people, or Only me. Then click Save. If you expand the sharing, confirm it in the Really share photos? dialog with Share.
Rename: Give the album a new name.
Delete album: Confirm with Delete album. The album will be removed, but the photos in it will be retained. Subalbums will move up one level.
Important
Everyone you share an album with will see all photos in it and can add their own photos and subalbums, including photos that are otherwise only visible to specific groups or people. This also applies to photos added later. With All employees, guests are excluded.
Share an album via a public link#
With a public link, people without an account can also view and download the photos and videos in an album.
Open the album and click the three dots (More) and then Public link for external users.
If needed, assign a password (at least 6 characters) and an expiration date.
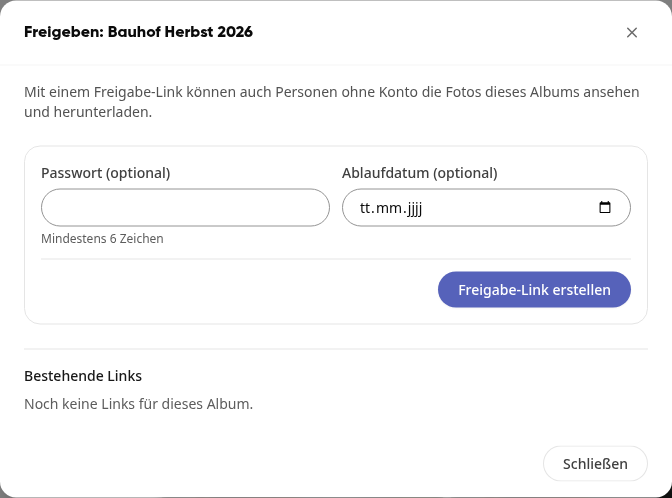
Click Create share link.
Under Existing links, you can copy the link, send it by email, edit it, or revoke it. The album will then show the notice Public link active.
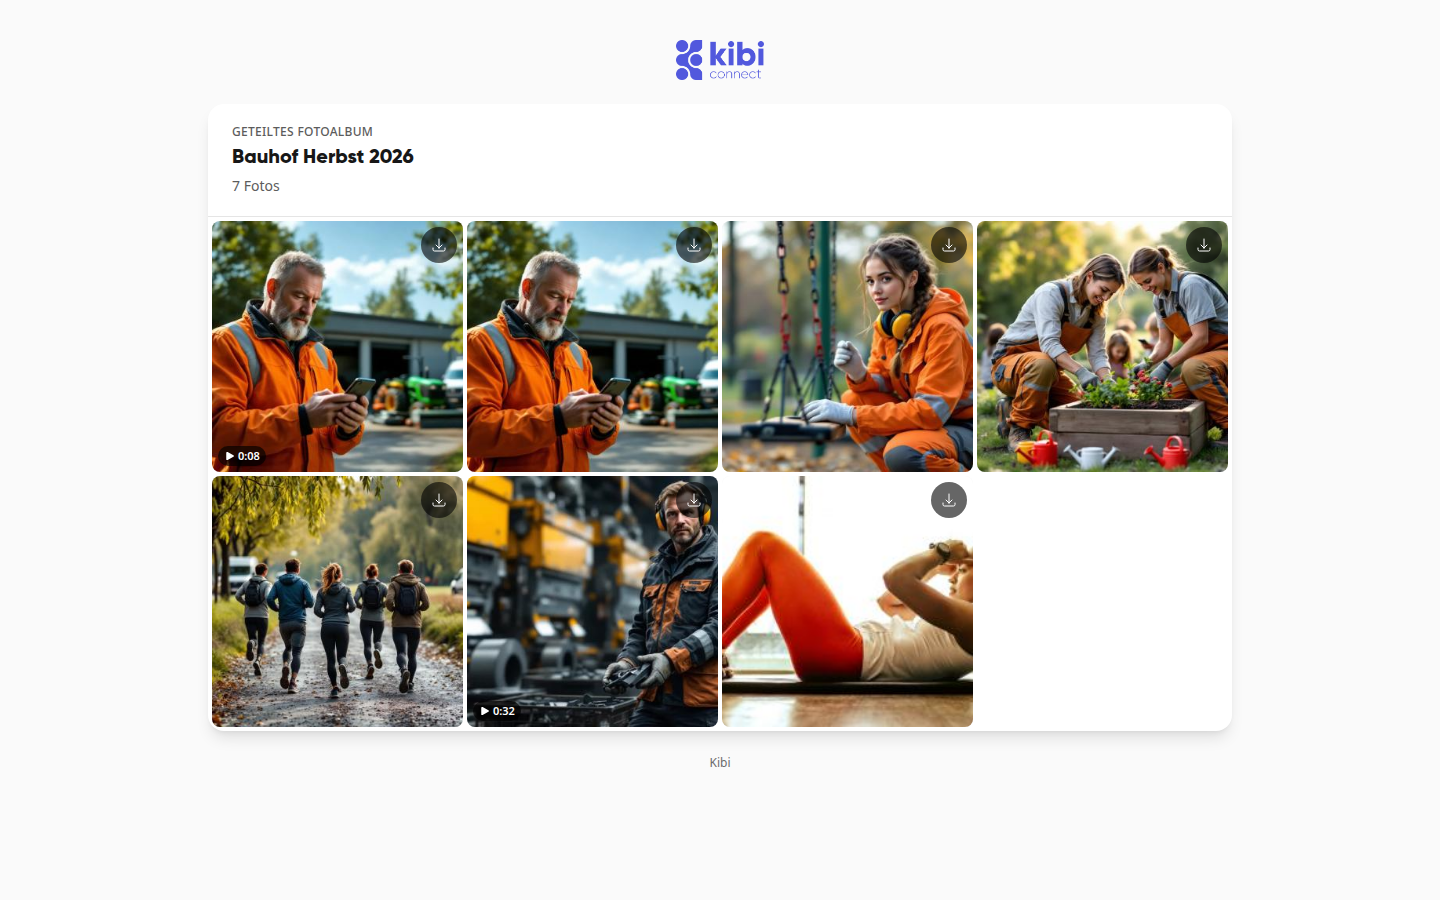
In the public view, videos display their play icon with the duration. Clicking a video plays it in a new browser tab, and the download icon downloads the original file.
Info
The link shows the photos and videos that are directly in the album. Content from sub-albums is not included.
Photos in the desktop app#
Albums that you are allowed to open can also be found read-only in Finder or Explorer under Photos. With Open in Kibi Connect you jump directly to the album. Find out more under Photos and personnel files in the desktop app.