
How do I set up folder structure, permissions, and deletion periods in the DMS?
Updated Reading time: 3 min
On this page
You define in which folders your team stores documents, who is allowed to read and store them, and how long they should be retained.
Info
These settings are available to system administration. You can find them in the administration under Organization > DMS.
Create folder structure#
Open DMS in the administration. You will land in the Structure tab.
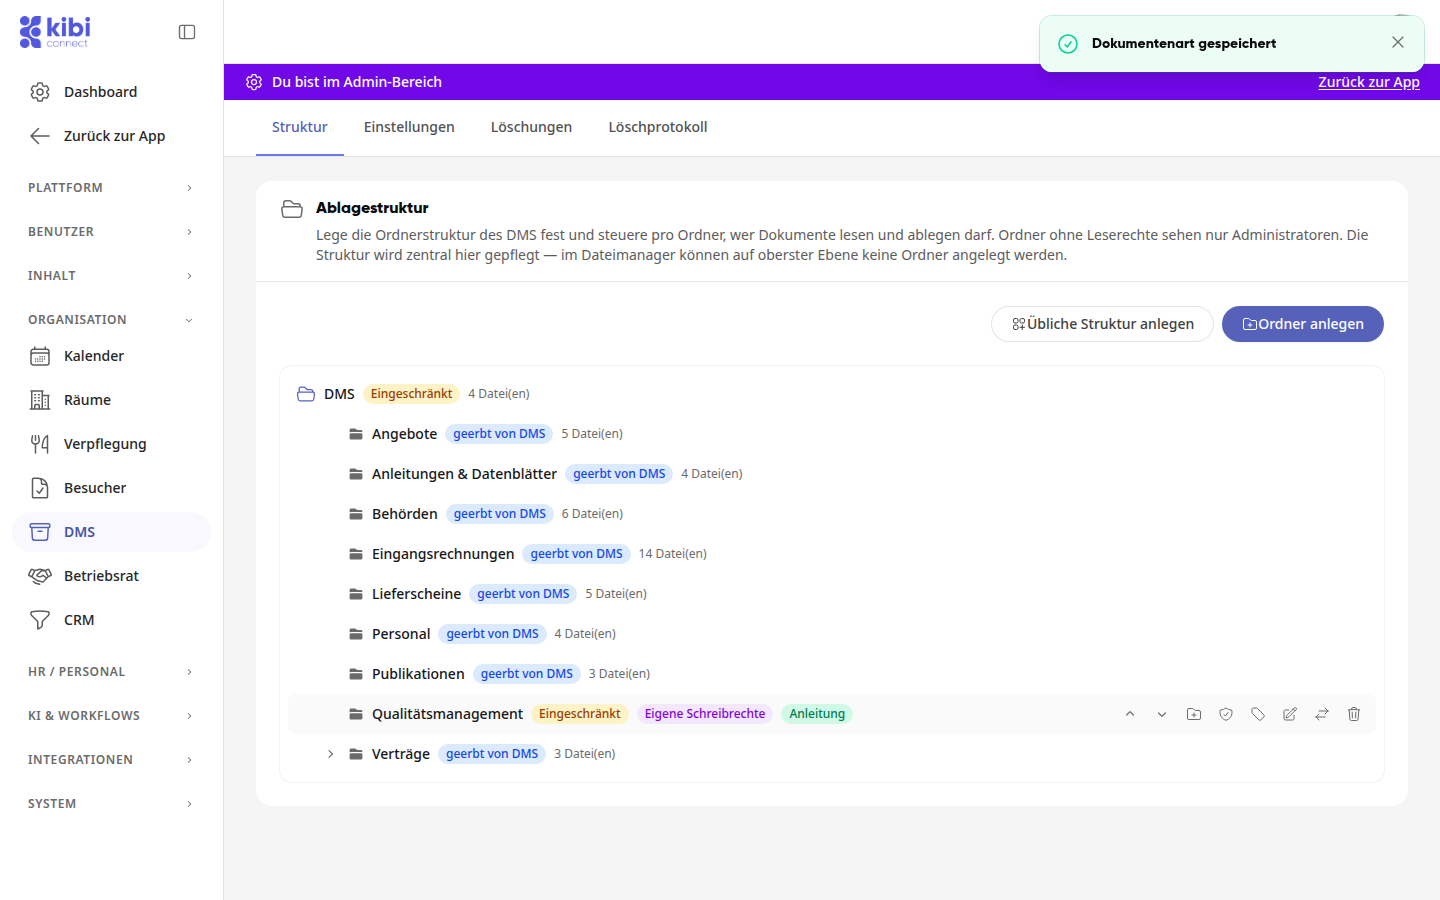
Click on Create standard structure, select the appropriate folders, and click on Create selected. Existing folders will be skipped. Personnel documents belong in the personnel file, not in this storage.
Or click on Create folder, enter the folder name, and click on Confirm.
Hover over a folder with your mouse to see its actions: Move up, Move down, Create subfolder, Permissions, Document type, Rename, and Move. You can also Delete empty folders.
Set read and write permissions#
Important
Folders without read permissions are only visible to administrators. To allow your team to use the DMS, grant read permissions, for example, on the top-level folder DMS.
Click on the Permissions icon for the folder.
Under Read permissions, select the option Restricted to: and add People, Groups, or Roles. The Colleague role covers all employees with this standard role.
Anyone who can read can also store documents. If only some should be allowed to do this, also select the option Restricted to: under Write permissions and add the authorized users.
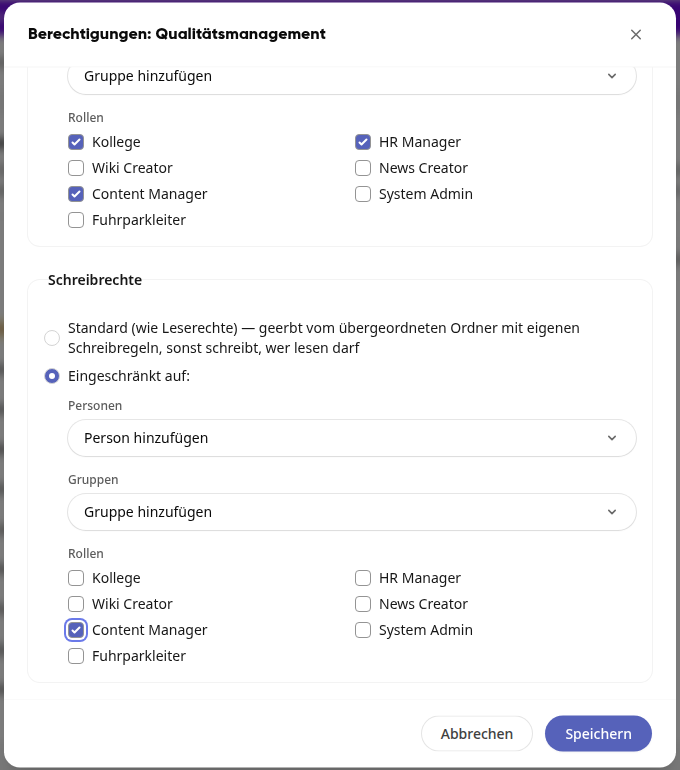
Click on Save. The folder tree now shows Restricted and for own write permissions Own write permissions. Folders without their own rules show, for example, inherited from DMS.
Info
The rules of a subfolder replace those of the parent folder. Read access remains a prerequisite for storage. System administrators always have access; externals never do.
Set document type for a folder#
Click on the Document type icon for the folder.
Select the document type, for example, Instruction, and click on Save.
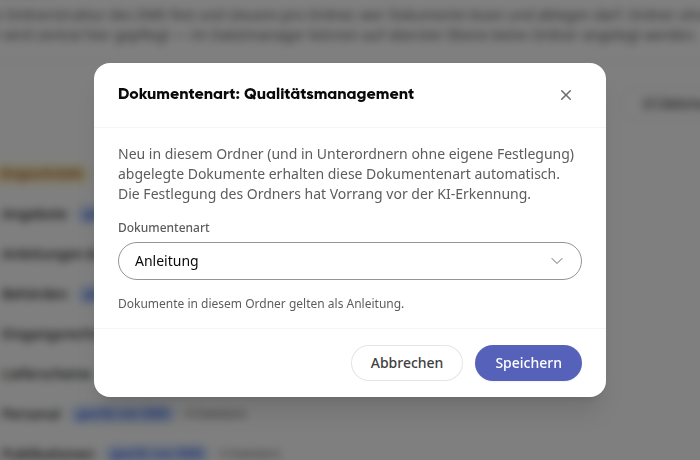
Newly stored documents in this folder automatically receive this type. This also applies to subfolders without their own settings. The folder's setting takes precedence over AI detection.
Set up automatic storage#
Open the Settings tab.
Under Automatic storage, select the processing mode: Kai handles the processing (default) or Manually confirm suggestions.
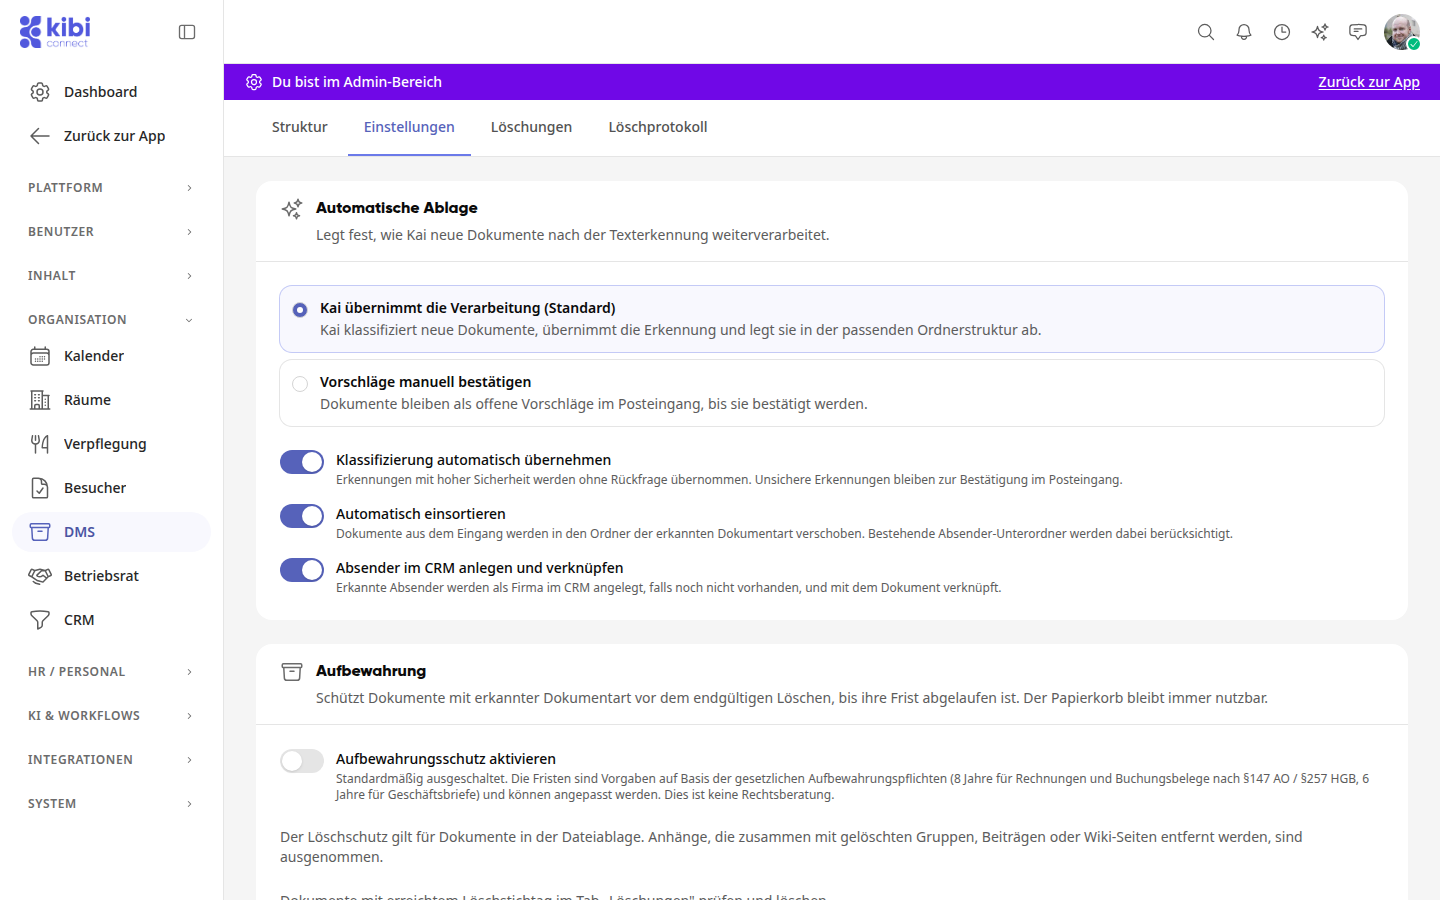
If needed, enable or disable Automatically adopt classification, Automatically sort, and Create and link sender in CRM.
Click on Save at the bottom of the page.
Set retention and deletion periods#
All settings in this section are in the Settings tab. After making your changes, click on Save at the bottom of the page.
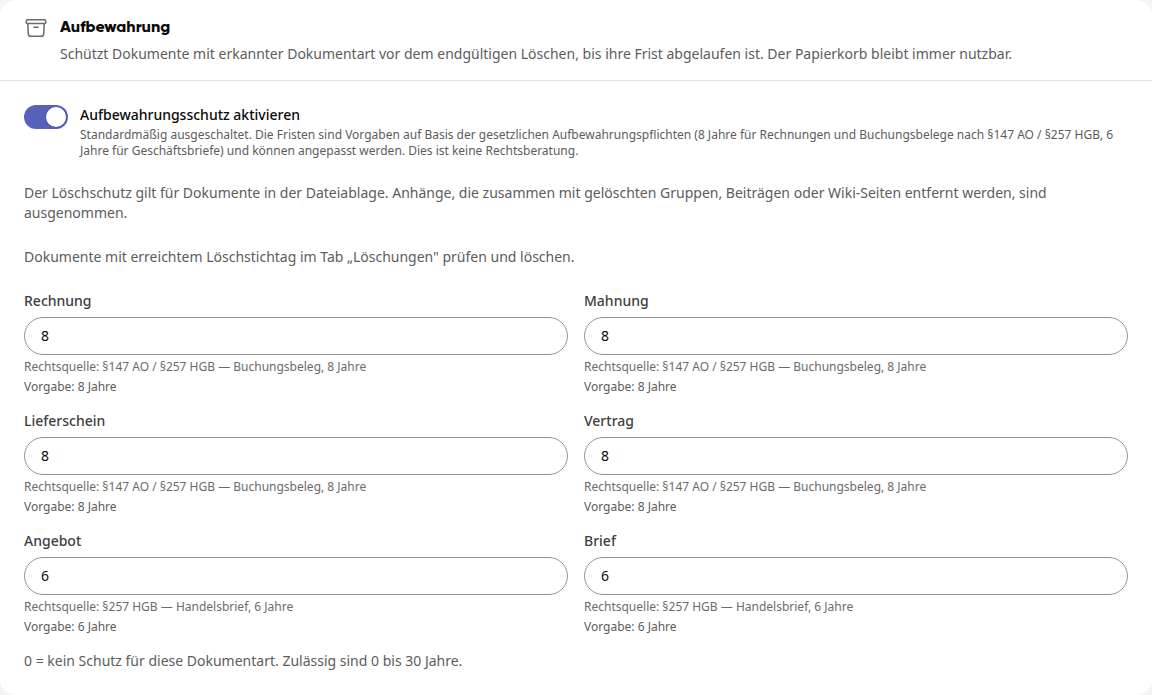
Under Retention, enable retention protection. It is disabled by default.
Check the period for each document type. Permissible values are 0 to 30 years; 0 means no protection for this document type.
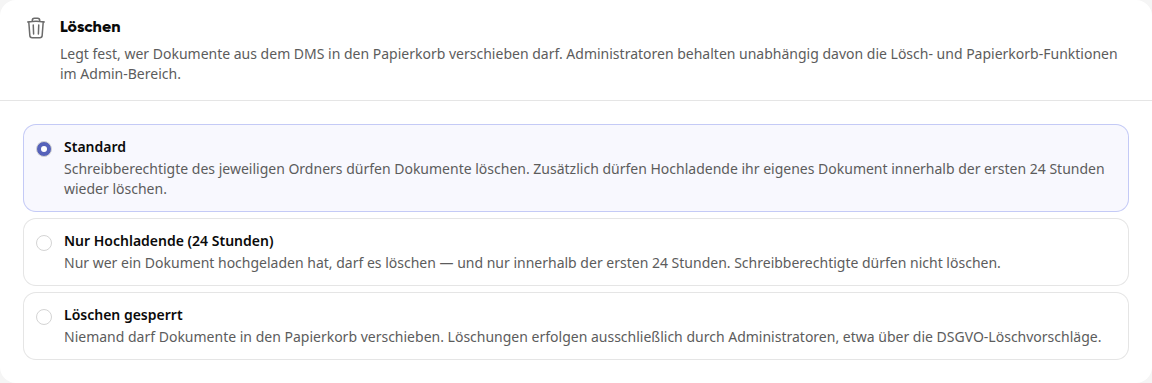
Under Delete, specify who can move documents to the trash: Standard, Only uploader (24 hours), or Delete locked.
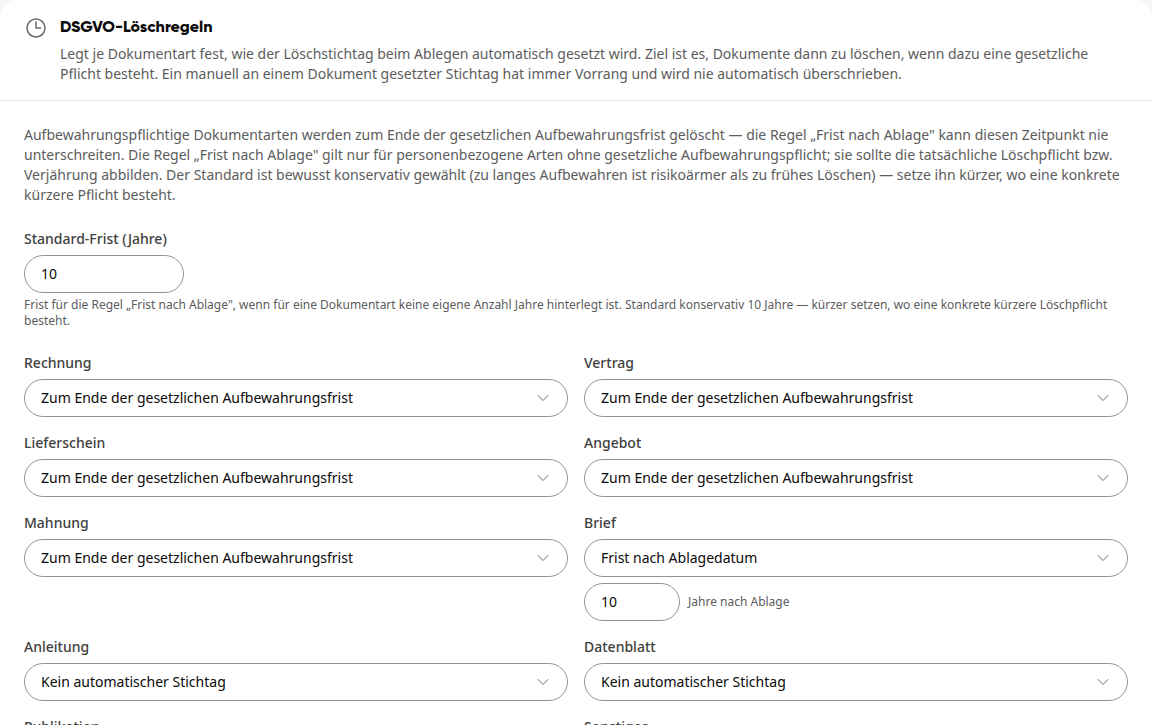
Under GDPR deletion rules, specify for each document type how the deletion date is set when storing: Until the end of the legal retention period, Period after storage date, or No automatic date. The Standard period (years) applies if no specific number of years is stored under Period after storage date.
Under External sharing, specify whether DMS documents and folders can be shared via public links.
Warning
The periods are guidelines based on legal retention obligations and not legal advice. A date manually set on a document takes precedence over the rules.
Permanently delete due documents#
Documents are never automatically deleted. Once the deletion date is reached, they appear in the Deletions tab; the number on the tab shows how many are due.
Open the Deletions tab and check the storage location, end of period, and deletion date.
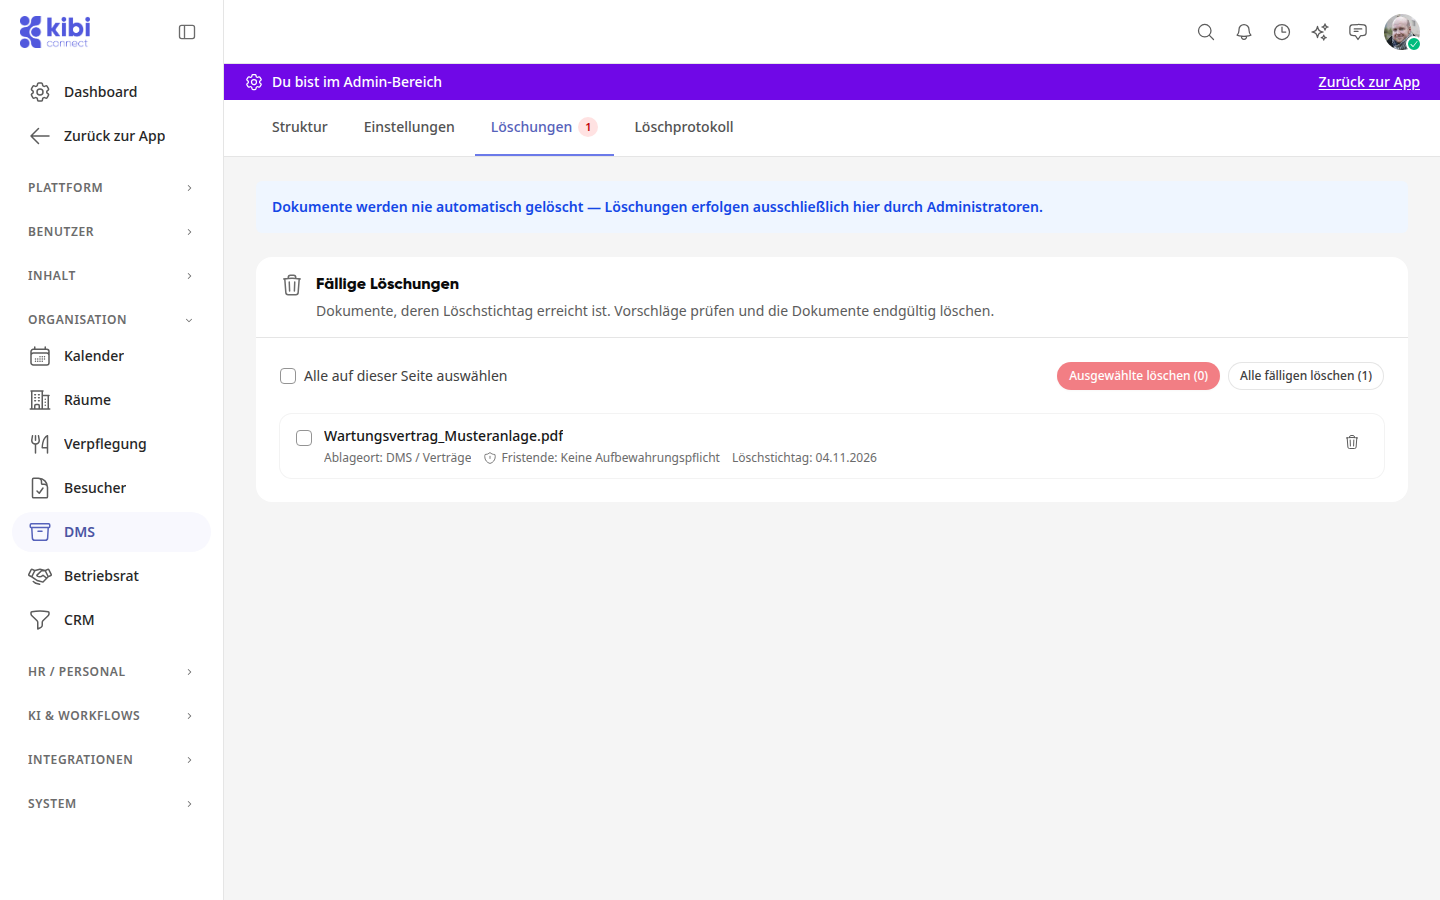
Click on the trash can icon for the document. To delete multiple documents, use Delete selected or Delete all due.
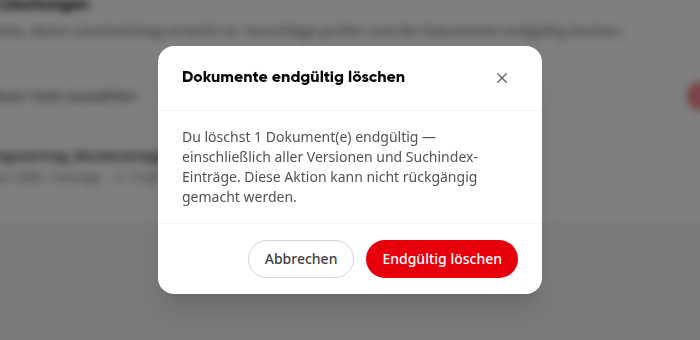
Check the confirmation prompt and click on Permanently delete.
Warning
Permanent deletion also removes all versions and search index entries and cannot be undone. The deletion is then recorded in the deletion log.