
How do I create a task and assign it?
Updated Reading time: 7 min
On this page
- Create a task with all details
- Create a task with a type
- Create a task directly in a column
- The opened task
- Inserting images in descriptions and comments
- Activity of a Task
- Mention an entire group in a comment
- Assign or change a task later
- Repeat task regularly
- Review changes in the history
- Create a task with the buddy
- Recognizing tasks created by Kai
- Assign a task to a parent task
- Archive or delete a task
You create a task with all the details or enter it directly into a column with a click. Then you assign it to yourself or to colleagues.
Create a task with all details#
Open Tasks in the navigation and click Create new task at the top right. It's faster with the C key, as long as you are on the tasks page and not typing in a field.
In the New task window, enter the title under What needs to be done? This is the only required field. Below that, add a description if needed.
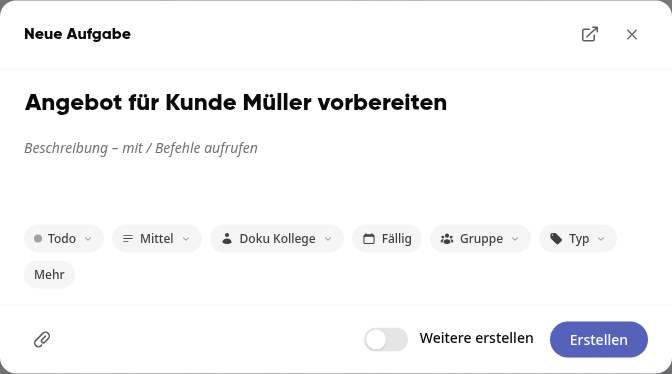
Set Status, Priority, and Due using the chips below the text.
Click on the chip with your name and select one or more people via Search for person… You are already listed and can remove yourself with a click. With multiple people, the chip shows, for example, Doku colleague +1.
Use the chip with the group icon to select the group the task belongs to. If you are in a group view, it is already entered.
Use the Type chip to select a task type if needed, for example a damage report. Its fields then appear below the chips (see below).
More reveals Belongs to and Add keyword… You add attachments via the paperclip at the bottom left.
Click Create. If you want to continue editing the task right away, click the icon next to the X at the top of the window instead (Create and open). The task is created and opens immediately.
After Create, the Task created message shows the identifier of the new task, for example VER-7 in a group. With Open task you jump directly into it. If you want to create several tasks in a row, enable Create more before creating. The window then stays open and is empty again for the next task.
Info
If you have selected a group, only the members of that group are available for assignment. Without a group, you will find all colleagues.
Create a task with a type#
Some tasks require fixed details, for example a damage report needs the type of damage, the location, and a photo. For this, there are task types that system admins set up.
In the New Task window, click on the Type chip and select the type. With No Type, it remains a normal task.
Fill in the fields below the chips. Fields with an asterisk (*) are required fields, but you only need them when completing the task.
Click on Create. You fill in photo and file fields afterwards in the opened task.
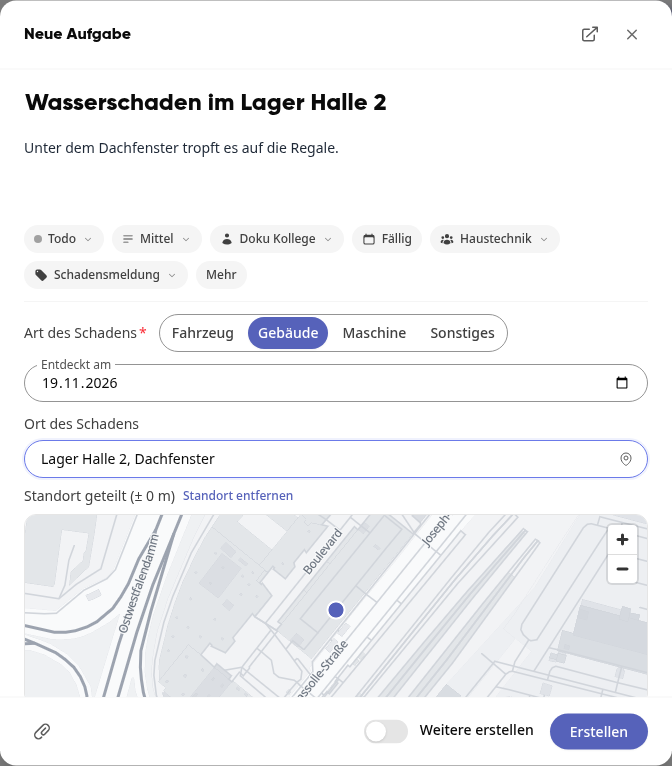
If a group has a standard task type, it is already entered when creating a task in that group's board. You can change it at any time.
Tip
How to fill in the fields later, change the type, and send documents for review is described under How do I work with task types and reviews?.
Create a task directly in a column#
In the board, click directly below the last card in the desired column on New task.
Enter the title and press Enter.
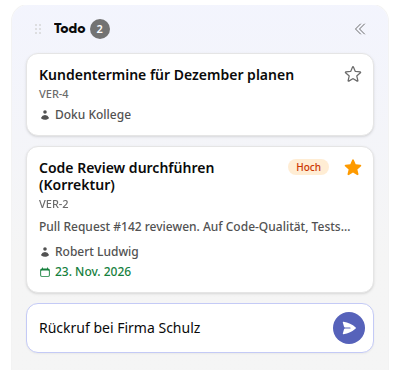
The task is now in this column and is assigned to you. In a group's board, it automatically belongs to that group. It starts without a type, even if the group has a default task type. You can set the type afterwards in the opened task under Type.
The opened task#
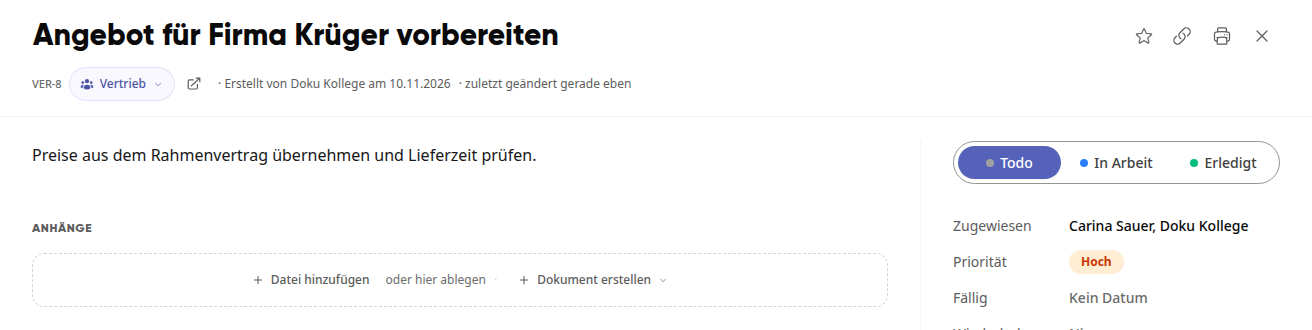
A click on a task in the board or in the list opens it. On the left are the description, below it the attachments and the activity. On the right in a narrow column, you set the status at the top and change the properties.
Inserting images in descriptions and comments#
A photo of the damage, a screenshot, or a price list: you can insert images directly into the description or into a comment.
Open the task and click into the description.
In the toolbar, click on Insert image and select the image. You can also insert an image from the clipboard or drag and drop it to the desired position in the text.
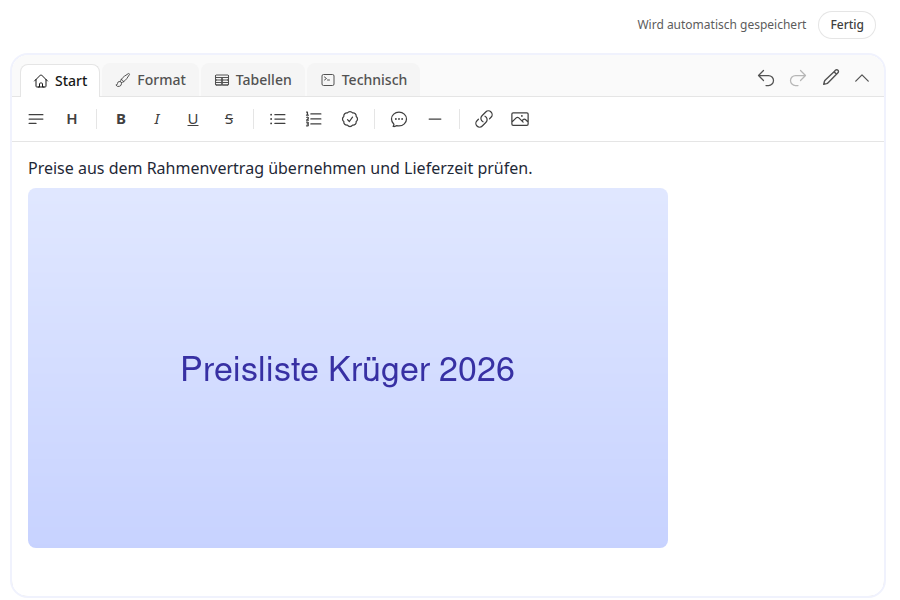
Click on Done. The description is saved automatically.
Each inserted image is also stored under Attachments. You can find it there again and delete it.
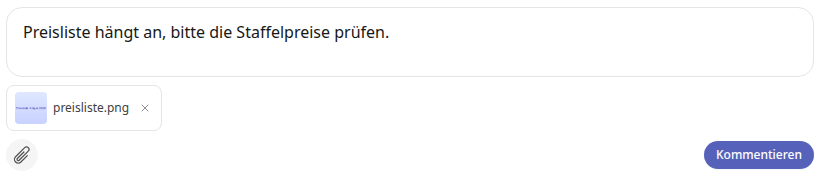
For a comment, write your text under Activity, click on the paperclip (Attach files) or insert the image from the clipboard, and then click on Comment.
Info
In the New task window, images cannot yet be inserted into the description; this is only possible once the task has been saved. So create it first, for example with Create and open, and then insert the image.
Activity of a Task#
The activity first shows the comments. Use the tabs to switch to times (only in groups with task time), history, or all. If the task repeats, the series tab is added.
Mention an entire group in a comment#
If the task belongs to a group, you can notify all members of that group at once with a mention.
Open the task and write your comment under Activity.
Type @ and the beginning of the group name. At the top of the selection, the group appears with the note Notify all members, followed by the individual people below.
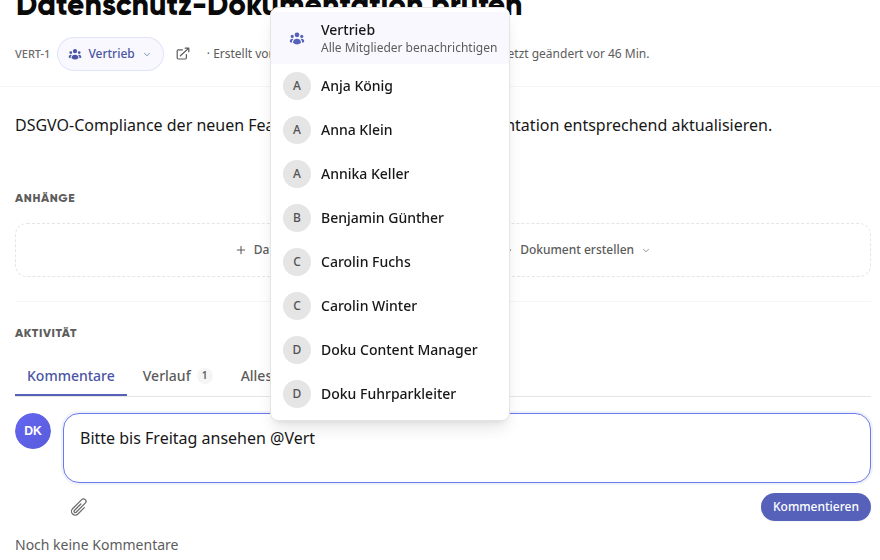
Select the group and click on Comment.
In the window Mention entire group? you can see how many people will be notified at most. Click on Send. With Cancel, nothing is sent and your text remains.
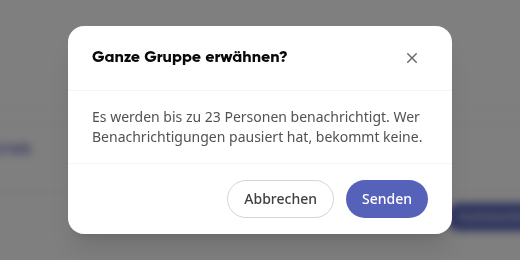
All members of the group except you will be notified. Anyone who is also mentioned by name will still only receive one notification. Anyone who has paused notifications will not receive any.
Info
Only the group of the task is offered, and only if you are a member yourself. If the group has more than 30 members, only group admins can mention it as a whole. Tasks without a group do not offer a group mention. If you edit a comment later, no one will be notified again.
Assign or change a task later#
Click on the task in the board or in the list.
Click on Assigned in the right column and search for the person using Search for person…. Clicking on a selected person again removes them.
Change Priority, Due date, or Tags in the same way. You set the status at the top of the right column.
Every change is saved immediately, and you will briefly see Saved. Newly assigned people are notified.
If a task is overdue, Kibi reminds the assigned people on the first overdue day and then once a week. If you move the due date, the reminder starts over. A task that is due today is not yet considered overdue.
Repeat task regularly#
For anything that recurs, such as a review deadline, you only create it once. Once the task is completed, the next one comes automatically.
Open the task and set a date under Due. Without a date, you cannot set up a repeat.
Click on Repeat, then on Never, and select the interval: Daily, Weekly, Weekdays (Mon–Fri), Monthly, Yearly, or Custom.
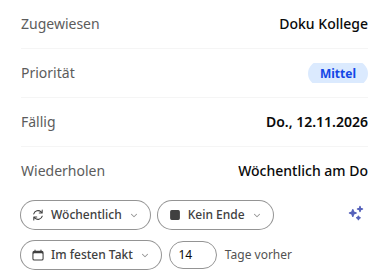
If needed, set the end: No end, Until date, or Number of repetitions.
Choose how the next due date is calculated. With Fixed interval, the dates remain fixed even if you complete the task later. With From completion, the interval counts from the day you completed the last task.
Under Days before, enter how many days before the due date the next task should appear. At 0, it appears on its due date.
The setting is saved immediately. As soon as you mark the task as Done, Kibi creates the next one or schedules it in advance. Only one task in the series is open at a time.
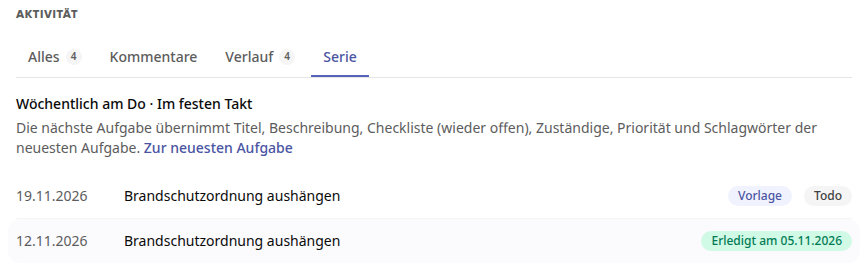
In the Series tab of the activity, you can see all tasks in the series. If the next task is still in the future, it also shows when it is due and when it will appear.
Info
The next task takes over the title, description, checklist (reopened), assignees, priority, and tags of the most recent task. You therefore change the rule on the most recent task; To the most recent task takes you there.
To end the repeat, open the most recent task, click on the interval under Repeat, and select Never.
Review changes in the history#
Open the task and select the History or All tab in the Activity.
Click on Show content for the entry "changed the description". You will see the text under Before and After.
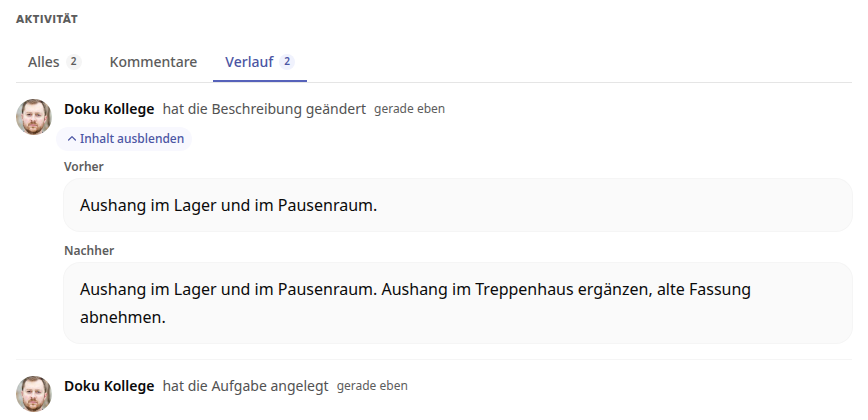
Use Hide content to collapse the text again. Multiple consecutive changes by the same person appear as a single entry.
Create a task with the buddy#
With the Kibi buddy, you dictate a task. Hold down the button on the front and name the project right away, for example, "Project Meier 1437 – prepare water pump". The task then lands in the group that matches this project.
Only your own groups count. If none or more than one match, the task is created without a group and the project remains in the title, for example, "Meier 1437: prepare water pump".
Recognizing tasks created by Kai#
When Kai creates a task in a workflow or for a mail rule, the label Created by Kai appears at the top of the task view next to the identifier. This lets you see that no person wrote the task.

If you hover your mouse over the note, you can see where the task comes from. The information may contain errors, so check it before relying on it.
Assign a task to a parent task#
You break down larger projects into multiple tasks.
Open the task and click on Belongs to.
Search for the parent task and select it.
In the board, Group: Hierarchy groups these tasks under the parent task.
Archive or delete a task#
Open the task and click on Archive or Delete task at the bottom. You can find archived tasks again via Filter and the Archived selection. After your confirmation, a deleted task is moved to the trash. If the task repeats, deleting it will also end the repetition.